Managing Tizen Projects with Project Explorer View
PUBLISHED
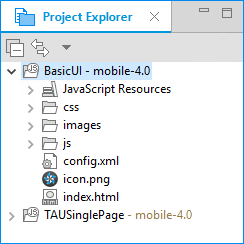
The Project Explorer view allows you to view and manage Tizen projects. You can view and change the resources of a project in the view, and build, export, and convert projects through the view.
Figure: Project Explorer

In this view, you can:
- Browse the file elements
- Open files in the editor view
- Open projects in a new window
- Create new projects, classes, files, or folders
- Manage existing files (cut, paste, delete, move, or rename files)
- Restore deleted files from local history
- Import or export files and projects
Opening the Project Explorer View
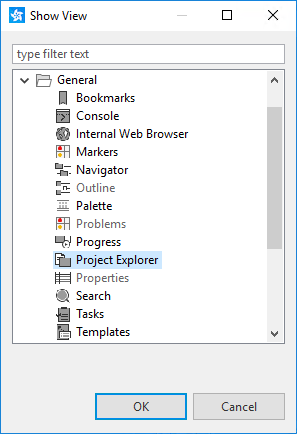
Usually, the Project Explorer view is located in the upper-left side of Tizen Studio. You can change the position by dragging and dropping it. If you close the view, you can show it again by selecting Project Explorer in Window > Show View > Other > General.
Figure: Opening the view

Using the Project Explorer View
The files that you select in the Project Explorer view affect the information that is displayed in the other views. You can execute and set some operations and configurations by clicking the icons (![]() ) in the toolbar.
) in the toolbar.
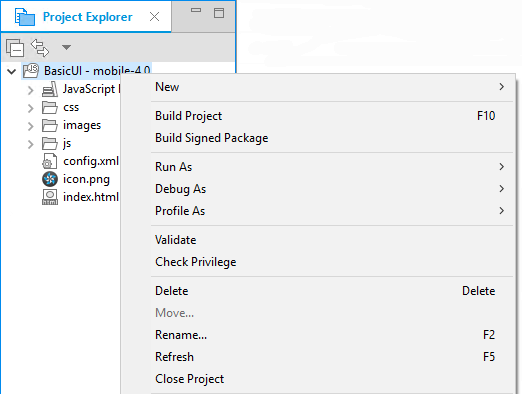
Figure: Executing operations

To execute operations, such as copying, moving, creating new resources, and comparing resources with each other, right-click on any resource in the Project Explorer view, and select the desired action in the context menu. The items in the context menu depend on the focused item. Different folder and file types have different action options.
Table: Project Explorer toolbar
| Icon | Name | Description |
|---|---|---|
| Collapse all | Collapses the tree expansion state of all resources in the view. | |
| Link with editor | Toggles whether the view selection is linked to the active editor. When this option is selected, changing the active editor automatically updates the selection to the resource being edited. | |
| Menu | Click the icon to open a menu of items specific to the view:
|
Table: Project Explorer context menu
| Menu | Description |
|---|---|
| New | Allows you to create a new resource in the workbench. Select the type of resource to create from the submenu. |
| Copy | Copies the selected resource to the clipboard. |
| Paste | Pastes resources on the clipboard into the selected project or folder. If a resource is selected, the resources on the clipboard are pasted as siblings of the selected resource. |
| Delete | Deletes the selected resource from the workspace. |
| Move | Moves the selected resource to another location. A dialog appears, prompting for the destination location to which the resource are to be moved. |
| Rename | Allows you to specify a new name for the selected resource. |
| Import | Opens the import wizard and allows you to select the resources to import into the workbench. |
| Export | Opens the export wizard and allows you to export the resources to an external location. |
| Export to CLI project | Exports the Tizen Studio Native project to a CLI (command line interface) project. This option also makes or converts some files. |
| Build Signed Package | Makes a 'signed' package. This option requires a certificate profile. You can create a certificate profile in Tools > Certificate Manager. |
| Localization | Opens the localization view and allows you to add or update languages and localize the string or resources. |
| Refresh | Refreshes the Workbench view of the selected resource and its children. For example, this is used when you create a new file for an existing project outside the Workbench and want the file to appear in the Project Explorer view. |
| Close Project | Closes the selected project (visible when an open project is selected). |
| Close Unrelated Projects | Closes any project unrelated to the selected project. |
| Open Project | Opens the selected project (visible when a closed project is selected). |
| Team | Menu items in the Team sub-menu are related to version control management and are determined by the version control management system that is associated with the project. Eclipse provides the special menu item Share Project... for projects that are not under version control management. This command presents a wizard that allows you to share the project with any version control management systems that have been added to Eclipse. Eclipse ships with support for CVS. |
| Compare With | Allows you to do one of the following types of compares:
After you select the type of compare you want to do, you either see a compare editor or a compare dialog. In the compare editor, you can browse and copy various changes between the compared resources. In the compare dialog, you can only browse through the changes. |
| Replace With | Allows you to replace the selected resource with another state from the local history. If the project is under version control management, there can be additional items supplied by the version control management system as well. |
| Properties | Displays the properties of the selected resource. The displayed properties depend on what type of resource is selected. Resource properties can include (but are not limited to):
|
