Developing Applications Using Databinding
PUBLISHED
![]()
![]()
Dependencies
- Tizen Studio 1.2 and Higher
Content
Databinding helps you to manage application-specific data sources and models along with data bindings. You can manage databinding in the UI Builder perspective using the Data Binding view, which allows you to bind JSON and XML data sources to your application UI.
In the Data Binding view, you can, for example, add data sources, create data models from those sources, and bind data elements to UI components in the Design tab. The view displays all the data sources that you have added to your application. Along with the data sources, you can also see the "data element – UI component" bindings that you have created.
When creating the application, you must use the Project Wizard and select a native UI Builder template (any template with the "UI Builder" prefix).
The Data Binding view opens by default when you switch to the UI Builder perspective. The UI Builder templates in the Project Wizard do not have any data sources by default.
Adding Data Sources
To add a new data source:
- Right-click in the Data Source panel of the Data Binding view and select Add.
Alternatively, you can click the ADD icon in the toolbar.
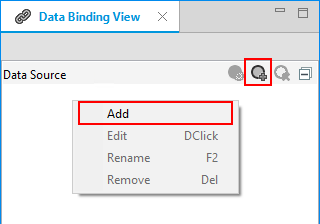
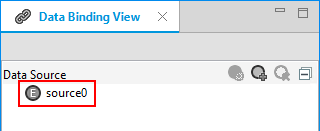
The new data source appears in the Data Source panel.
- Right-click the new data source and select Edit.
Alternatively, you can click the EDIT icon in the toolbar.
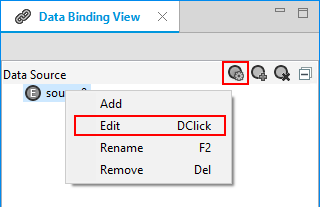
- You can create static (default) and remote data sources:
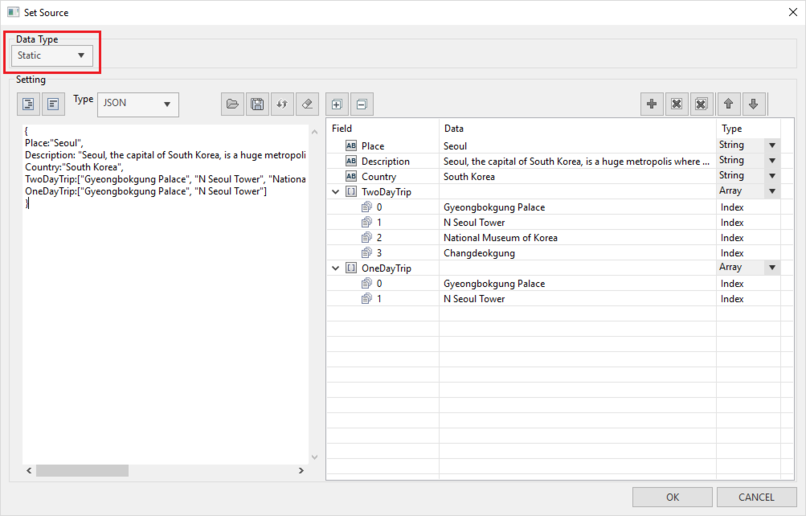
- To create a static data source:
- Set the type as JSON or XML.
- Add static JSON or XML data in the text area.
The data source schema populates the side panel.
- Click OK.
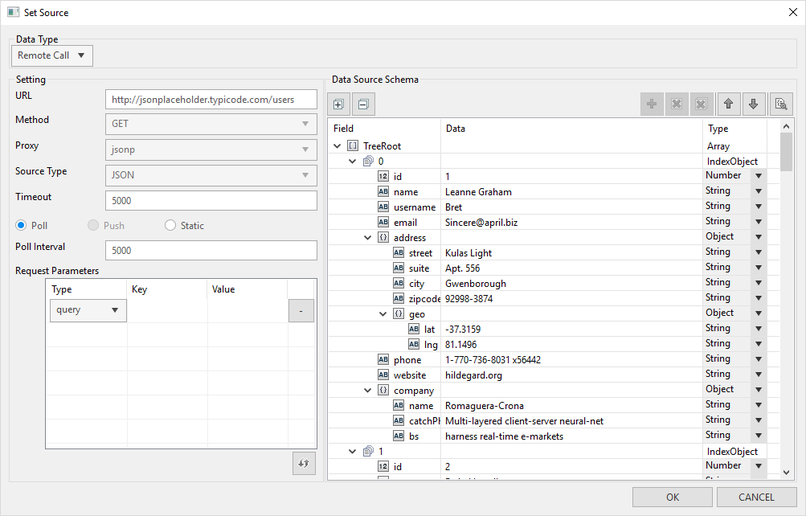
- To create a remote data source:
- Change the data type from Static to Remote Call.
- Add the URL of the remote data source.
You can also add query parameters, if required.
If the data is retrieved successfully, the data source schema populates the side panel.
- Click OK.
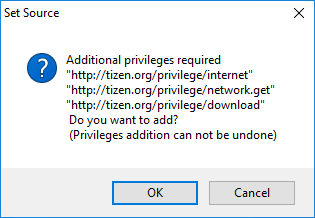
- If the application requires privileges, a popup window appears asking you to add them.
Click OK.
- To create a static data source:
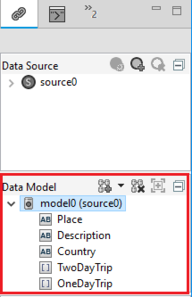
Adding Data Models
Data models are created from the added data sources. A newly created data model is the exact replica of the data source from which the model is created. You can modify the data model according to your application’s needs. For example, to de-clutter, you can remove unnecessary data elements from the data model and keep only the relevant portion of the data source in your data model.
To add a data model:
- Drag and drop a data source from the Data Source panel to the Data Model panel.
Alternatively, you can select a data source from the drop-down list in the Data Model panel.

- To remove any unnecessary data elements, right-click the element and select Remove.
Creating Data Bindings
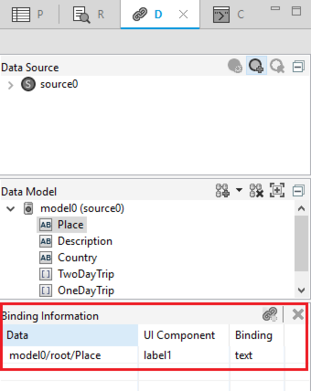
To bind a data element with a UI component present in the Design tab:
- Expand the data model and select the data element which you want to bind to a UI component.
- Drag the data element and drop it on the UI component in the Design tab.
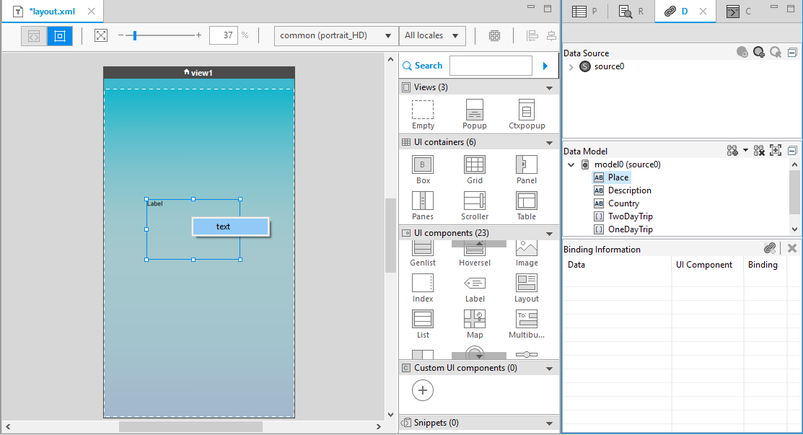
- When you drop the data element on the UI component, the available binding types (text and foreach) are displayed in a popup window. Select the binding type you want.
The binding information is displayed in the Binding Information panel of the Data Binding view.
Adding Filters For Data Bindings
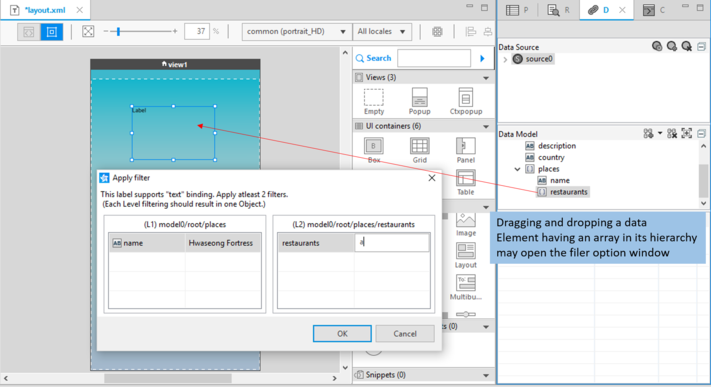
In certain scenarios, based on the structure of the data received from the data source, you can apply filters to the data element while binding.
For example, if you have a data source which has information about restaurants in different places within a city (such as "Suwon") and you only want to list the restaurants present around a particular place (such as "Hwaseong Fortress"), you can use filtering to achieve this:
- Drag the restaurants data element to the list UI component in the Design tab.
Because direct mapping is not possible in this case, a filtering window appears.
- Add "Hwaseong Fortress" as a filter value for the places data element.
- Click OK.
When you run the application, the list component shows all the restaurants around Hwaseong Fortress in Suwon.
Figure: Filtering a data binding