Game development with CraftyJS library - introduction
PUBLISHED
Introduction
The aim of this article is to familiarize the developer with CraftyJS framework and describe how to use it in Tizen applications. These topics are illustrated with a sample application - game Quiz. It is the first article in a series, covering CraftyJS-s basics. Framework's structure, scenes and the entity/component system will be explained. Then we will show how to work with sprites and create simple entities. At the end some basic animations will be presented.
Crafty
CraftyJS is a young and actively developed JavaScript HTML5 game engine. It's open source, distributed under the MIT or GPL license. It's relatively easy to use. You have to include just one small library file to your project. It's cross browser compatible and works well on Tizen. Crafty is based on entity-component system instead of the classical inheritance system. It enables you to easily create reusable components. Rendering can be done using either DOM or Canvas. Crafty also gives you tools to handle sprites, asset loading and audio.
In this article we will explain how to use all these features to make creating JavaScript games in Tizen quick and easy. Most of this article will be devoted to explaining how to create a good looking UI using sprite sheets and animations.
To learn more you can refer to this presentation, Making Games with JavaScript and Crafty tutorial, or the official tutorial. The official documentation is available at http://craftyjs.com/api/. Library's code is very easy to read and well commented so it's also a good idea to take a closer look at it.
Sample application and prerequisites
A sample game called Quiz is provided to demonstrate the use of CraftyJS framework. The aim of the game is to answer all of the questions correctly in a limited time. It works in landscape mode. The sample application is based on the jQuery Mobile 1.2.0 framework which allows you to create highly scalable web applications with an intuitive and coherent user interface. To be able to use the jQuery Mobile, your application must include the jQuery library as well.
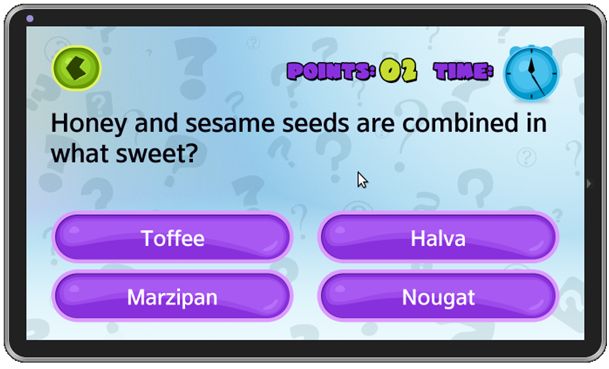 Fig. 1 The quiz game
The code samples use custom functions to send log messages to the console. They can be found in the application's js/lib/tlib folder.
Adding Crafty to your project
You can download the latest Crafty library from:
- the official site (http://craftyjs.com),
- Crafty source on Github (https://github.com/craftyjs/Crafty).
To add Crafty to your Tizen project you simply have to copy crafty.js file into resources and add it to the index.html file.
<script src="js/lib/external/crafty.js">
Then you have to init Crafty with Crafty.init() function:
// init Crafty
Crafty.init(this.config.width, this.config.height);
Crafty.canvas.init();
Scenes
Scenes are a way of organizing objects. They represent distinct parts of the game. These can be different screens or levels. In our Quiz game we have scenes like menu (showing the main menu), options (setting game options), about, help and the main game scene with the actual game.
All you have to do to run a scene is to call the Crafty.scene(scene) function from any part of your code. It takes just one argument: scene's name.
Crafty.scene("menu");Remember that calling a scene destroys all currently displayed entities.
You can define a scene in the fallowing way:
Crafty.scene("menu", function() {
    // define game objects here
});
It's a good practice to define each scene in a separate file. This will make your application modular and easier to understand.
You can define a background for the application, common for all the scenes:
// set background
Crafty.background("url('images/game_bg.png')");
If you need a separate background for each scene you have to use the Carfty.background() function in each scene initialization.
Loading assets
In Crafty library there is a preloader function for assets provided. It takes a list of urls and adds them to the afty.assets object.
Crafty.load([ "images/quiz_sprite.png", "images/quiz_sprite_help.png",
        "sounds/game_correct.mp3" ],

        // on load finish
function() {
    Crafty.scene("menu"); // go to menu scene
},

// on load progress
function(e) {
    // do sth
},

// on error
function(e) {
    // do sth
});
The Crafty.load() method takes four parameters:
- assets - array of assets to load. These can be sounds and images.
- onLoad - callback when the assets are loaded.
- onProgress - callback when an asset is loaded. It is passed an object with information about the progress of loading:
- { loaded: j, total: total, percent: (j / total * 100), src:src}
- onError - callback when an asset fails to load. This function is passed the asset that couldn't be loaded. If you don't provide this callback the onLoad method will be called no matter if the assets have loaded successfully or not.
The entity/component system
- Entity - a game object, like player, ball or an animated UI item. It is a single instance of this object.
- Component - abstract object or set of functions/properties. It can be applied to entities ("inherited" by them). They're reusable and a single entity can consist of many different components.
var answerText = Crafty.e("2D, DOM, Text, Mouse");The answerText is a sample entity, text shown on the screen. It consists of ("inherits from") four different components: "2D", "DOM", "Text" and "Mouse". All of these components are predefined in the Crafty engine. In the declaration you separate them by a comma. Working with entities and creating your own custom components will be explained later.
Working with sprites
Loading many separate images can seriously damage the application's performance and code readability. If you have many image resources, especially many resources that represent different stages of a single object's animation, it's a good idea to create a sprite sheet.
![]() Fig. 2 One of the Quiz sprite sheets
Fig. 2 One of the Quiz sprite sheets
Crafty provides some built-in functions to improve handling sprite sheets. It has a method to splice sprite maps into individual components. These components can be applied to any 2D entity.
Let's take a look at the example:
// load main sprite sheet
Crafty.sprite(5, "images/quiz_sprite.png", {
    // menu scene buttons
    startBtn : [ 0, 0, 74, 22 ],
    normalBtn : [ 0, 22, 74, 22 ],
    ...
});
In Crafty we divide sprite sheets into smaller elements: tiles. They're square and the sprite sheet has to be divided in such a way that a single tile belongs to exactly one sprite. The picture below illustrates this concept. It shows a sprite sheet consisting of 5 sprites (in different colors) and divided into 15 tiles.
![]() Fig. 3 Example sprite sheet divided into tiles
Fig. 3 Example sprite sheet divided into tiles
Crafty.sprite() function takes three arguments:
- tile - tile size in pixels. Default value is 1. For the best performance choose the biggest tile size possible on your sprite sheet. Often you have sprite sheets consisting of objects of the same size. If they're square choosing the perfect tile size is easy - it's the length of a single square's side. When different sprites are of different dimensions and shapes choose the greatest common divisor of their dimensions. In case of the sample Quiz game every sprite dimension is a multiple of 5.
- url - path to the sprite image.
- map - array of [key : position] objects. Position is an array of four values: x coordinate of the top left corner of the sprite on the sprite sheet, y coordinate of the top left corner of the sprite on the sprite sheet, sprite's width, sprite's height. All these values are not in pixels, but in tiles.
Tiles are used to make the code more readable. It works especially well when all of the sprites on a single sprite sheet are equal squares. It's a good practice to create sprite maps that apply to this rule whenever it is possible. In the case of our sample quiz game there is a wide variety of sprites of different sizes, so using tiles just makes the numbers in the code smaller. Instead of giving the values in pixels, we use tiles (here 1 tile = 5 pixels). With the default tile value (1) the same piece of code would look like this:
Crafty.sprite(1, "images/quiz_sprite.png", {
    // menu scene buttons
    startBtn : [ 0, 0, 370, 110 ],
    normalBtn : [ 0, 110, 370, 110 ],
    ...
});
Once the sprite sheet is loaded every sprite becomes an entity with a name defined in the "key". It means that you can use it in entity definitions like this:
varstartButton = Crafty.e("2D, DOM, startBtn").attr({
    x : 455,
    y : 225
});
In the code above, an entity, startButton is created. It uses three components: "2D", "DOM", and "startBtn". The "startBtn" component has been defined when loading the sprite. Setting attributes x and y gives our object a position. The code above shows the image "startBtn" on the screen.
Entity
As mentioned before, entities can be made of many different components, passed as a string to the Crafty.e() function. By adding new components to an entity you also add these components' functions. Let's take a look at this example. This entity shows text of a question.
var questionText = Crafty.e("2D, DOM, Text").attr({
    w : 1170,
    h : 200,
    x : 55,
    y : 185
}).text("The country famous for Samba dance is?").textFont({
    size : '20px'
});
You can see that chaining used in defining this object is similar to JQuery style. Most of Crafty elements support it. The attr() function is for "2D" component and the text() and textFont() functions are for the "Text" component. You can see the full list of available methods in components' documentation. Here we'll discuss only some of them.
With attr() function you can set basic properties of a 2D element:
- x - horizontal position on the stage,
- y - vertical position on the stage,
- w - width,
- h - height,
- alpha - transparency of an entity (0 for fully transparent, 1 for fully opaque),
- rotation - rotation of the entity (in degrees in a clockwise direction),
- visible - if the entity is visible or not (true/false).
You can also omit chaining. It is possible to create an empty entity and add some components later:
var questionText = Crafty.e();
questionText.addComponent("2D, DOM, Text");

questionText.attr({
    w : 1170,
    h : 200,
    x : 55,
    y : 185
});
questionText.text("The country famous for Samba dance is?");

questionText.textFont({
    size : '20px'
});
Now you should understand how to create entities based on various components. Creating your own, custom components will be explained later.
Tween animation
Tween is one of the simplest animations. In Crafty it is defined as a component. It enables you to animate properties of a 2D entity over time. The properties you can change are: x, y, w, h, alpha and rotation.
Crafty.e("2D, DOM, Tween").attr({
    x : 0,
    y : 0
}).tween({
    x : 100,
    y : 100
}, 60).bind("TweenEnd", function() {
    // todo
});
The example above shows how to create a simple Tween animation. All you have to do is to add the "Tween" component to you entity, set some 2D properties and use the tween() function to change them over time. The tween() function uses two parameters:
- properties - object properties to be changed (with their final values),
- duration - animation duration in number of frames.
You can also add event listener that will be triggered when the animation ends. The bind() function takes two parameters:
- event type (here "TweenEnd"),
- function to be triggered.
With this event listener we can create chains of tweens - when one tween ends another one is started. We'll illustrate this with an example.
In the Quiz application the main menu tile is dropped from the top of the screen. It emerges slowly from the top, slides down, bounces up and falls down again. It is illustrated on the picture below.
 Fig. 4 Steps of title tween animation
To do this we use the fallowing code:
Crafty.e("2D, DOM, gameTitle, Tween").attr({
    x : 295,
    y : 0
}).tween({
    y : 65
}, 60).bind("TweenEnd", function() {
    this.unbind("TweenEnd");
    this.tween({
        y : 55
    }, 20);
    this.bind("TweenEnd", function() {
        this.tween({
            y : 65,
        }, 20);
    });
});
In our example, Tween animations change only the vertical position of the title. You can also notice a component "gameTitle" with graphics added. This component represents the game title sprite, and was created by the Crafty.sprite() method, when loading the sprite sheet.
Sprite animations
Sprite animations are another type of animations. Different stages of animation are saved as separate images on the sprite sheet. It's especially efficient when sprites have the same width.
![]() Fig. 5 Example sprite sheet
Fig. 5 Example sprite sheet
Let's assume that the squares 1-5 are frames of the animation and the side length of each square is 10 pixels. We want to animate our object from frame number 1 through 2, 3 and 4 to the frame number 5. First, we load the sprite shown on Fig.5. As you already know, we use Crafty.sprite() method to do it:
Crafty.sprite(10, "sprite.png", {
    object : [ 0, 0 ]
});
Notice that we use 10 as the tile size. Now we can define an entity with animation. It has to use the "SpriteAnimation" component.
var player = Crafty.e("2D, DOM, object, SpriteAnimation").attr({
    x : 0,
    y : 0
}).animate("anim", 0, 0, 4); // setup animation
The animate() function for setting the animations up takes four parameters:
- id - name of the animation,
- formX - starting horizontal position on the sprite map (in tiles),
- y - vertical position in the sprite map (in tiles),
- toX - end horizontal position (in tiles).
Note that the y position remains constant through the animation. If you have to change it, you need to use methods explained later on.
Now that our animation is set up we can run it using the animate() function with three arguments:
- id - animation id,
- duration - duration of the whole animation in frames,
- repeatCount - number of times to repeat the animations.
player.animate('PlayerRunning', 15, 0); // play animation once
player.animate('PlayerRunning', 15, -1); // play animation infinitely
Playing the animation infinitely is very useful in games when a character has to be animated all the time, for example when it's running. There are some additional functions for handling animations: stop() and reset():
player.stop(); //stop all entity's animiations
player.reset(); //reset all entity's animations
To check if the animation is currently playing use the isPlaying() function:
player.isPlaying("anim"); //check if the animation if currently playingIf you call it with empty parameter you'll check whether there are any animations playing.
The method shown in the previous paragraph is very efficient and easy to configure when frames of the animation have the same width and are placed in one row of the sprite map. When they're not you have to pass the coordinates of each frame separately.
button.animate("blink", [ [ 222, 50 ], [ 222, 75 ], [ 222, 50 ], [ 222, 75 ], [ 222, 50 ], [ 222, 75 ] ]);The animation defined in the code above is blinking three times. You will find more about this type of animations in the next article.
Summary
In this article CraftyJS framework and using it in Tizen applications has been introduced. Framework's structure, including scenes and the entity/component system, was explained. You learned how to work with sprites and create simple entities. At the end some basic animations were presented. To learn more about working with Crafty on Tizen read the next article in the series: "Working with CraftyJS library - Follow-up"