Essential game mechanics in Unity3D
PUBLISHED
Introduction
In this article we will show you how to properly prepare for creating simple games in the Unity3D game creation software. Unity3D plays a key part in the game development world nowadays, so it is crucial for Tizen developers to be able to quickly learn, create and deploy their games to the Tizen Seller Office.
This article will describe the mechanics which are crucial in building games on any platform. We will provide C# code samples as well. We want to focus on showing you the quick way to achieve things in Unity3D. Things you know that need to be present while programming any game, but still you don’t know how to achieve them using C# in Unity3D, because you are new to the language and environment.
This article is very practical and is based upon the Sub Explorer game, which can be found on the Tizen Store. Also please note that if you haven’t read about publishing Unity3D applications on the Tizen Store then it is strongly recommended to read the First Steps with Unity in Tizen article first.
The Game Manager
Ok, so you have installed Unity3D and you read the article about publishing applications to the Tizen Platform. But what’s next? Where should you start coding your game?
The answer is easy. First of all you should create a Game Manager. This will be the place where all of our game elements will communicate with each other. Score and energy values will be stored here also. And it will be the place where the main game loop resides as well.
In the case of the Sub Explorer game our GameManager C# class is a singleton class. Why is that? It needs to be created only once. We need exactly one GameManager in our game. And we want it to be accessible from any other part of our game. So how our singleton GameManager class could look like in the Unity3D C# script? Below you can have a glimpse. Detailed explanation of the code is in the comments. All in all you can see that in the beginning we are creating some GameObject variables which will store information about our game objects like prefabs, camera, player, game UI screens etc. Also there are variables which are responsible for game logic and score. The most important part happens near the declaration of the Awake() function. And just before it we make the GameManager instance public and static. This will give the access to it throughout our whole project. You can then access the GameManager from any part of your code by typing GameManager.instance.xyz. Where xyz stands for any public variable or function. Below that we have the actual implementation of our GameManager singleton. And beneath that you can see some example, but probably essential functions in any game like newGame(), pauseGame(), resumeGame(), quitGame(), etc.
[…]

using UnityEngine;

public class GameManager : MonoBehaviour
{

    //game prefabs assigned via the Unity3D editor
    public GameObject myPrefab1;
    public GameObject myPrefab2;
    public GameObject myPrefab3;

    //game Camera
    public GameObject gameCamera;

    //game canvases
    public GameObject mainMenuCanvas;
    public GameObject hudCanvas;

    //an example player GameObject
    public GameObject player;

    //some example game logic
    public bool isPausedMode = false;
    public bool isPreviewMode = true;

    //score logic
    public int score = 0;
    public float depth = 0;

    //energy of the player
    public int life = 100;

    public static GameManager instance = null;

    //Awake is always called before any Start functions in the game
    void Awake()
    {
        //Here we have to check if the instance already exists
        if (instance == null)

            //if id does not exist, then we set the instance to this
            instance = this;

        //If the instance already exists and it is not this...
        else if (instance != this)

            //Then we need to destroy this. This enforcing of our singleton pattern. In other words - there can only ever be one instance of a GameManager.
            Destroy(gameObject);

        //It assures that this won't be destroyed when reloading the game scene
        DontDestroyOnLoad(gameObject);

        //Here you can call any functions which start the game. For example:
        newGame();
    }

    void Start()
    {

        // Disable screen dimming for our game
        Screen.sleepTimeout = SleepTimeout.NeverSleep;

        // get last high score points from Player Preferences
        var checkPts = PlayerPrefs.GetInt("highscore");

    }

    //The Update function is called every frame.
    void Update()
    {


    }

      // example functions of what can be in our GameManager C# script
      public void newGame()
      {

      }

      public void addPoint(int pts)
      {

      }

      public void pauseGame()
      {

      }

      public void resumeGame()
      {

      }

      public void endGame()
      {

      }

      public void quitGame()
      {
          Application.Quit();
      }

    }

[…]
Ok, but after reading the code above a new question arises. Where we should attach or create our GameManager script? The simplest thing to do is to attach it to some empty GameObject on the scene and it will run as soon as the GameObject it is attached to will be instantiated on the scene.
To create an empty GameObject you need to choose from the upper Unity3D editor menu GameObject >> Create Empty. Then you can attach the GameManager script component in the Inspector window on the right with the Add Component >> New Script and specyfing the script name as GameManager.
As maybe you have noticed in the example above, some interesting code has been written. Such as Application.Quit() which quits a Unity3D application on the device. Screen.sleepTimeout = SleepTimeout.NeverSleep; which prevents the device screen from dimming during the game play. Also Destroy(gameObject) which removes a GameObject from the game scene. Not mentioned here but opposite to the Destroy() function, we have the Instantiate(gameObject) function which as you can expect creates a new instance of a desired GameObject on the scene. The last interesting bit of code in the example is the DontDestroyOnLoad(gameObject) function. If the game scene on which the desired object resides would be ever reloaded then the object won’t be destroyed. You will find it very useful in your future Unity3D game projects.
Components
Because Unity3D world objects are made of many components, you will need access to them via code to change the GameObject behavior. The components are created and assigned in most cases through the Unity3D editor. To get access to them through code you need to use the GetComponent<ComponentName>().xyz; function. Where xyz is any variable, function or data type a component has. Below there are some examples of using components to change the GameObject behavior. Remember that this code will only work from a C# script directly attached to the GameObject, the component of you want to change.
[…]

// this will stop rendering the GameObject
GetComponent<Renderer>().enabled = false;

// and this will disable the Collider2D component of a GameObject. So it won’t be affected by physical collisions in Unity3D
GetComponent<Collider2D>().enabled = false;

// this line will change the GameObject material color to red
GetComponent<Renderer>().material.color = new Color(1.0f, 0.0f, 0.0f, 1.0f);

[…]
You can check the whole list of components while adding one to your GameObject in the Unity3D editor. Just click the Add Component (fig. 1) button in the Inspector panel and browse through various components. They all can be controlled via code. They are the nuts and bolts of your game application.
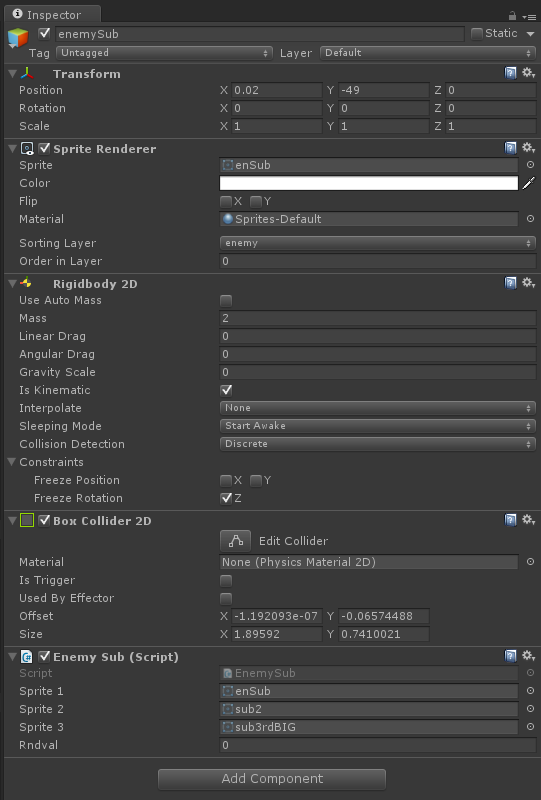
Figure 1 – preview of the Inspector panel with components and the Add Component button
Other essential game mechanics
Knowing how to create a simple GameManager class for our game and how to use components in Unity3D, the time has come to get some more knowledge about how things are done in Unity3D.
Nowadays many games utilize the accelerometer data for controlling the player behavior. Also the Sub Explorer uses accelerometer to control horizontal movement of the submarine. So how did we achieve that in Unity3D for Tizen? Below you can find the code snippet.
[…]

float moveHorizontal = Input.acceleration.x;

if (float.IsNaN(moveHorizontal))
{
    return;
}

[…]
From the code above you can see that we are creating a float variable. Then we assign to it the read out value of the accelerometer on the devices’ x axis. If you would like to get the acceleration for the y axis just write Input.acceleration.y instead.
Now you are probably wondering why we need the if statement below. This is a prevention mechanism. Sometimes the accelerometer can return a null value. By performing the condition check we are sure that no null values will pass in to our main game mechanics, thus crippling the gameplay.
Another thing which can be useful in creating games is the usage of delays. We often want in our games something to happen after a period of time. For this task the Coroutines of C# come in handy. As you can see in the code below we just have to use the StartCoroutine() function with a String parameter inside. The parameter is the name of an IEnumerartor function. Inside that function you specify what should happen. Somewhere in the body of that function there should be specified a yield which will return a WaitForSeconds(duration) object. Everything written after the yield will be run after the specified in the function time period. And in the case below it will be run only once after 7 seconds.
[…]

StartCoroutine("StartDoing");

private IEnumerator StartDoing()
{
        // something can be done here at first

        yield return new WaitForSeconds(7.0f);

        // do here something after 7 seconds
}

[…]
But sometimes, especially in games, you want something to happen after some period of time but constantly (for example spawning new enemies). Starting many Coroutines all the time would be very troublesome and would lead also to performance issues. That is why you can change the code above a bit by adding a while loop. By doing that you are gaining a constantly repeating itself Coroutine after the specified amount of time.
[…]

StartCoroutine("StartDoingConstantly");

private IEnumerator StartDoingConstantly()
{

    while (true) {

         yield return new WaitForSeconds(4.0f);

         // do here something constantly after 4 seconds

    }

}

[…]
Ok but we might want to finally stop our Coroutine. How would we do that? It is very simple. You just need to write StopCoroutine(“FunctionName”);. This will stop the running Coroutine immediately. Coroutines are a much larger topic, so if you want to read more about it please read the official Unity3D documentation about Coroutines.
The next thing which is sometimes useful in Unity3D games is the device vibration. You can achieve it by typing in Handheld.Vibrate();. Unfortunately you cannot specify the length of the vibration of the device. In order to change its duration you would have to create or use existing Unity3D plugins for specific device platforms. We have used vibration in the Sub Explorer game in order to tell the user that his submarine has collided very hard with an object and he lost energy.
Another thing you might find useful during development in Unity3D for Tizen is invoking some functions using the phones back button. It is quite simple. Below you have an example how to use the back button in order to quit a Unity3D application. But at some point you might also use the back button to get back from menus to the main game screen, etc.
[…]

if (Input.GetKeyUp("escape") )
{
    Application.Quit();
}

[…]
Another nice thing to know while creating Unity3D games is to get access from one script to the script attached to another GameObject. First of all you need to create a GameObject variable which will hold a reference to the GameObject holding our script. In our case it is the mySub variable. Then we need to use the GameObject function named Find to find our submarine on the scene. Having done that, we can create a subScript variable which is of SubmarineController type. It is worth noting that SubmarineController is the C# script attached to the submarine GameObject. Then you use the GetComponent function to get access to the SubmarineController script. At the end the subscript variable holds a reference to the SubmarineController script, so you can invoke functions and get access to variables inside of it. Of course if they are public. In our case it was the respawnSub() function. The complete code can be found below.
[…]

GameObject mySub = GameObject.Find("submarine");
           SubmarineController subScript = (SubmarineController)mySub.GetComponent(typeof(SubmarineController));
           subScript.respawnSub();

[…]
If you’re making a game then for sure you will want to move something. To do so, you should use the Transform component of your GameObject. This component has the Translate function, which as its name says translates the position of the given GameObject in the game space. Below you have the code which must be placed inside an Update() function in order to work properly. It simply moves the GameObject using the 2D vector value of Vector2.up multiplied by Time.deltaTime. As the name of the latter says, it returns a difference value between current time and last time in milliseconds, so we can use it to move objects inside the Unity3D game engine. The last parameter in the Translate function is the information about the coordinate system used to perform the Translate operartion. It can be Space.World or Space.Self. The first one refers to the world coordinate system, the second one to the objects own coordinate system, putting it in the center.
[…]

Update() {

      transform.Translate(Vector2.up * Time.deltaTime, Space.World);

}

[…]
Please also note that you can specify your own Vector2 values, for both x and y axes. Meaning that you can specify your own direction of the GameObject will be going to. So the code from above could look like the code below.
[…]

Vector2 myVector = new Vector2(1.2f, -1.0f);

Update() {

      transform.Translate(myVector * Time.deltaTime, Space.World);

}

[…]
While creating a game we would probably want to have a possibility to run some background music, so the players of our game can enjoy a nice rhythm when fighting their way through the game levels. You can do this in Unity3D in a simple way. First you need to locate your main game camera in the Hierarchy window. Then click the camera. The Inspector panel will show the camera components. Then locate the Audio Source component and open its tab. Then look for a field named AudioClip. This field is essential.
If you have already imported any music to the Project >> Asset window, then you can drag that file to the AudioClip field. You will attach the music to the game camera by doing that. And since the game camera is created in the beginning of running the Unity3D game project, then you are sure it won’t stop playing. As you look deeper into the options of the Audio Source component you will see that there is a Loop option. You can use it to toggle if the music should repeat playing after the end or not. You can also Mute the music from start or disable the music from playing by ticking the Play on Awake option. There are also many sound control options there like Pitch, Volume or Stereo Pan. Feel free to play around with them to get some interesting effects.
Summary
In this article we have showed you how to create a GameManager class for your game. We have also explained the importance of Components in Unity development and how to use them to access GameObject properties and functions. Next, we have described how to access the accelerometer and how Coroutines can be utilized. We also showed how to access from code C# scripts of another GameObject and how to program the behavior of the device back button in order to quit the Unity3D application. Lastly we wrote about using the Transform to Translate a GameObject position by using the Vector2 object and how to implement background music to your game utilizing the main game camera. We hope that this tutorial has familiarized you more with the Unity3D game development for Tizen and that in the near future you will create many great game projects for the Tizen Platform.