Creating a complete Currency Calculator application in AngularJS for Tizen – part 2
PUBLISHED
Introduction
In part 1 of our Currency Calculator article series we have showed you what kind of application we will be creating using the angular.js framework. We have introduced the libraries needed to complete the Currency Calculator (fig. 1). We showed you from which API we will obtain the data. We have also showed the basic HTML structure and the CSS of our application.
In part 2 of our article series we will show you how to obtain and filter data from the fixer.io external data API into our Currency Calculator application. We will also introduce basic concepts used in angular.js application development process.
For better understanding what is happening in this article, we encourage you to open the attachment with the applications’ complete project and code provided together with this article.
MVC – model, view, controller
AngularJS is a MVC framework. The model will hold our data. The views are responsible for showing the interface of the application to the end user and the controller is for controlling the view and in many cases manipulating the data from the model to be used in the view.
As we want to show you the easiest way to create the Currency Calculator application we will start off with the most important things.
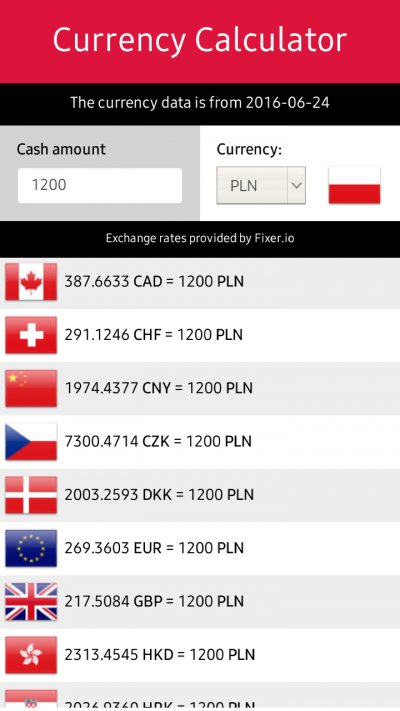
Figure 1 – The Currency Calculator application available on the Tizen Store
To initiate an angular.js application we need to use a directive in our HTML code. This directive is ng-app. It tells angular.js which part of our HTML code is actually the application and where in our HTML we can use angular.js directives, expressions, etc. In our case everything between the <html> tags will be in the scope of our angular.js application. So we added the ng-app directive to the <html> tag.
<!DOCTYPE html>
<html ng-app="currencyCalc">

/* -- angular.js controlled code here -- */

</html>
Having done that, we need to create a controller for the Currency Calculator to tell angular.js which part of the application will be controlled by this controller. So, first what we did, was to use on the <div> with the main id the ng-controller directive. Just like in the example below.
<!DOCTYPE html>
<html ng-app="currencyCalc">
<head>
</head>
<body>
    <div id="main" ng-controller="CalcController">

          /* Here is the stuff controlled by the CalcController */

    </div>
</body>
</html>
So now we know which part of our HTML will be controlled by the CalcController. The next thing to do will be to setup the controller itself in our app.js file, which we have created in the first part of our tutorial series. When building large angular.js applications, the controllers should be put in separate JavaScript files. But in our Currency Calculator application, since it will have only one controller, we will put it inside our app.js file.
Main application module and controller
In order to create the main application module for the Currency Calculator you need to type in your app.js file the following lines of code.
[…]

var app = angular.module('currencyCalc', ["ngStorage","ngAnimate"]);

[…]
We are assigning to the app variable an angular.js module named currencyCalc. We are also assigning to our application dependencies in the brackets. These are ngStorage and ngAnimate. What they do is the first one is helping in management of local storage data via AngularJS. The second one helps us manage animations in our angular.js application. Maybe you are wondering where both of these come from. So let us remind you that we have imported them between the <script> tags in our index.html file earlier.
[…]

<script src="js/ngStorage.min.js"></script>
<script src="js/angular-animate.min.js"></script>

[…]
So, having prepared our angular.js module we now need to create a controller for the part of our HTML which was marked by us by an ng-controller directive to be controlled from JavaScript. As you can see below, we must specify the name of the controller and then we need to specify what kind of modules we will be using in our controller. In our case these are $scope, which holds the data in our controller, the $http module, which is responsible in our application for retrieving data from the fixer.io JSON currency data service. And the last one is $localStorage which will help us store the downloaded data for usage when there is no Internet connectivity.
[…]

app.controller('CalcController', ['$scope', '$http', '$localStorage', function($scope, $http, $localStorage){

    /* controller code goes here */

}]);

[…]
Checking the Internet connectivity
Inside our controller function we will perform reading the data from fixer.io by using an http request and then we will parse the data and do proper filtering using the lodash.js library. But before that we need to know if we have an Internet connection at all. Because it is crucial for the user to have one when he downloads the application and uses it for the first time ever. The user needs initial data to be able to see any currency rates. To check Internet connectivity we use the isInternet() function in our code.
[…]

   function isInternet() {
        var xhr = new XMLHttpRequest();
        var file = CURRENCY_SERVICE_URL;
        var randomNum = Math.round(Math.random() * 10000);
        xhr.open('HEAD', file + "?rand=" + randomNum, false);
        try {
            xhr.send();
            if (xhr.status >= 200 && xhr.status < 304) {
               console.log("XHR status = " + xhr.status);
                return true;
            } else {
                return false;
            }
        } catch (e) {
            return false;
        }
    }

[…]
Whenever this function is invoked, it will send an XMLHttpRequest checking if our application will receive data from the CURRENCY_SERVICE_URL, which in our case is the fixer.io web currency service.If a response status is higher or equal to 200 or lower than 304 then it means that there was a valid response from the server and that we have internet connectivity. Otherwise there is no access to the Internet.
Fetching currency data from the fixer.io web service using AngularJS
Obtaining the currency data from fixer.io to AngularJS is fairly easy. In our Currency Calculator project we did it using the loadData() function. The first thing it does is checking if there is Internet connectivity by invoking the earlier explained isInternet() function. If that function returns true then it goes into the if statement and runs the AngularJS $http module. The module performs a GET request to fixer.io also utilizing a JavaScript promise. Beneath this text you can find a simplified example how it works in our application.
[…]

function loadData() {
  console.log("LOAD DATA!");
    if (isInternet()) {
      $http({
          method : "GET",
          url : CURRENCY_SERVICE_URL
        }).then(function mySucces(response) {

            // CONNECTED TO FIXER.IO!
            // NEXT PARSE THE DATA!

          }, function myError(response) {

            // CONNECTION ERROR
            // REPEAT THE CALL TO FIXER.IO

        });
    }
    else {
        if ($localStorage.curData != null) {

            // NOT CONNECTED AND RETRIEVE PAST DATA IF EXISTS IN LOCAL STORAGE
            // NEXT PARSE THE DATA!

        }
        else {

          // NOT CONNECTED, NO STORED DATA, TRY TO CONNECT TO THE INTERNET
            // REPEAT THE CALL TO FIXER.IO


        }
    }
}

[…]
If there is Internet connectivity and the connection to fixer.io was established then we are parsing the data and populating the rows of the application with currency rates. If there was an error, we try to call fixer.io again. But if there is no Internet connectivity then first we try to see if we have stored some previously downloaded data from fixer.io. If yes, then we parse that data. But if not, then we try to call fixer.io again.
Below you can find the complete loadData() function from the Currency Calculator application. As you can see we are utilizing the $scope object to store information about the status of our request and Internet connectivity in the $scope.netConnectivity variable. We will later use this variable to determine what we want to show in our application view in HTML to the user. Please note that the $scope object is accessible only inside the controller part of the application. We are also using the $localStorage object to store the loaded data in the curData (currency data) variable for later use. And we store it also for time being in the $scope.currencyData variable. But when there is no Internet connectivity or when the download process will be disrupted and an error will occur, we are using a setTimeout() function to try again to invoke the loadData() function.
[…]

function loadData() {
  console.log("LOAD DATA!");
    if (isInternet()) {
      $http({
          method : "GET",
          url : CURRENCY_SERVICE_URL
        }).then(function mySucces(response) {
            $scope.currencyData = response.data;
            $localStorage.curData = $scope.currencyData;
            $scope.netConnectivity = 0; // CONNECTED!
            parseData();
            //console.log("netcon0");
          }, function myError(response) {
            console.log("ERROR STATUS = " + response.statusText);
            $scope.netConnectivity = 1; // CONNECTION ERROR
            continousLoad = setTimeout(loadData, refreshTimeDelay);
            //console.log("netcon1");
        });
    }
    else {
        if ($localStorage.curData != null) {
            $scope.netConnectivity = 2; // NOT CONNECTED AND RETRIEVE PAST DATA IF EXISTS
            $scope.currencyData = $localStorage.curData;
            parseData();
            //console.log("netcon2");
        }
        else { // NOT CONNECTED TRY TO CONNECT TO THE INTERNET
            $scope.netConnectivity = 3;
            clearInterval(continousLoad);
            continousLoad = setTimeout(loadData, refreshTimeDelay);
            //console.log("netcon3");
        }
    }
}

[…]
Parsing the currency data
Now as we are storing the downloaded data in the $scope.currencyData variable, we are ready to parse it and convert the received JSON to an array of objects which will be the most suitable form for the lodash.js library to filter it through. The parsing of the data takes place in the Currency Calculator in the parseData() function.
But before doing the actual parsing we have to make here a remark and get back to the JSON data provided by fixer.io and the money.js library. As you remember in the first article of this series we showed you that fixer.io returns us JSON data in a format like shown below.
{
    "base": "EUR",
    "date": "2016-06-29",
    "rates": {
        "AUD": 1.4911,
        "BGN": 1.9558,
        "BRL": 3.6216,
        "CAD": 1.4407,
        "CHF": 1.0854,
        "CNY": 7.368,
        "CZK": 27.114,
        "DKK": 7.4376,
        "GBP": 0.8255,
        "HKD": 8.6041,
        "HRK": 7.5273,
        "HUF": 316.95,
        "IDR": 14577.25,
        "ILS": 4.2793,
        "INR": 74.9693,
        "JPY": 113.85,
        "KRW": 1283.15,
        "MXN": 20.7331,
        "MYR": 4.4594,
        "NOK": 9.3065,
        "NZD": 1.5565,
        "PHP": 52.106,
        "PLN": 4.4261,
        "RON": 4.5253,
        "RUB": 71.0452,
        "SEK": 9.4311,
        "SGD": 1.4951,
        "THB": 39.028,
        "TRY": 3.2157,
        "USD": 1.109,
        "ZAR": 16.6016
    }
}
As we will be making only one call for the API in a day, since it is updated once a day, then we need to provide money.js with properly prepared data. As you can see above in the list of the currency rates from the response there is no EUR currency, because it was set in the API call as our base currency. But money.js will also need the EUR to EUR rate which is of course 1. So after receiving the data and storing it in $scope.currencyData we will need to add it manually to our data by typing the following code.
[…]

$scope.currencyData.rates["EUR"] = 1;

[…]
Please note that the EUR currency rate will be added at the end of our currencies, after the ZAR currency. We will need this information later. The next step is to provide the money.js library with the modified currency data. We are doing it by executing the code beneath. We simply assign to the rates variable of the fx object the rates from $scope.currencyData.
[…]

fx.rates = $scope.currencyData.rates;

[…]
Now we are ready to parse our currencyData and create an array of objects for filtering in lodash.js. We are using a for var … in loop for this task. For every entry in the rates we are checking the key value pairs. Then we are creating a temporary parsedObject in which we assign the rate of the currency to the rate field and the currency value accordingly. Having done that, we are pushing the parsedObject to the $scope.parsedList array. Please note that the parsedList array is initialized in the first lines of the code of our controller.
[…]

    for (var cu in $scope.currencyData.rates) {
           if (cu) {
               var cuVal = $scope.currencyData.rates[cu];
               var parsedObject = {
                 "rate" : cuVal,
                 "currency" : cu
               }
               $scope.parsedList.push(parsedObject);
           }
     }

[…]
After the loop ends we are using on the parsedList the lodash.js library. If you have used the underscore library in the past, then you will have no problem with using lodash.js also. We use its orderBy function, which takes as the first parameter the array to be filtered, as the second parameter the field by the value of which the filtering will be performed and lastly the third parameter tells lodash about the filtering order. In our case we want the data to be filtered in the ascending order.
[…]

$scope.parsedList = _.orderBy($scope.parsedList,['currency'], ['asc']);

[…]
Having parsed the data we are ready to connect our downloaded data to HTML elements in the view of our Currency Calculator application.
Summary
In this article we have presented how to initiate an angular.js application, how to create a controller and how to add modules to the controller. We also showed how to use the $http module to download the fixer.io currency data and how to store it for later usage in with the $localStorage module. We also described how to use the data with the money.js library and parse it and then filter it with lodash.js for usage with the view of our application. We hope that this article helped you in better understanding of angular.js development.
In the next article we will show you how to connect the data with the view of the Currency Calculator.
We would also like to thank http://www.senojflags.com for the possibility to use their beautiful country flags for our article and the Currency Calculator application.