Developer Application Case Study: Todo List
PUBLISHED
Developer Application Case Study: Todo List
Overview
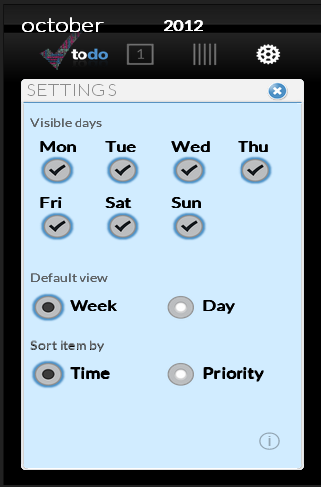
To-do list is a utility application that is used to track your daily activities. A task can be prioritized, color coded, and added to a part of the day. Visible days can be configured along with the default view. Tasks can be sorted by time or priority.
Table of Content
- Features
- Internationalization
- Storage
- JS Prototype
- Dynamic Creation of DOM Elements
- Use of JSON Files
- Screenshots
Features
From a web application developer's perspective, the features of interest is:
- Internationalization using Chromium API (if present)
- Use of local storage for tracking the history and memory.
- Use of JSON files to store localization strings.
- Use of JS prototype and classes.
- Use of CSS selectors within CSS and from java script.
- Dynamic creation and manipulation of DOM elements.
Internationalization
To internationalize, all user-visible strings has to be placed in a file named messages.json (under a directory named _locales/LocaleCode, LocaleCode is a representation code like en for English). The Configuration files, CSS files, and JavaScript code use each string's name to get its localized version.
To retrieve the locales, web application needs to call chrome.i18n.getMessage() method. In this example js/Localizer.js file, provides getTranslation function to retrieve the locales.
You'll find a lot more information about internationalization at Read more.
function _(string, args) {
    if(window.chrome && window.chrome.i18n) {
        return chrome.i18n.getMessage(string, args);
    } else {
        return  LOCALE[string];
    }
};
Storage
By using HTML5, web applications can store data on the client device. In earlier versions of HTML, data storage was done with cookies and flash storage. By using client-side storage, you can develop an application that works in offline mode, Reduce number of network requests and improve the performance of application.
Web applications can store data in following ways:
- Web Storage (Local Storage / Session Storage)
- Web SQL Database
- IndexedDB
- Application Cache
- Filesystem APIs
- Cookies
Web Storage
Using Web storage APIs, an application can store data in key/value pairs and it can only retrieves data stored by it.
SettingsBackendLocalStorage.prototype.init = function() {
    settingsdaykey = 'settingsdays';
    var daysArray = JSON.parse(localStorage.getItem(settingsdaykey));
    if (daysArray == null) {
        var noofdays = 7;
        var array = new Array(7);
        for (var i = 0; i < noofdays ; i++) {
            var day = new SettingsItem();
            day.id = i;
            day.value = SettingsItem.dayItem.CHECKED;
            array[i] = day;
        }
        localStorage.setItem('settingsdays', JSON.stringify(array));
        localStorage.setItem('defaultview', JSON.stringify(SettingsItem.DefaultView.WEEKVIEW));
        localStorage.setItem('sortby', JSON.stringify(SettingsItem.SortItemBy.TIME));
    }
};-
Local Storage
- Application can store data without any expiration date.
- Data is persistent.
- Avoids HTTP overhead of cookies.
- Mainly used to store settings.
-
Session Storage
- Stores data for one session.
- Mainly used for sensitive data.
Note: Web Storage APIs accepts only strings.
JS Prototype
To add additional methods and properties to a JS object, web application needs to use prototype property. Initially this property points to an empty object.
function SettingsBackend() {
    /* initlization code. */
    this.init = function() {};

    /* Creates a new settingsItem. This method should ALWAYS be used to create
     * settings items, instead of a simple instantiation. */
    this.create = function() {};
}

function SettingsBackendLocalStorage() {
}

SettingsBackendLocalStorage.prototype = new SettingsBackend();

SettingsBackendLocalStorage.prototype.create = function() {
    var item = new SettingsItem();
    item.guid = 'xxxxxxxx-xxxx-4xxx-yxxx-xxxxxxxxxxxx'.replace(/[xy]/g, function(c) {
        var r = Math.random()*16|0, v = c == 'x' ? r : (r&0x3|0x8);
        return v.toString(16);
    });
    return item;
};
Every object within JavaScript has a hidden property named __proto__. This property is added to the object when it is defined or instantiated. Based on __proto__ property, prototype chain is accessed. Since all browsers don't support this property, it is not safe to access __proto__ property directly.
In general, it's only possible to set an object's prototype during object creation: If you create a new object via "new SettingsBackend()", the object's prototype
property will be set to the object referenced by SettingsBackend.prototype.
This example uses prototype property to add methods to an object(s).
You'll find a lot more information about prototype at Read more.
Dynamic Creation of DOM Elements
Using java script or jquery, web application developer can dynamically create or modify a DOM element. To add a new element to a document you need to follow these three steps:
- Create the node or element.
- Identify the target location within the document.
- Append the node to document.
By using createTextNode() or createElement() method of the document object, web application developer can create a text node or a new tag respectively. Use setAttribute() method to add an attribute to the created tag.
Once the creation of the node is finished, identify the location where you want to append it in the document tree. You can locate the place in two ways:
- Navigate the document tree by using parent and children relation. Use document.childNodes, document.nextSibling and document.parentNode methods to traverse the document tree.
- Use document.getElementById("ID") method to locate the node based on ID.
After identifying the target location, append the node using appendChild() or insertBefore() methods.
this.__create_todo_ui = function(todo, date, draggable, editable) {
	var self = this,
	$item = $('').addClass('todo-item'),
    //Create the node.
	$img = document.createElement("img"),
	$text = $('').addClass('text');

	$item.data('todo-item', todo);
	$item.data('date', date);

    //Set the src attribute.
	if(todo.priority == 1)
        $img.src = "images/priority_00.png";
    else if(todo.priority == 2)
        $img.src = "images/priority_01.png";
    else if(todo.priority == 3)
        $img.src = "images/priority_02.png";
    else if(todo.priority == 4)
        $img.src = "images/priority_03.png";

    //Append the image node
    $item.append($img);
};
Use of JSON Files
JSON is a lightweight data exchange format. It can be written by following some simple norms that are familiar to programmers of the C-family of languages. JSON is language independent and is easy for humans to read and write. The main concepts used in JSON are Collection of key/value pairs and ordered list.
This example uses JSON files to save localization strings and define web app manifest file
You'll find a lot more information about JASON at Read more.
//Localization example.
{
    "appName": {
        "message": "Todo List",
        "description": "The name of the app."
    },
    "appDescription": {
        "message": "A simple, fun todo app that allows you to assign priority via font size and category via color.",
        "description": "The description of the app."
    }
}
//example manifest file.
{
  "name": "__MSG_appName__",
  "description":  "__MSG_appDescription__",
  "version": "0.0.1",
  "default_locale": "en",
  "app": {
    "launch": {
      "local_path": "index.html",
      "container":"panel",
      "width":1280,
      "height":720
    }
  },
  "icons": {
    "128": "icon_128.png",
    "48": "icon_48.png",
    "16": "icon_16.png"
  },
  "homepage_url" : "https://01.org/webapps/content/todo-list",
  "update_url" : "https://01.org/webapps/content/todo-list/update.xml"
}
Screenshots
Below are the screenshots of the Todo list application.
Figure-1: This is how it looks when the web page is loaded and phone is in landscape mode. 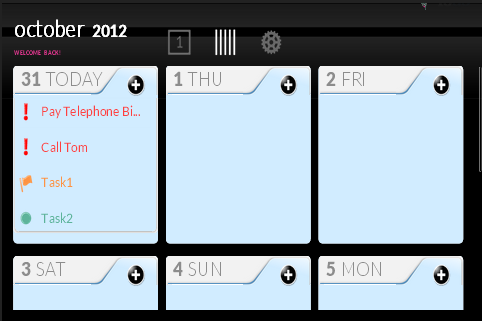
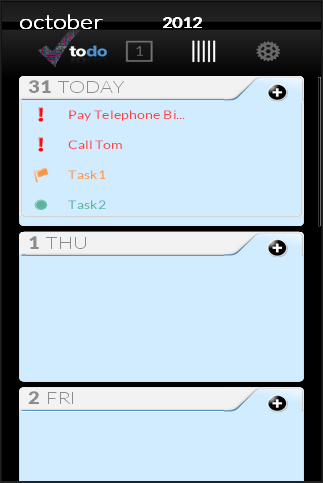
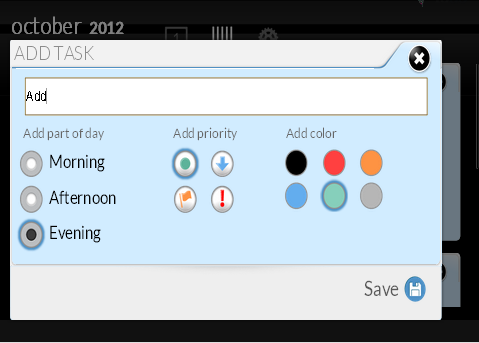
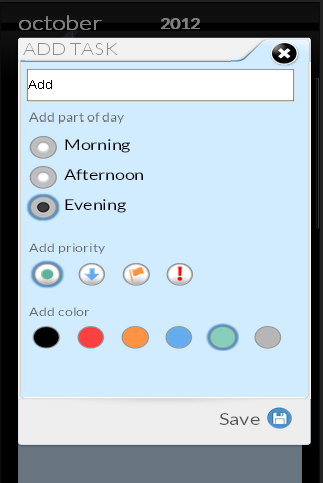
Figure-4: Add new task in portrait mode.