Creating a complete Currency Calculator application in AngularJS for Tizen – part 3
PUBLISHED
Introduction
Welcome in the last part of the angular.js Currency Calculator article series. In the previous part we showed you how to obtain the data from the public currency rate API, how to filter it and store for future use. In this article, as we have promised, we will focus on showing how to connect the downloaded data from the fixer.io public API with the view of the Currency Calculator application. We will also describe how to filter the stored data and show it in a pleasant way to the end user. And lastly we will give you a hint how to block user input to input fields using a custom directive and how to utilize ng-animate to enhance the visual side of the Currency Calculator (fig. 1) application.
It is advised to read both part 1 and part 2 of this tutorial series before proceeding with further reading, because we will be referencing many things described in both of these articles.
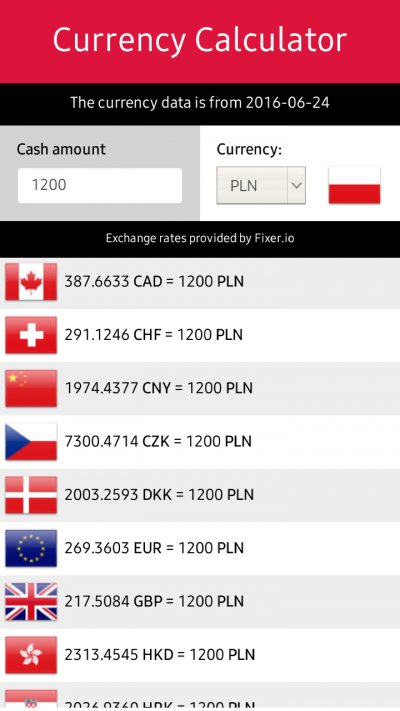
Figure 1 – The complete Currency Calculator application available on the Tizen Store
Making the view alive using AngularJS directives
In the first article about angular.js in Tizen we have showed you how the basic index.html file of our application will look like. We created the visual structure of our application, but still it lacked any angular.js specific code. Therefore it couldn’t be managed or populated by the data obtained from the fixer.io currency rate data service. In the second article we showed how to set the “boundaries” of your application inside a HTML file using the ng-app directive and how to use controllers to perform operations on parts of an angular.js application. Now we will describe how to combine the data with the view in order to control and populate HTML elements of your index.html file.
First of all we want you to understand how we will manipulate the HTML view using angular.js directives and which of them we will use. Our index.html file consists of many elements which depending what happens to the application data, we will want to show, hide or change. For this purpose we will use the listed below angular.js directives in our Currency Calculator application.
- ng-class – Assigns a specific CSS class to the desired HTML element.
- ng-if – Performs a condition check on the given expression and if true then shows the element, otherwise it hides it.
- ng-disabled – Performs a check on the given condition and if true it disables the HTML element.
- ng-repeat – It instantiates a given template basing on data from a provided data collection and you can think of it as a for loop to create items in your application, for example a list.
- ng-class-odd – This one assigns the specified class only to the odd elements, for example of a list.
- ng-class-even – It assigns the specified class only to the even elements, for example of a list.
- ng-src – You need to use this directive if you want to use dynamical names in the HTML src attributes. For example using an angular.js expression in a normal HTML src attribute like {{itemName}} would be treated literally and would create an error. That is why we need to use ng-src instead.
- ng-options – This one lets you create a list for the <option> element for the <select> HTML dropdown by using data from an array or object.
- ng-change – What it does, it runs the code when the element’s value which it is assigned to has changed. For example when the value of a text area changes.
- ng-model – This directive binds an input, text area or select to a property on the $scope object.
- ng-show – If the statement in this directive is true then the element which it is assigned to will be shown.
- ng-hide – If the statement in this directive is true then the element which it is assigned to will be hidden.
We will also use the ng-animate library to use some CSS to create animations for our currency rates list.
You use directives in angular.js like in the example below. They can be an attribute to HTML tags. In this particular example if the myCondition variable will be equal to 1 then the <div> and everything inside it will be disabled. Also please keep in mind that the variable must be in the $scope object of the controller which is responsible for controlling that particular part of our HTML code containing that <div>.
<div ng-disabled=”myCondition == 1”></div>
Connecting the Currency Calculator model with the view
This is the moment where you should definitely open the attached to this article Currency Calculator source code and look inside the index.html file. It will make things much easier.
First of all we need to get back to the part 2 of this tutorial series. In that article we have assigned to the netConnectivity variable inside the CalcController controller a specific value. It differed, based on the status of the Internet connection and access to the currency rates API. So let us recall these values, because we will need them to change the application view accordingly to the status of the data and Internet accessibility.
netConnectivity = 0 – we have connected successfully, so there is Internet connectivity
netConnectivity = 1 – a connection error has occurred, no Internet connectivity
netConnectivity = 2 – no Internet connectivity but there is earlier stored data in the $localStorage so we can use it
netConnectivity = 3 – there is no Internet connectivity and no earlier stored data
The first thing we will want to change depending on the Internet connectivity and access to data is the <div> with the header id at line 20 of the index.html file. It is the main label of the application and as you can see below we are using the ng-class directive in order to assign either labelActive or labelInactive CSS class to it. You can also see that we have performed a conditional operation there which is basing on the netConnectivity variable and assigning the appropriate CSS class to the header <div>.
[…]

<div id="header" ng-class="(netConnectivity == 1 || netConnectivity == 3) ? 'labelInactive' : 'labelActive'" class="container-fluid">

[…]
As you can see in the main style sheet, which is the style.css file, labelActive changes the background-color property of the header <div> to crimson, while the labelInactive class changes is to grey.
[…]

.labelActive {
  background-color: crimson;
}

.labelInactive {
  background-color: grey;
}

[…]
The next place which is dependant on the netConnectivity variable is the dateHeader <div>. We are using on paragraphs the ng-if directive and checking if the conditions have been met either to show one paragraph with the information about the date of the currency data last update or the other paragraph which displays that there is no Internet connectivity.
[…]

<div id="dateHeader" class="container-fluid blackHeader">
<p ng-if="(netConnectivity == 0) || (netConnectivity == 2)" class="text-center">The currency data is from {{currencyData.date}}</p>
<p ng-if="(netConnectivity == 1) || (netConnectivity == 3)" class="text-center">No Internet connection!</p>
</div>

[…]
You might also wonder why currency.data is in curly brackets like this – {{currency.data}}. The curly brackets are an angular expression. They tell angular.js that between the brackets there should be put the value of the variable or expression specified by the programmer. In our case we will get the date of the currency rates rendered in the HTML. But generally expressions are used to render to HTML data from angular.js. So, if you do something like in the snippet below, then you can see that the expression was automatically evaluated. Please remember that the variable value you are trying to render to HTML via an angular expression must be in the $scope object of the controller responsible for handling the part of HTML code you want the expression to be rendered in.
[…]

{{2 + 2}} // this will evaluate to 4

[…]
In the line 33 we are using ng-disabled for the first time on the input field responsible for typing in the amount of money. If there is no Internet connectivity we are simply disabling the input field. But that is not all. We are also using ng-change and ng-model and a custom directive input-block.
The ng-change directive is used to launch the currencyChanged() function from our CalcControl controller. We are using it to generate a new currencyList array which will be later used to display the currency rates using ng-repeat. In the parameters of that function we are sending the amount of money typed into the input box of the selected currency.
We are also using here ng-model to store the information about the typed amount of cash. As for the custom directive input-block-length=”validLength” we are blocking the possibility to type in more digits than 8 (validLength value). We will later show how to construct this custom directive.
[…]

<input ng-disabled="(netConnectivity == 1) || (netConnectivity == 3)" type="number" class="form-control" id="currency1" placeholder="type amount" ng-maxlength="10" step="0.01" ng-change="currencyChanged(moneyAmount, selectedCur)" ng-model="moneyAmount" input-block input-block-length="validLength">

[…]
Line 40 has a <select> element. It is responsible for changing the destination currency we want to check the currency rates for. We are also hiding it with ng-disabled if there is no Internet connectivity. We are also updating the currencyList array using ng-change and the currencyChanged() function whenever the user selects a currency from the <select> element. We also store the users’ selection using ng-model in the selectedCur variable. But the most important thing is that we are using the ng-options directive to populate the selection list of the <select> element with currencies from the parsedList array. We got the parsedList from parsing the data from fixer.io currency rate API with the parseData() function in part 2 of this article series.
In the ng-options directive we are telling angular.js to use the currency variable from every item object found in the parsedList.
[…]

ng-options="item.currency as item.currency for item in parsedList"

[…]
Next at line 43 of the index.html file there is another angular directive called ng-src. As we have written earlier it is used in the case where you want to create dynamical paths for src attributes in HTML elements. We used ng-src to load an image of the national flag where the currently selected currency is used. We have named the flag PNG image files just like the currencies. So for example the euro currency is EUR.png and Polish currency is PLN.png. This way we could use an angular expression in the ng-src directive to dynamically set the selectedCur variable, which stands for the current flag image name and load it. Just like in the example below.
[…]

ng-src="images/flags/48/{{selectedCur}}.png"

[…]
The next place in the Currency Calculator, where we need to have the view bound to the data from the application model is the providerHeader <div> at line 49. This <div> shows in a paragraph the information about who provides the data for the application, which is the fixer.io service. We want to show this information only when there is data from fixer.io, new data or earlier stored. For this purpose we are using the ng-show directive. We evaluate it over the currencyList array. Specifically over its first element, which is the currencyList[0]. If there is currency data inside of the currencyList then ng-show evaluates to true and shows the <div>. If not, the <div> will stay hidden, simple as that.
The opposite of ng-show is ng-hide and we use this one at line 52 in the infoText <div>. If there is currency data then we hide the screen which tells us about the connection status, because the data is there, we don’t need that screen in this case.
In lines 53 to 56 we are again using ng-if to determine Internet connectivity and show proper information to the user about using the application when it has data and to show an error message when something went wrong. But you might spot another directive along ng-if in these lines. We are talking about ng-aria. This directive is applied to Bootstrap glyph icons in our case and what it does, it prevents from showing those icons on text reader devices, because text readers could have problems rendering them.
Then in line 56 we are using again ng-show to show the <div> with the list of currencies and the rate for our target currency, basing again on the existence of the first element in the currencyList. This <div> shows in opposite to the infoText <div> in our application. We either get information about connection problems or we get the currencies and rates on the screen.
Inside the <div> with currency rates we have to actually show these currencies and rates. We must list them in this <div>. Using angular.js it is easy. We just have to use the ng-repeat directive. Then we specify that we want to get from the currencyList array a data object representing the currency (curr) and its rate. What ng-repeat will do is it will list all the rates accordingly to the number of items there are in the currencyList array.
[…]

ng-repeat="curr in currencyList | myFormat: selectedCur"

[…]
What is more, if you look at lines from 60 to 64 then you can see that we can access the data objects representing each currency rate and render to the HTML the rate, currency, amount of money and the base currency for this exact currency row. And also we can render a proper flag icon image using the ng-src directive in line 60.
But you are probably wondering what is all about this myFormat thing after the pipe in the code snippet above. The answer is simple. It is a custom filter for data. We passed in the selected currency to the custom filter. We did that because we need to prevent a situation when the selected currency will show through ng-repeat the currency rate to itself, which will be always 1 (1 US Dollar is 1 US Dollar, etc). It is no point in showing that, that is why we need a custom filter.
Our custom filter for ng-repeat looks like in the snippet below and is located in the app.js file, but not in the CalcController.
[…]

app.filter('myFormat', function() {
      return function(obj, currentCur) {

          var myArray = [];
                      for (var c in obj) {
                         if (obj[c]["currency"] != currentCur) {
                             myArray.push(obj[c]);
                         }
                      }

                   // myArray =  _.sortBy(myArray,['currency']);
                      myArray =  _.orderBy(myArray,['currency'], ['asc']);

          return myArray;
      };
    });

[…]
We declare a custom filter by using the filter method on our angular module variable (app). Then passing in the name of the filter as a string, and then returning a function with the data object and a parameter, if we need one. Then inside the body of the function we manipulate the data and at the end we return the modified data to be used by ng-repeat.
In our case the parameter is the current currency. Then we initiate a temporary myArray array and we iterate over it using a loop. While doing that we are checking if the provided in the parameter currency is different from the one we have checked in the current iteration. If it is different then we put it in myArray, if it is the same then we do nothing and perform the next iteration. This way we are ensuring that our listed data (currency rates) won’t display the rate to the currently selected currency (which is 1 to 1 always and is actually useless information for the end user). At the end we are using the lodash.js sortBy() function or orderBy() function to sort the currencies alphabetically and ascending. The last thing to do is to return the modified data (myArray). This way ng-repeat will use the filtered data from myArray to render currency rate rows in HTML.
What needs to be explained are the ng-class-even and ng-class-odd directives. They both point to CSS classes inside the style.css file. We wanted the currency rate rows more readable for the end user, so we have styled even and odd rows differently. That is what you use these both directives for. The result can be seen on figure 1.
[…]

.evenCurrencyStyle {
  background-color: #EEE;
}

.oddCurrencyStyle {
  background-color: white;
}

[…]
We have also written about ng-animate. Each currency row has been assigned this directive. It simply lets you animate the chosen HTML element. Inside the CSS you specify how the element should be styled in the beginning, styling it under the .ng-enter class. Then you can set its style for the end of the animation using .ng-enter.ng-enter-active class. If you would like to add stagger properties to the animation of your element then you can use the .ng-enter-stagger class. We have used this class to create a transition-delay of 0.07 seconds for every currency row, making a nice unveiling animation of all rows when either the selected currency or the amount of cash typed in by the user changes.
[…]

.ng-enter {
	-webkit-transition: 0.2s linear all; /* For Tizen */
	transition: 0.2s linear all;
        transition-delay: 0.1s;
        animation-delay: 0.1s;
        opacity: 0;
}

.ng-enter-stagger {
                    transition-delay: 0.07s ;
                        -webkit-transition-delay: 0.07s ;
                    /*
                        FROM THE DOCUMENTATION:
                        In case the stagger doesn't work then these two values must be set
                        to 0 to avoid an accidental CSS inheritance.
                    */

                    transition-duration: 0s ;
                        -webkit-transition-duration: 0s ;
                    }

.ng-enter.ng-enter-active {
	opacity: 1;
}

[…]
So, our application is practically done. The HTML view has been connected with the model stored in AngularJS. But we promised you when we were talking about the input-block custom directive the description how to create such custom directives. Our directive specifically prevents typing more than 8 digits in the input field. But first of all we will focus on how to create a custom directive then we will describe how to achieve the input lock for 8 digits using that directive.
The custom directives in angular.js are a big topic but as this article is devoted to showing how to build an angular.js application then we will only describe how to create a custom directive specifically for our application, without going into the vast topic of custom directives creation. So beneath you can see how our custom directive is used in the HTML together with the <input> element of our application.
[…]

input-block input-block-length="validLength"

[…]
As you can see the input-block directive is assigned inside of the <input> element tag, as its parameter input-block-length, which has assigned the value of validLength. In our case the value is 8. This means that only 8 digits will be permitted in the input field for the amount of currency.
Now we must setup the custom directive inside the app.js file. We do it just like in the code snippet below, by invoking the directive function on the app variable, which is our main module. Then we specify in camel case the name of the directive as a string. Next, we specify a function which uses the $parse service. In the return block we must specify the inner scope of the directive. Inside the directive we are specifying the inputBlockLength variable and telling angular.js to bind inputBlockLength to the given object. We also need to specify a link function which will serve as the place where we will bind the keypress event to the input element, checking and if necessary blocking the number of digits of the input field the user may enter. This all may sound complicated and guess what, it actually is. So if you are looking to dive in deeper into custom directives in angular.js, which is a vast topic, then feel free to look for articles and tutorials in the Internet.
[…]

app.directive('inputBlock', function ($parse) {
        return {
            scope: {
              inputBlockLength: '='
            },
            link: function (scope, elm, attrs) {
              elm.bind('keypress', function(e){
                if(elm[0].value.length > scope.inputBlockLength){
                  e.preventDefault();
                  return false;
                }
              });
            }
        }
    });

[…]
Summary
That wraps up building of the Currency Calculator application. The view of the application is now connected with the applications’ model. In this article we showed you how to use angular.js directives. We have also described how to change the view basing on the Internet connectivity status. And finally we wrote about creating custom filters and custom directives in AngularJS.
In the whole article series about creating the Currency Calculator we have showed you from scratch how to create an angular.js application. We described what is important in the development process, what interesting libraries can be used to help you manage filtering the data and managing the currency value data. You could also read how to connect to a remote JSON service in order to obtain external data and how to parse, render and animate the currency rates using AngularJS.
We hope that you have learned much from this article series and that your adventure with AngularJS and Tizen will continue by delivering great web applications to The Tizen Seller Office.
We would also like to thank http://www.senojflags.com for the possibility to use their beautiful country flags for our article and the Currency Calculator application.