In this lesson we will look at the features of application publication for Samsung Gear S2/S3. Currently such application can be published only via Samsung Galaxy Apps, (further “store”), which is available at the following link: http://seller.samsungapps.com.
Click at the link to open the login window:
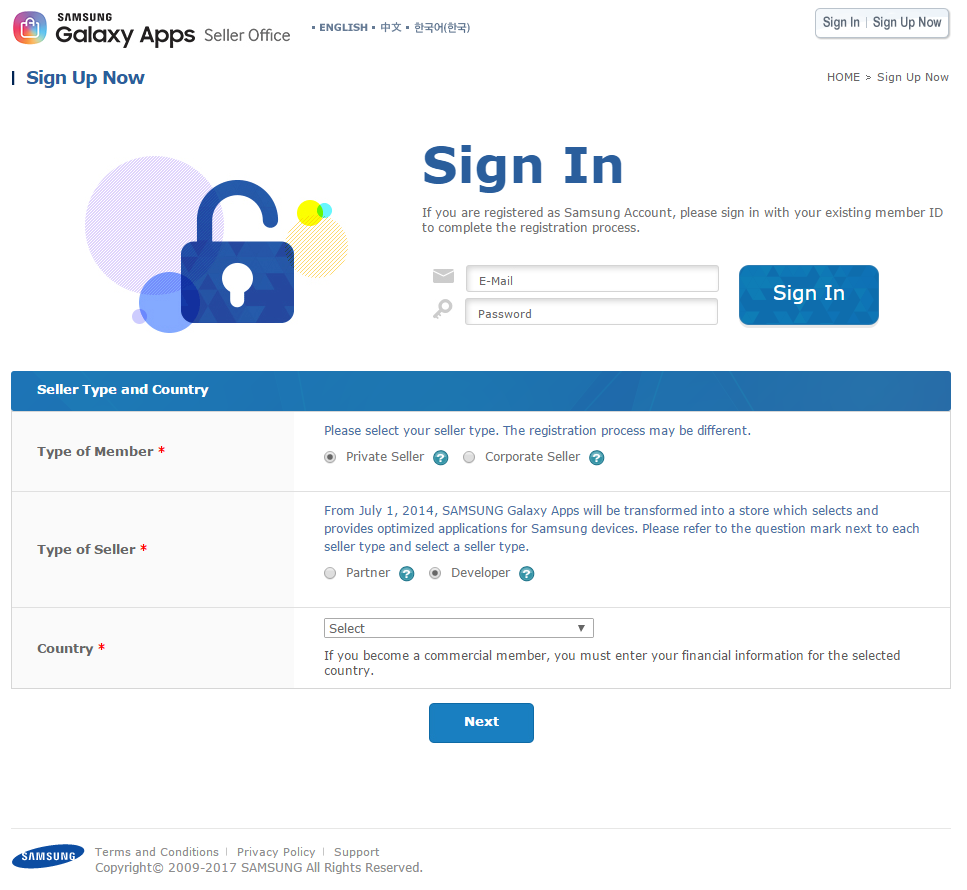
The store interface language can be selected in the upper left corner of the screen. At the moment, there are three available languages: English, Korean and Chinese.
To enter the store, create an account. Click Sign Up Now. In the opened form, fill in the basic information.
Specify:
Email and password, which will be used for entering the store.
Type of Member – is it private user or company.
Type of Seller – is there some partnership relation with Samsung
Electronics Co. If so, it is required to indicate the corporate email of company employee, who is authorized to confirm the partnership.
Country – select one of the listed countries.
Click Next button to open the window with conditions of publications and the store rules. Put check mark after each description block or just click on Agree to All at the bottom of the page, to confirm that the submitted rules have been carefully read and fully accepted.

Click Next to open the form for filling in basic information.
Basic Information: specify email, password and personal information.

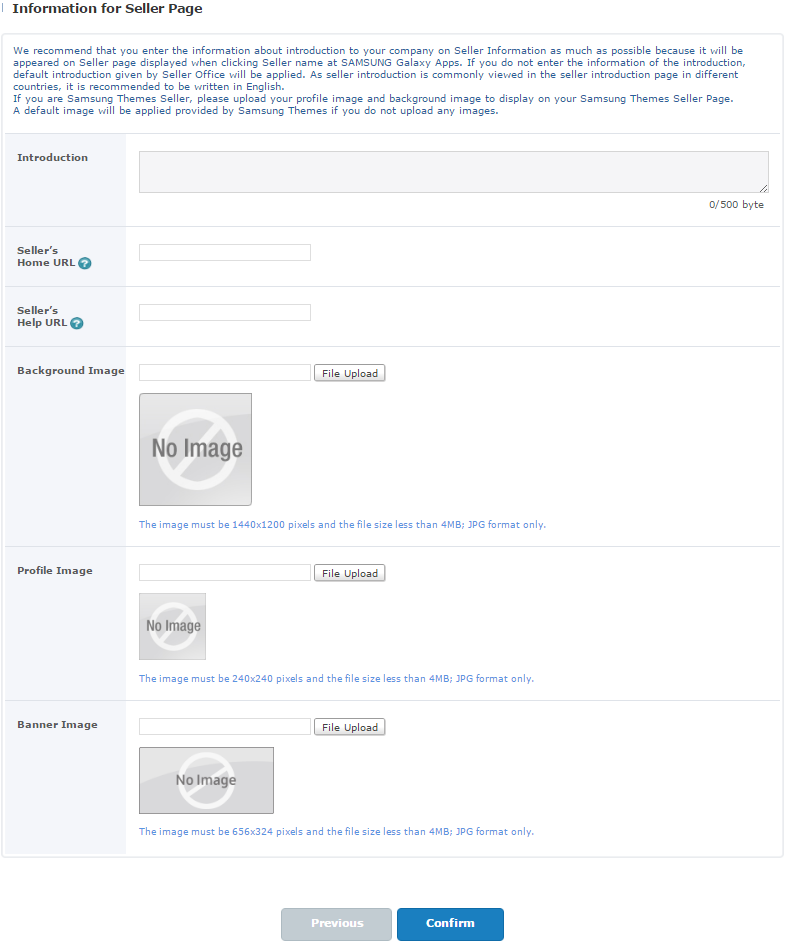
Information for Seller Page – information about publisher of the application. This data will be available to users in the store.
Important:
Basic Information section must be filled in English.
Fields marked with a red asterisk are required. *
After pressing Confirm button, a confirmation letter will be sent to the specified email address. It is necessary to open this letter and go to the indicated link. Registration is complete.
For authorization, on the login screen, go to the Sign In section, enter the email and password that were specified during account creation, and click the Sign In button. The main store page will be opened.
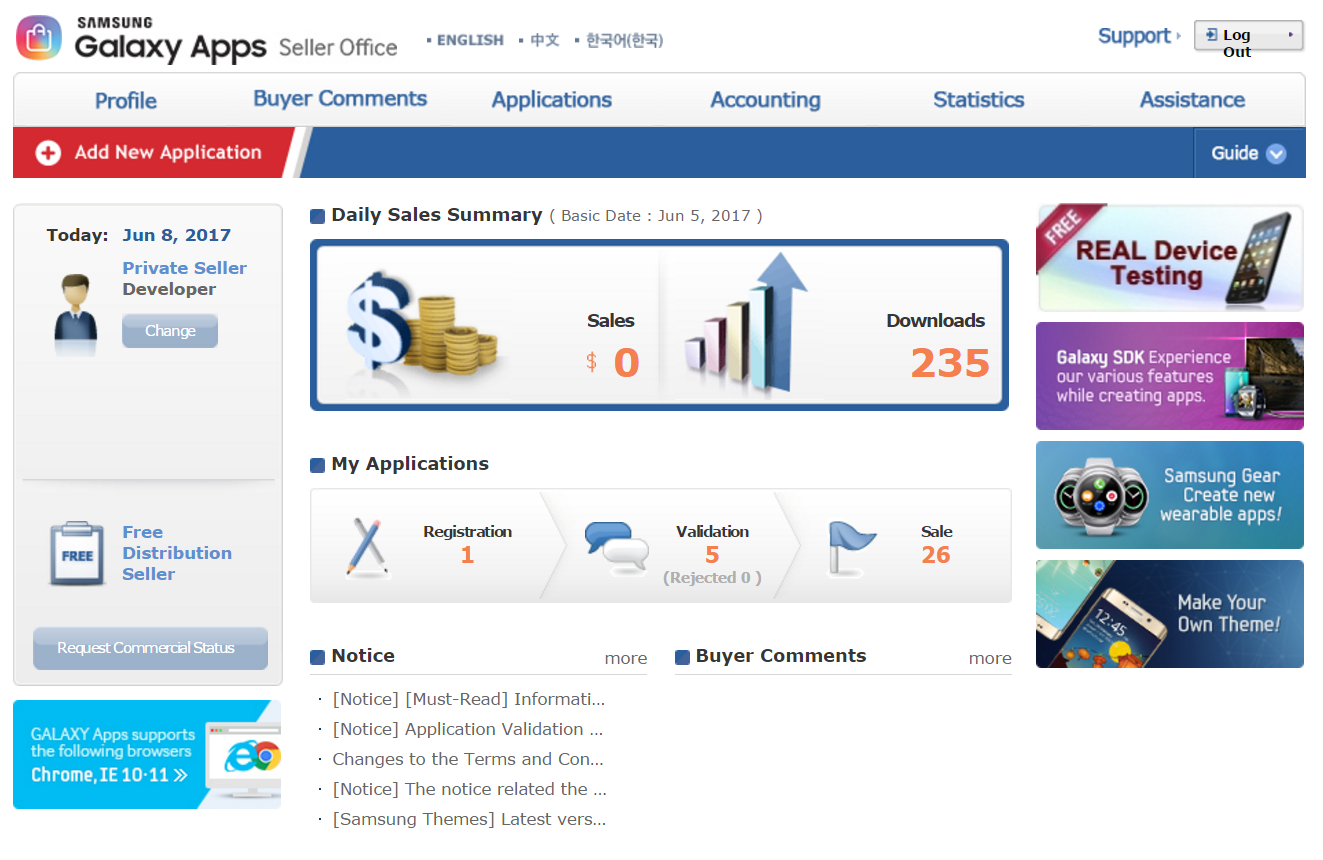
There is such basic information on the main screen:
Daily Sales Summary – statistics of received funds and downloads of all published applications for the last reporting day (Base Date).
My Applications – information about the status of published applications (how many applications are on the registration, on the verification and how many are available for downloading).
Notice – general notification of the store.
Buyer Comments – recent users comments about published applications.
Add New Application button, located on the top left corner of the screen, opens publication form for the new application.
The Change button, located on the left side of the screen, allows changing the profile.
Button Request Commercial Status - request to change status in the account, it authorizes publishing paid applications.
The Guide button, located on the upper right corner of the screen, contains links to documentation that describes all the features and the store terms of use.

Important:
Documents in the Guide section are very informative. If you have any questions, it should be your first place for seeking answers.
Also on the top of the main page you can find links to other sections of the store:
Profile – change account information.
BuyerComments - all users comments on the published applications.
Applications – contains three management sub-sections: applications, coupons and discounts.
Accounting – allows generating various financial statements.
Statistics – allows generating reports on the number of downloaded applications.
Important:
The sections BuyerComments, Accounting, Statistics and Assistance allow you to download reports in Excel format. Data can be filtered. In addition, in the Statistics section → Applications, directly in the store, you can build informative graphics to see applications download statistics.
To publish a new application, click Add New Application in the top-left corner of the screen.
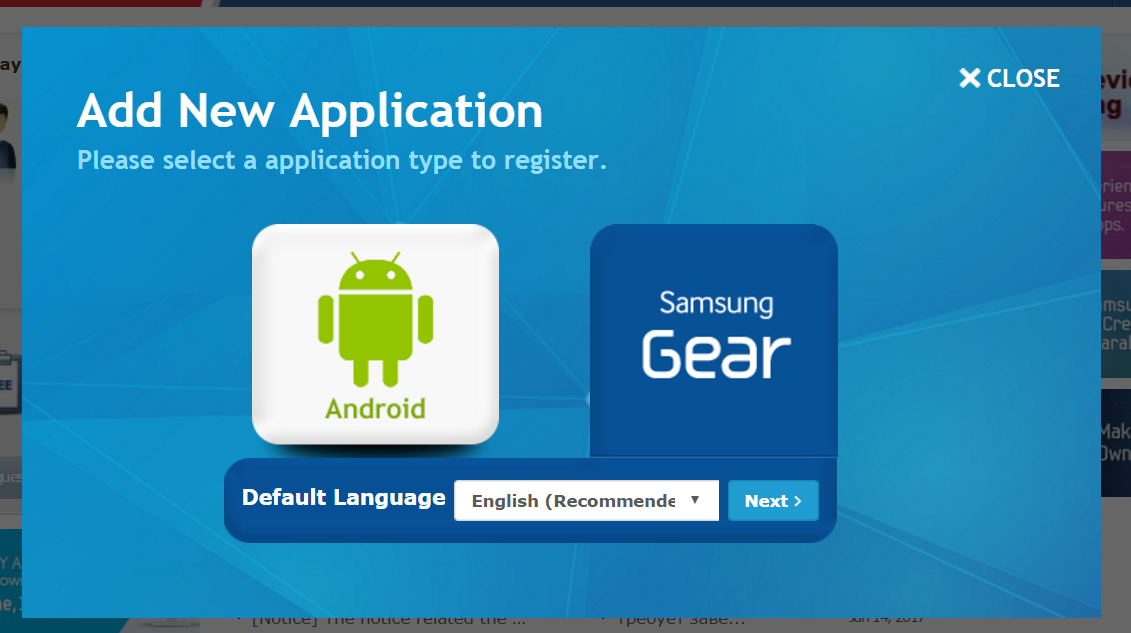
In the appeared window, select Samsung Gear and specify the main language of the application (English is recommended). Click Next to open a form for filling information about the application. The following sections are available (located on the left side):
App Information – general information about the application that will be available for the users in the store.
Binary – section for loading and setting the parameters of the executable module.
Country & Price – selection of distribution conditions and countries in which the application will be available.
In App Purchase – setting up sales within the application.
Validation – information for the QA team, who will be testing the application on the side of the store before its publication.
Important:
Fields marked with a red asterisk are required. *
In the sections App Information, Binary and Country & Price, you can switch between simple and advanced modes for adding advanced information.
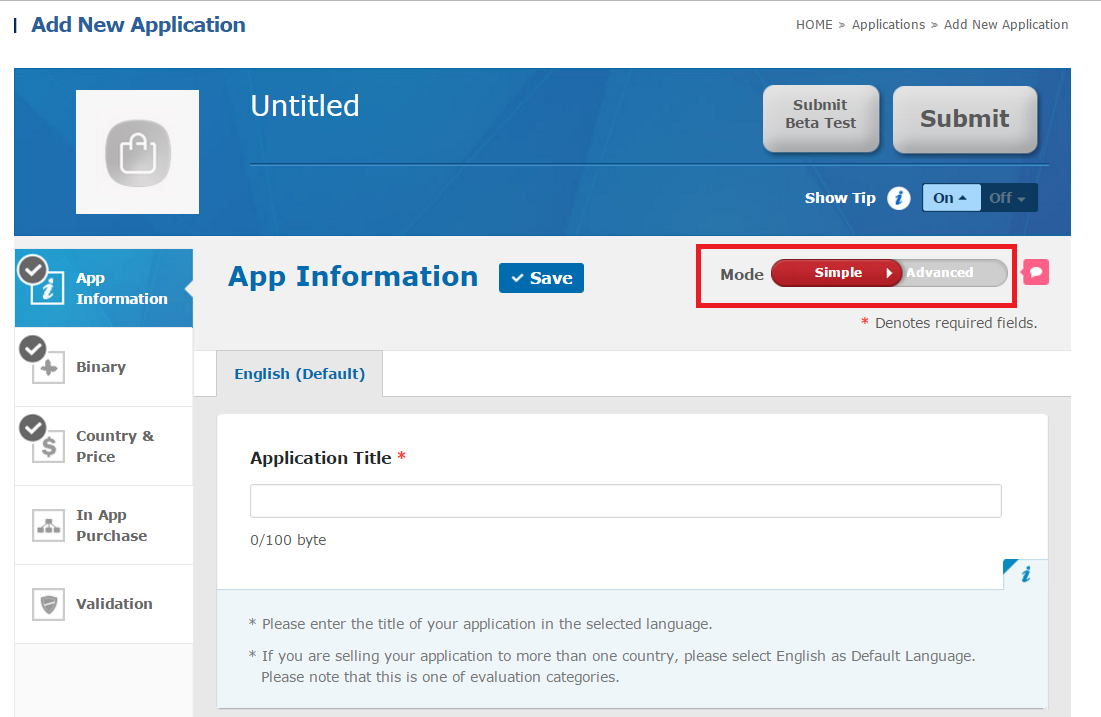
In the App Information section, you should specify:
Application title – application name.
Description – description of the application.
Icon – icon of the application in PNG format with a 512x512 resolution and a size less than 1024kb.
Screenshots – from 4 to 8 application screenshots in JPG/PNG format, with a resolution from 320 to 3840 points for each measurement (both width and height should be in this range) and with a ratio of no more than 2:1 (width can not be 2 times more the length and vice versa).
Category – select the section of the store to which the application will belongs.
Age Restriction – select age limitations.
Supported Languages – select the languages supported by the application.
Support E-Mail – specify the postal address for feedback.
In the advanced mode of the App Information section, you can also add: title, description, and screenshots in languages that are not the main for the application ("+ Add" button). You can also specify the brand name, 5 tags (they will be used for finding the application in the store), and a number of external links to the materials related to the application, for example, a link to a video on YouTube.
Important:
When filling out information in any of the sections, it is recommended to use the Save button (located at the top or at the very bottom of the page), as often as possible. It helps prevent loss of entered data. Also, if you do not make some action for a while (do not press the buttons and do not switch between the sections of the store) the session will be ended and all not saved data will be lost.
Binary section can be conditionally divided into 2 parts. The first one is for loading the executable module; the second one is for specifying information about closed beta testing. The application can be published without this testing, and if it is the case, fields in this section do not have to be filled in.

Click the Add Binary button, to open dialog window for loading the executable module.
Specify:
Gear Resolution(s) – supported screen resolutions. Based on the selected resolutions, will be created a list of devices for which published application will be available in the store.
Google Mobile Service – whether applications use Google services or not. In case of use, China will be automatically excluded from the countries in which the application will be available for downloading, since this service is prohibited in this country.
Binary Upload – loading the executable module.

In the advanced mode of the Binary section, you can view and, if necessary, change all device combinations for which the application will be available in the store.

In the Country & Price section, specify countries in which the application will be available and in what price. In advanced mode, you can edit the list of countries, as well as specify start and finish of the sales.
Important:
In the Validation section, make sure you specify all required for testing information. It is recommended to describe in detail main ways of application use as well as provide all data for tests, including the account on which the application can be tested. Note that testing will be performed by the store and can be conducted by people, who know nothing about the published application or the service that it provides.
After entering and saving all information, the Submit button will become active. Click it to send application to the store for review and publication. To send the application for closed beta testing, use the Submit Beta Test button.
After submitting the application, all specified information and application performance will be tested on the side of the store. Usually the process of verification and final publication takes up to 5 working days. There are several stages that can be traced on the applications page Applications → My Applications. Application Created → Ready to Pre-Validation → Ready to Pre-Reviews → Under Pre-Reviews → Under Content Review → Under Device Test → Under Test Confirmation → Ready for Change → For Sale.
Note that the publication process can be canceled at any time.
Important:
You can see full list of changes of application status by clicking on the date in the last column Last Updated.

If all the specified information is correct and the application is functioning properly, after checking it receives For Sale status and becomes available in the store. But if some problems were found during the verification, the application will be declined and it receives Rejected status. In this case, to get detailed information about detected problems, you should click on the status and download the archive, which usually contains problems description in the text format and, if necessary, screenshots, video or other information. To fix the problems, you should return the application into Re-Register status and edit the necessary information or download the corrected executable module. The process of updating or re-registering the application is practically the same as the registration process, except that all fields have been filled.
Note that the distribution of the published application can be suspended; the application can be updated or removed from the store. The most convenient way to do this is through the list of all applications, using the Update, Suspend, and Delete buttons in the Applications section -> My Applications.
Important:
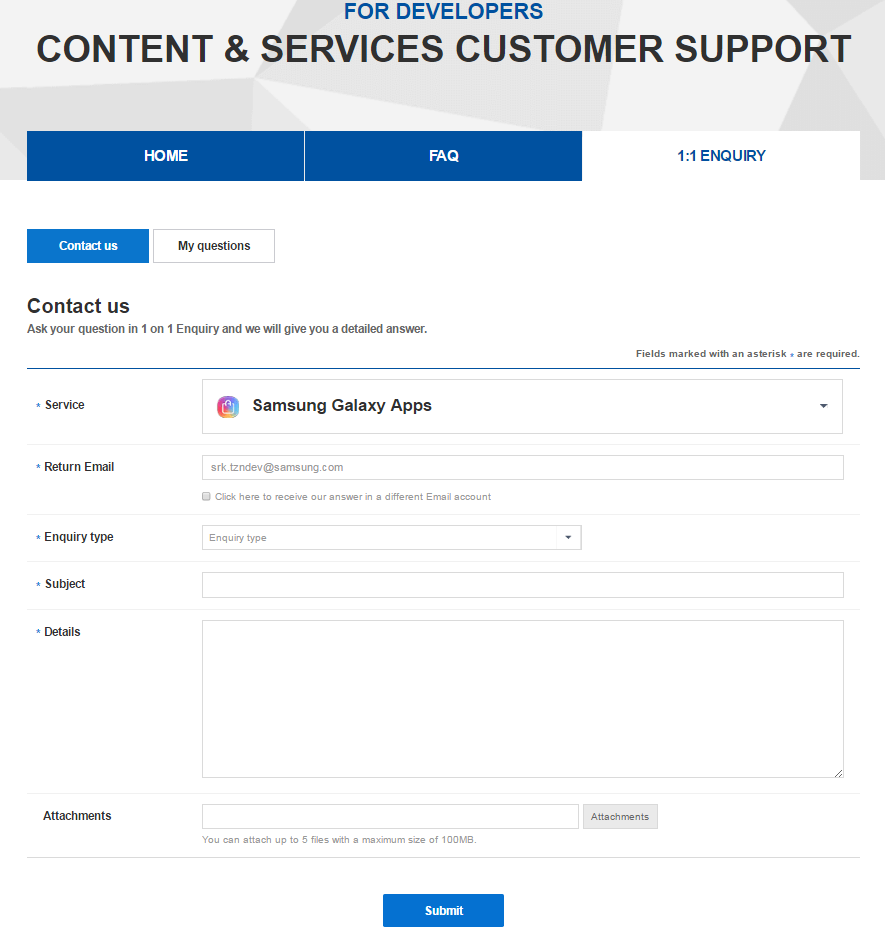
In case you have questions or need clarifications, concerning the found problems, you may refer to the technical support of the store, by using the Assistance section → My question, click the Contact us button and fill in the opened form.