Using Meteor Astronomy in Tizen applications
PUBLISHED
Introduction
This article is the follow up of Using Blaze templates in Tizen and Using local MiniMongo database in Tizen talking about the Blaze library - Meteor's templating engine. In these articles we covered the subject of creating templates and using MiniMongo database to fill these templates with data. The MiniMongo library offers storage of simple JavaScript objects. Objects fetched from a database don't have any logic implemented inside them, so we have to do it manually. Unfortunately Meteor is not shipped with any built in package for that task. Following the MVC pattern in the programming of applications, we would like to have a library, thanks to which we could create a Class schema, describing how objects should behave in different situations and what fields should they have and many more.
The Meteor Astronomy package comes with the help. It provides a Model layer in the MVC pattern that allows the creation of a class schema. In this article, we will describe how to use it along with the Blaze templating engine. We will use the standalone blaze generator tool for generating standalone Blaze library files with all the required packages (including the Meteor Astronomy).
Using the Blaze generator
NOTICE! Right now there are problems with using the Standalone Blaze Generator on operating systems other than Mac OS. If you just want to use the Blaze package integrated with Meteor Astronomy you can download the compiled file (blaze_with_astronomy.zip) from this website at the end of the article.
To start using the Blaze generator, first you need to install the jq tool. You can download the binary for your operating system from this website.
Now, you can clone this repository and start configuring the build environment. First thing you may need to do is setting the METEOR variable to the proper path of the Meteor executable file location. It will be required if you get the following error on execution of the ./build-blaze.sh command in the terminal.
./export-packages.sh: 9: ./export-packages.sh: /home/user/meteor/meteor: not found
rm: cannot remove `app-for-export.*': No such file or directory
mv: cannot stat `client.js': No such file or directory
./export-packages.sh: 9: ./export-packages.sh: /home/user/meteor/meteor: not found
rm: cannot remove `app-for-export.*': No such file or directory
mv: cannot stat `client.js': No such file or directory
sed: can't read s/[[:space:]]*\/\/ [0-9]+$//g: No such file or directory
sed: can't read /^\/\/.+\/\/$/d: No such file or directory
sed: can't read /^\/\/# sourceMappingURL=.*/d: No such file or directory
The METEOR variable can be found in the export-packages.sh file, which you can edit and modify the path. In my case it was set to ~/meteor/meteor and I had to change it to ~/.meteor/meteor.
The next thing you have to do is choosing the packages that should be compiled into one result file. Let's edit the build-blaze.sh file and change the value of the PACKAGES variable. You can add to this list packages that you want to include in the final built file.
Last thing is to execute the build process by running the command ./build-blaze.sh in the terminal window. It produces two files blaze.js and blaze.devel.jsm ,where the second one is a development version without minification.
Preparation
In order to use Blaze we have to attach the library file to our index.html file.
<body>
  <!-- Your code here -->

  <script src="js/lib/blaze.js"></script>
  <script src="js/main.js"></script>
</body>
MongoDB is a document oriented database. Records are kept as documents in collections. Any JSON compatible object can be a document and each document can have different attributes. Let's see how to create a collection.
var Collection = Package.mongo.Mongo.Collection;
var Items = new Collection();
As you can see, we've created a reference to the Package.mongo.Mongo.Collection constructor. Now we can use our Collection reference to create new Items collection. That's it.
Benefits of using Meteor Astronomy
Let's imagine how would we create an item, add it to the Items collection and execute some operations on the object fetched from this collection.
// Create new object.
var item = {
  title: 'Some title',
  votes: 0
};
// Insert object into collection.
Items.insert(item);

// Fetch object from collection.
var item = Items.findOne();
// Modify some field.
item.title = 'New title';
item.votes++;
if (item.votes > 10) {
  throw new Error('To many votes!');
}
// Update object into collection.
Items.update({
  _id: item._id
}, {
  $set: {
    title: item.title,
    votes: item.votes
  }
});
As you can see it's a lot of writing. Let's try making it shorter with Meteor Astronomy.
// Create new object.
var item = new Item({
  title: 'Some title'
});
// Insert object into collection.
item.save();

// Fetch object from collection.
var item = Items.findOne();
// Modify some field.
item.title = 'New title';
item.voteUp();
// Update object into collection.
if (item.validate()) {
  item.save();
}
As you can see the version using Meteor Astronomy is shorter and you can move some class specific logic into a separate file. Moreover you don't have to care about what fields need to be saved into the collection when updating - Meteor Astronomy keeps track of all modified fields. Normally, objects fetched from collections would be simple JavaScript objects. Thanks to the Meteor Astronomy they become instances of developer defined classes that can do much more than just store data. We will describe most important library features and how you can use them in real life applications.
Defining a class schema
Everything starts with the Astronomy.Class function (or its alias Astro.Class which creates a new class from the schema definition passed as a first argument. Let's create an Item class with some basic fields.
Items = new Mongo.Collection('posts');
Item = Astronomy.Class({
  name: 'Item',
  collection: Items,
  fields: ['title', 'votes']
});
There are two mandatory fields: name and fields. The name attribute is used internally by the library. On the other hand, a class without fields wouldn't make any sense, so we have to provide at least one. We can also specify fields` types so that setting the numeric fields value with string value from the form input will cause automatic type transformation.
Item = Astronomy.Class({
  name: 'Item',
  collection: Items,
  fields: {
    'title': 'string',
    'votes': 'number'
  }
});

var value = document.querySelector('input[name="votes"]').value;
item = new Item();
item.votes = value; // Automatic type transformation from String to Number.
Now, when we execute the following code, we will get instance of the Item class.
var item = Items.findOne(); // Get instance of Item class.
Of couse, now we can save our newly created object into the database using the save() method, instead of using the compilation of insert(), update() and upsert(). We can also remove the object using the remove() method.
var item = new Item();
item.title = 'Some title';
item.save();

item.votes = 5;
item.save(); // Update only votes field.

item.remove();
Defining methods
Let's see how we can add methods to our model.
Item = Astronomy.Class({
  name: 'Item',
  /* ... */
  methods: {
    voteUp: function() {
      this.votes++;
    },
    voteDown: function() {
      this.votes--;
    }
  }
});
It's as simple as adding methods object to our schema definition with list of methods. In the methods definition we don't add any logic related with checking the votes field's value. We will implement it later as a validator.
Having methods defined, we can call them like in the example below.
var item = new Item();

item.voteUp();
item.save();

item.voteDown();
item.save();
Defining validators
The Meteor Astronomy package is highly modularized. With the core package, there is no validation feature, however we can add it using the Meteor Astronomy Validators module. Normally, when using the Meteor platform you would add it using $ meteor add jagi:astronomy-validators command. With the Standalone Blaze Generator, we've already included this module in the build file. Let's see how to define validation rules.
Item = Astronomy.Class({
  name: 'Item',
  /* ... */
  validators: {
    votes: Validators.lte(10, 'To many votes!')
  }
});
Once again, we have an extra attribute in the schema definition. This time it's the validators attribute. We define the validation rules in the form fieldName: validationRules, where validation rule is the function returned from Astro.Validator method. The validation function used in this example is one of many predefined validators. The lte means Less Than Or Equal. The list of all available validators can be found here. You can combine many validators into nested rules. Let's take a look at the example below.
Item = Astronomy.Class({
  name: 'Item',
  /* ... */
  validators: {
    votes: Validators.and([
      Validators.lte(10, 'To many votes!'),
      Validators.notNull(),
      Validators.gt(0)
    ])
  }
});
Now before saving the object we can validate its fields.
var item = new Item();
if (item.validate()) {
    item.save();
}
Of course, it will fail to save the object into a collection. We can get an error for the votes field with the following command.
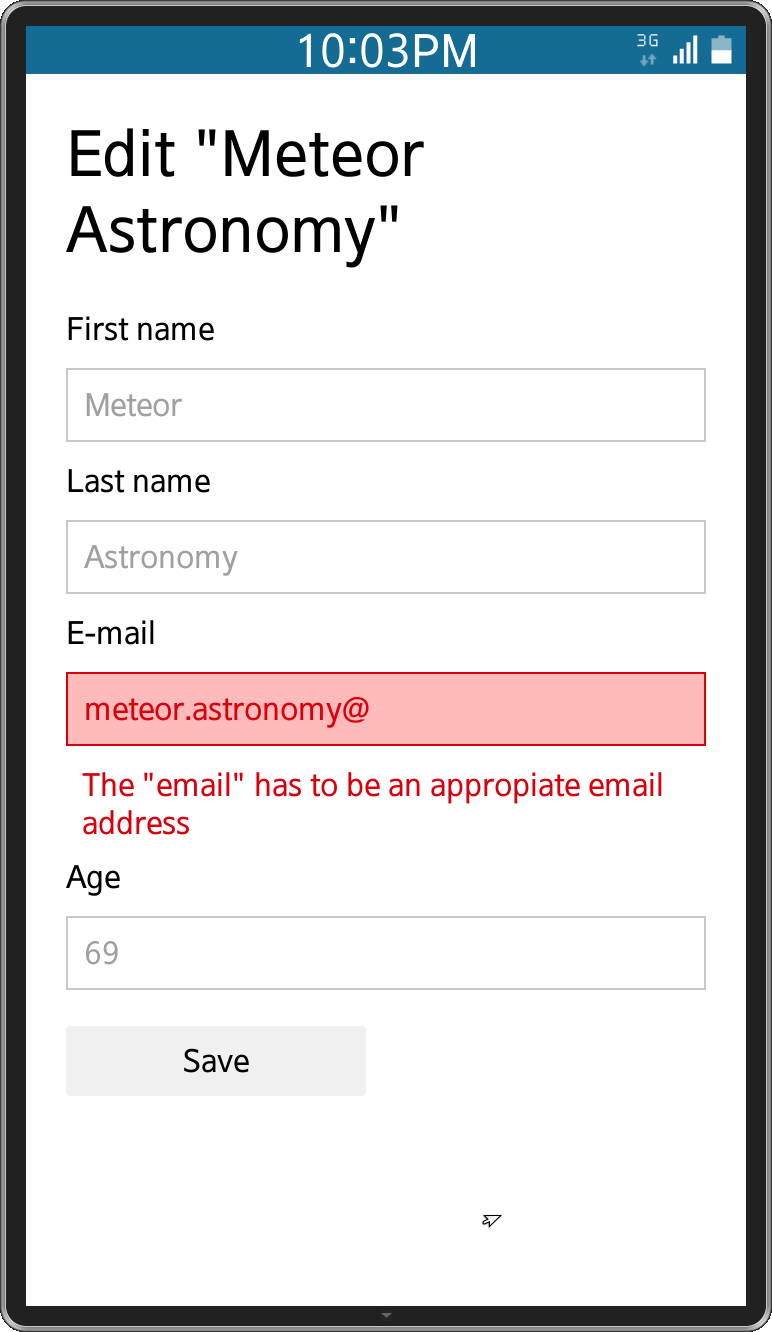
item.getError('votes');In fact you're not gonna use it very often. Instead, you will use the helper function in the template to display an error message next to the form field. We will discuss it in the section describing the sample application attached to this article.
Sample application
The sample application attached to this article is a simple list of items with possibility to add, edit or remove items using a simple form.
On the screenshots below, you can see how the application looks like.
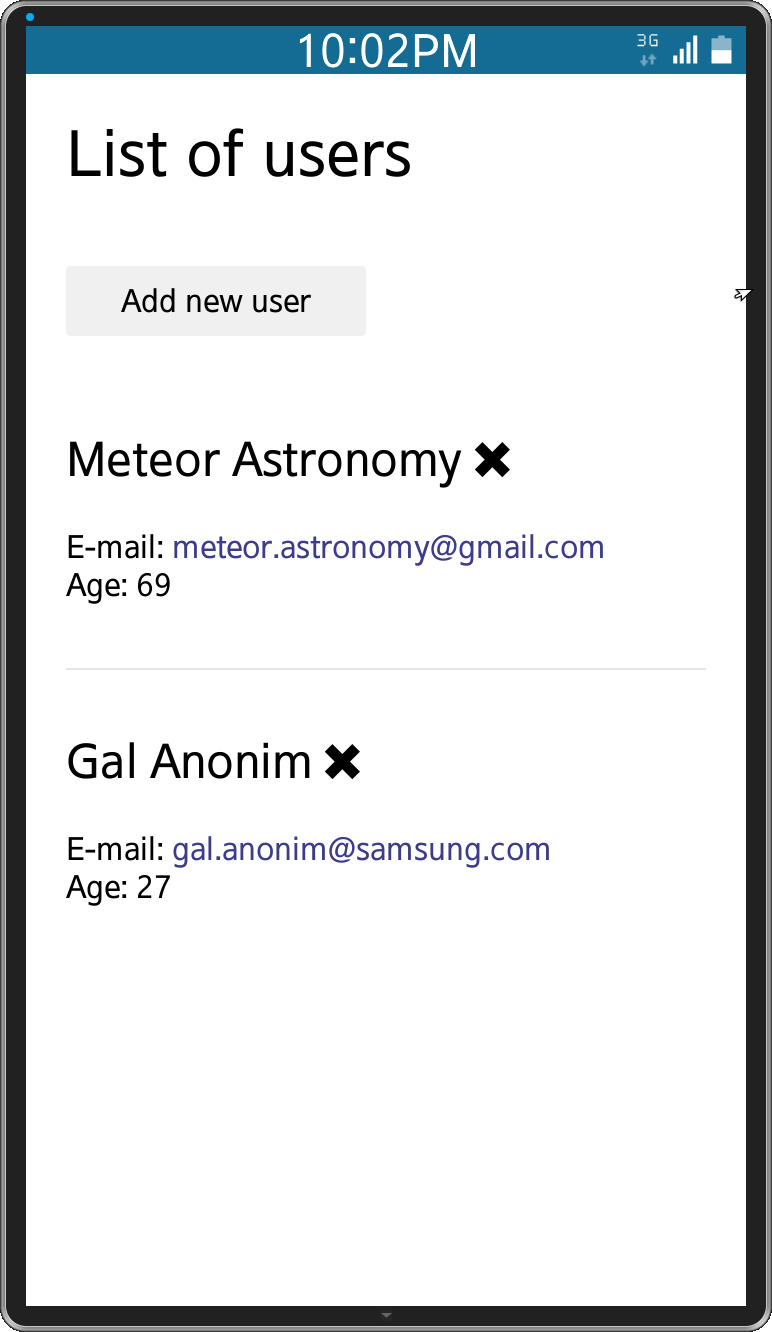
Application stores a list of users which you can add, modify and remove. Let's examine some bits of the application.
Everyting starts in the index.html file. As you can read in the article about Blaze templates, we have to provide default main template that will be displayed on application start up.
<script type="text/spacebars" name="main">
    {{> Template.dynamic template=template}}
</script>
The only thing we do in this template is displaying another template depending on the value of the template reactive variable. We have defined 5 additional templates: Members, Member, Edit, Add, Form. Their content is quite obvious, they just display data passed to it by the Template.TEMPLATE_NAME.helpers helper functions. At the end of the template definition and before closing BODY tag we've added two scripts.
<body>
    <!-- TEMPLATES DEFINITION -->

    <script src="js/lib/blaze.devel.js"></script>
    <script src="js/main.js"></script>
</body>
Let's move on to the main.js file. At the top of the file we handle the tizenhwkey event to support the back button. We just want to change any screen in which we are to our main template which is Members. This template displays list of users like in the first screenshot.
document.addEventListener('tizenhwkey', function(e) {
    if (e.keyName == 'back') {
        try {
            if (template.get() !== 'Members') {
                template.set('Members');
            } else {
                tizen.application.getCurrentApplication().exit();
            }
        } catch (error) {
            console.error('getCurrentApplication(): ' + error.message);
        }
    }
});
The next thing is a class definition.
Members = new Mongo.Collection('members');

Member = Astro.Class({
    name: 'Member',
    collection: Members,
    fields: {
        firstName: 'string',
        lastName: 'string',
        email: 'string',
        age: 'number'
    },
    validators: {
        firstName: Validators.and([
            Validators.str(),
            Validators.minlen(3)
        ]),
        lastName: Validators.and([
            Validators.str(),
            Validators.minlen(3)
        ]),
        email: Validators.and([
            Validators.str(),
            Validators.email(3)
        ]),
        age: Validators.and([
            Validators.num(),
            Validators.gte(18),
            Validators.lte(100)
        ])
    }
});
Let's take a look at the Form template's events where the magic happens.
Template.Form.events({
    'change input': function(e, tmpl) {
        var field = e.currentTarget;
        this[field.id] = field.value;
        this.validate(field.id);
    },
    'click [name=save]': function(e, tmpl) {
        if (this.validate()) {
            this.save();
            saveDatabase();
            template.set('Members');
        }
    }
});
After leaving any input ("change input" event) we just take field name (field.id) and field value (field.value) and after putting given value in our object (this[field.id] = field.value), we simply validate object's field using this.validate(field.id) function. That's it, no more things to do. All the magic happens behind the scene.
Let's discuss what happens after clicking SAVE button. We just validate the entire object (this.validate()) and if the function returned true, then we save new or modified document (this.save()). It couldn't be easier.
There are some more things to make everything work however, they were described in previous articles, so if you didn't read them yet I encourage you to do it now.