Developer Application Case Study: Shopping List
PUBLISHED
Overview
Shopping list is a web application that is designed to aid people while shopping. Users can assign a color to the list for easy identification. It allows users to add an item to the list, mark as favorite, remove from the favorites and delete items from the list. It also provides feature like sorting the items alphabetically by type, by store or by bought status.
Table of Content
- Features
- Internationalization
- Storage
- File System API
- Tizen Media Content
- JS Prototype
- Get User Media
- Use of JSON Files
- Screenshots
Features
From a web application developer's perspective, the features of interest are:
- Internationalization using Chromium API
- Use of local storage to save data as key value pairs.
- Use of SQLite database to store more complex data.
- Accessing the file system.
- Use of Tizen mediacontent APIs to search for media files in the device.
- Use of JSON files to store localization strings.
- Accessing the user media, like camera and microphone.
- Use of JS prototype and classes.
Internationalization
To internationalize, all user-visible strings has to be placed in a file named messages.json (under a directory named _locales/LocaleCode, LocaleCode is a representation code like en for English). The Configuration files, CSS files, and JavaScript code use each string's name to get its localized version.
To retrieve the locales, web application needs to call chrome.i18n.getMessage() method. In this example js/Localizer.js file, provides getTranslation function to retrieve the locales.
You'll find a lot more information about internationalization at Read more.
getTranslation: function(string) {
    if (window.chrome && window.chrome.i18n) {
        return chrome.i18n.getMessage(string);
    } else {
        return LOCALE[string];
    }
}
Storage
By using HTML5, web applications can store data on the client device. In earlier versions of HTML, data storage was done with cookies and flash storage. By using client-side storage, you can develop an application that works in offline mode, Reduce number of network requests and improve the performance of application.
Web applications can store data in following ways:
- Web Storage (Local Storage / Session Storage)
- Web SQL Database
- IndexedDB
- Application Cache
- Filesystem APIs
- Cookies
Web Storage
Using Web storage APIs, an application can store data in key/value pairs and it can only retrieves data stored by it.
//Write data in localstorage
window.localStorage.setItem( "videoStreamUrl", url );

//Read data from local storage
var streamUrl = window.localStorage.getItem( "videoStreamUrl" );-
Local Storage
- Application can store data without any
expiration date. - Data is persistent.
- Avoids HTTP overhead of cookies.
- Mainly used to store settings.
- Application can store data without any
-
Session Storage
- Stores data for one session.
- Mainly used for sensitive data.
Web SQL Database
Web sql is nothing but sqlite, which can be used to create sql database on the client-side.
In our example js/dbmanager.js file, provides function to create and manipulate database.
//Sql statements
self.createStoresStatement = "CREATE TABLE IF NOT EXISTS stores (name TEXT PRIMARY KEY NOT NULL UNIQUE)";
self.createListsStatement = "CREATE TABLE IF NOT EXISTS lists (name TEXT PRIMARY KEY NOT NULL UNIQUE, color TEXT NOT NULL)";
self.createItemsStatement = "CREATE TABLE IF NOT EXISTS items (_id INTEGER PRIMARY KEY AUTOINCREMENT NOT NULL UNIQUE, name TEXT NOT NULL, list TEXT, store TEXT, type TEXT, image TEXT, bought INTEGER NOT NULL, favorite INTEGER NOT NULL, FOREIGN KEY(list) REFERENCES lists(name), FOREIGN KEY(store) REFERENCES stores(name))";

self.onError = function(tx, error) {
    console.log("[ERR] DBmanager: "+error.message);
};

self.onSuccess = function(tx, result) {
};

self.createTables = function() {
    self.db.transaction(function(tx) {
        tx.executeSql(self.createStoresStatement, [], self.onSuccess, self.onError);
        tx.executeSql(self.createListsStatement, [], self.onSuccess, self.onError);
        tx.executeSql(self.createItemsStatement, [], self.onSuccess, self.onError);
	});
};

//Create database.
self.db = openDatabase("ShoppingListDb", "0.1", "Shopping List DB", 2 * 1024 * 1024);
//create diffrent tables.
self.createTables();
File System API
Filesystem APIs provide support for creating, writing, reading and navigating to a sandboxed section of the user's local file system.
To request access to user's local file system, a web application needs to call window.requestFileSystem() method.
In our example js/FileSystem.js file, provides functions to access filesystem. By using filesystem API, this example saves the captured image to user's local file system.
You'll find a lot more information about Filesystem API at Read more.
self.initialize = function() {
	// request access to a sandboxed file system
	window.requestFileSystem = window.requestFileSystem || window.webkitRequestFileSystem;

	// Initiate filesystem on page load
	if (window.requestFileSystem) {
	   self.initFS();
	}
};

self.initFS = function() {
	var quotaBytes = 10*1024*1024; // 10 MB
    window.requestFileSystem(
        window.PERSISTENT, // TEMPORARY, PERSISTENT
        quotaBytes,
        self.onInitFs,
        self.errorHandler);
};

self.onInitFs = function(fs) {
	//console.log('FileSystem onInitFs() Opened file system: ' + fs.name);
	Helper.printObjectProperties(fs);
	var quotaBytes = 10*1024*1024; // 10 MB

	if (window.webkitStorageInfo && window.webkitStorageInfo.requestQuota) {
	   window.webkitStorageInfo.requestQuota(webkitStorageInfo.PERSISTENT, quotaBytes);
	}
	self.fileSystem = fs;
};

//Save image to file system.
self.saveCanvasAsImage = function(fileName, callback) {
	self.savePhotoCallback = callback;

	//create image file
	self.fileSystem.root.getFile(fileName, {create:true}, function(fileEntry) {

    	//start file writer
	   fileEntry.createWriter(function(fileWriter) {
	       var image = $("#itemPhoto")[0];
	       var url = "";
            try {
	           url = image.toDataURL("image/png");
	       } catch (err) {
	           self.savePhotoCallback(false);
	           return;
	       }
	   fileWriter.write(self.dataURItoBlob(url));
	   }, self.errorHandler);
	}, self.errorHandler);
};
Tizen Media Content
To launch tizen gallery, web application needs to request the system to launch a service by using the tizen.application.launchService() method. It takes the following arguments:
- service- Object describing service details.
- id- Identifier of the application to be launched.
- successCallback- Function called when the invocation ends successfully.
- errorCallback- Function called when an error occurs.
- replyCallback- Response callback (this is of type ApplicationServiceDataArrayReplyCallback)
ApplicationService
The ApplicationService object describes service details requested by calling application. Once system receives the launch request with this object, then it finds and launches appropriate application (or shows applications in the application selector).
An ApplicationService object consists of the following primary information:
- Operation- The operation is a string that defines the action to be performed by the Application Service. The operation is the mandatory information for sending a launch request. You can also define your own operation to describe specific action of your application.
- URI- URI defines the data on which the action will be performed.
- MIME- MIME type defines the specific type of the URI.
- Application Service Data-Application Service Data is key-value pairs to provide additional information for the launch request and can be used for the result of the request.
ApplicationServiceDataArrayReplyCallback
If the requested operation completes successfully, the onsuccess() method is invoked. It receives data that the launched application has returned as the result of the operation. The data is delivered as an array of ApplicationServiceData objects. Each such object contains two attributes: key and value. The value attribute is
actually an array of values. The function below will print all received data. In case of failure onfail() method is invoked.
An ApplicationServiceDataArrayReplyCallback object consists of the following two methods:
- onsuccess()- This method invoked when the service provider calls ApplicationService.replyResult().
- onfail()- This method invoked when the service provider calls ApplicationService.replyFailure().
This example launch gallery service to pick the image.
// object with service reply callbacks
var serviceReply = {
    onsuccess: onServiceReplySuccess,
	onfail: function() {
	   showInfoDialog(Localizer.getTranslation("gallery_launch_failed"));
	}
};

function selectImageFromGallery(callback) {
	galleryCallback = callback;
	try {
	   // the object describing the service
	   var service = new tizen.ApplicationService (
	           'http://tizen.org/appsvc/operation/pick',
	           null,
	           'IMAGE/*');

	   tizen.application.launchService(
	           service, // ApplicationService object
	           null, // application ID
	           function() {},// launch success function
	           function(err) {
	               console.log('Error: Gallery launch failed: ' + err.message);
	               showInfoDialog(Localizer.getTranslation("gallery_launch_failed"));
	           },// launch error function
	           serviceReply // service reply object);
	   } catch (exc) {
	       console.log('Error: tizen.application.launchService() exception: ' + exc.message);
	       showInfoDialog(Localizer.getTranslation("gallery_launch_failed"));
	}
}

function onServiceReplySuccess(replyData) {
	var data;
	if (replyData[0].value[0]) {
	   if(galleryCallback) {
	       galleryCallback(IMAGE_TYPE.GALLERY_IMAGE, replyData[0].value[0]);
	   }else {
	       showInfoDialog(Localizer.getTranslation("error_adding_photo"));
	   }
    } else {
	    showInfoDialog(Localizer.getTranslation("error_adding_photo"));
	}
}

function onError(e) {
    console.log('Error: ' + e.message);
}
JS Prototype
To add additional methods and properties to a JS object, web application needs to use prototype property. Initially this property points to an empty object.
function InfoDialog(dialogType, message, noButtonHandler, yesButtonHandler, keepShadow) {
//Create Dialog.
}
InfoDialog.prototype.show = function() {
//Code to show the dialog
}

var dialog = new InfoDialog(DIALOG_TYPE.INFO, message, null, null, keepShadow);
dialog.show();
Every object within JavaScript has a hidden property named __proto__. This property is added to the object when it is defined or instantiated. Based on __proto__ property, prototype chain is accessed. Since all browsers don't support this property, it is not safe to access __proto__ property directly.
In general, it's only possible to set an object's prototype during object creation: If you create a new object via "new InfoDialog()", the object's prototype property will be set to the object referenced by InfoDialog.prototype.
This example uses prototype property to add methods to an object(s).
You'll find a lot more information about prototype at Read more.
Get User Media
To capture Audio or video, Web Application has to request permission to use webcam or microphone by calling navigator.getUserMedia() method. This method accepts media type as first parameter. For example, application want to access the webcam, the first parameter should be {video: true}. To use both the microphone and camera, pass {video: true, audio: true}.
You'll find a lot more information about prototype at Read more.
PhotoFullScreenView.prototype.showLiveCamera = function() {
	var self = this;
	var streamUrl = window.localStorage.getItem( "videoStreamUrl" );

	if ( $("#photofullscreen_view_itemVideo")[0].src != streamUrl ) {
	   var $thisVideo = $("#photofullscreen_view_itemVideo");
	   self.itemVideo.style.display = 'none';

	   $thisVideo.bind("playing", function() {
	       photoFullScreenView.itemCanvas.style.display = 'none';
	       photoFullScreenView.itemVideo.style.display = 'block';
	   });
	   $thisVideo[0].src = streamUrl;
	}
}

PhotoFullScreenView.prototype.takePhoto = function() {
    var self = this;
	self.itemVideo.style.display = 'none';

	if (navigator.webkitGetUserMedia) {    //Check whether the feature is available or not.
	   var $canvas = $("#photofullscreen_view_itemCanvas");
	   $canvas[0].width = 388;
	   $canvas[0].height = 303;

	   var $itemVideo = $("#photofullscreen_view_itemVideo");
	   var video = $itemVideo[0];

	   var context = $canvas[0].getContext("2d");
	   context.scale(-1,1);
	   context.translate(-388,0);
	   context.drawImage( video, 0, 0, 388, 303 );

	   self.itemCanvas.style.display = 'block';
	   self.imageType = IMAGE_TYPE.CAMERA_IMAGE;
	} else {
	   showInfoDialog(Localizer.getTranslation("photo_capture_not_supported"));
	}

	self.stopVideo();
}

// take_from_camera
photoFullScreenView.showLiveCamera();
Use of JSON Files
JSON is a lightweight data exchange format. It can be written by following some simple norms that are familiar to programmers of the C-family of languages. JSON is language independent and is easy for humans to read and write. The main concepts used in JSON are Collection of key/value pairs and ordered list.
This example uses JSON files to save localization strings and define web app manifest file
You'll find a lot more information about JASON at Read more.
//Localization example.
{
  "en_US": {
    "display": "English (North American)",
    "strings": {}
  },
  "fi": {
    "display": "Suomi",
    "strings": {}
  }
}
//example manifest file.
{
   "name": "__MSG_appName__",
   "description":  "__MSG_appDescription__",
   "version": "1",
   "default_locale": "en",
   "app": {
     "launch": {
       "local_path": "index.html"
     }
   },
  "icons": {
    "128": "icon_128.png"
  },
  "permissions": ["unlimitedStorage"],
  "homepage_url" : "https://01.org/webapps/content/shoppinglist",
  "update_url" : "https://01.org/webapps/content/shoppinglist/update.xml"
}
Screenshots
Below are the screenshots of the Shopping list application.
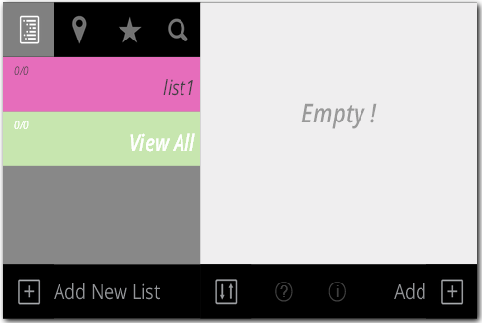
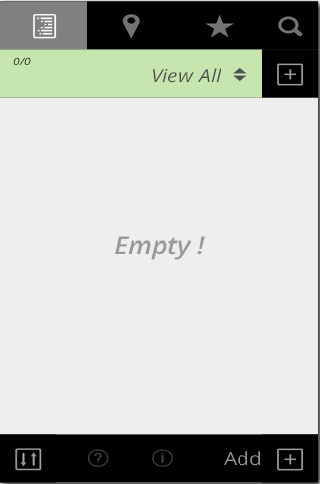 Figure-2: This is how it looks when the web page is loaded and phone is in portrait mode.
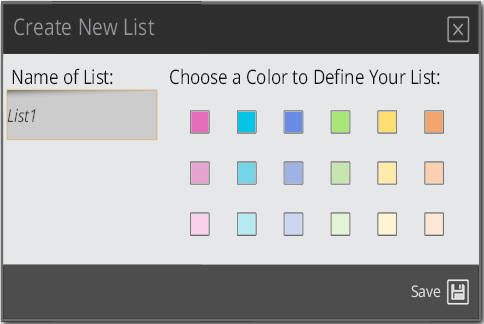 Figure-3: Add new list in landscape mode.
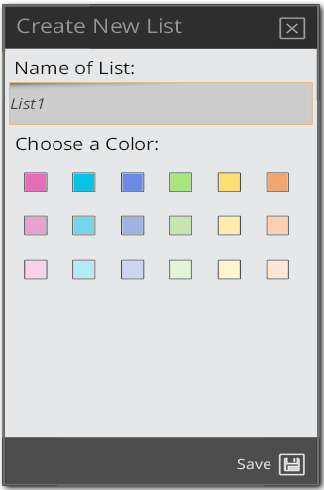 Figure-4: Add new list in portrait mode.
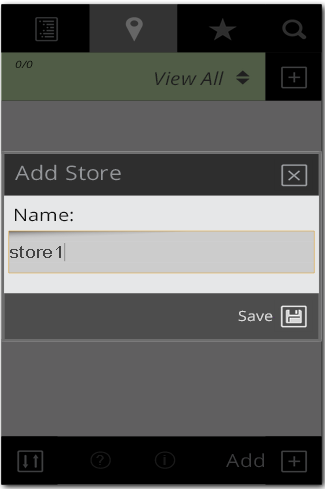 Figure-5: Add new store in portrait mode.