Developer Application Case Study: Hang On Man
PUBLISHED
Developer Application Case Study: Hang On Man
Overview
Hang On Man is a HTML5 implementation of the classic word guessing game. The game uses many of the features of the HTML5, CSS and JavaScript.
Table of Content
- Features
- Use of Chrome API(I18n)
- Computed Style
- DOM- Document fragments
- Local Storage
- JSON files
- CSS Transforms, Transitions, and Animations
- Use of Body classes
- Images for Background, Mask and Border (Tricks with images)
- HTML5 Audio support
- Sceenshots
Features
From a web application developers perspective , the features of interest are:
- Internationalization using either the Chromium API (if present) or a JavaScript implementation
- Determining the computed style property value of an object, as opposed to the CSS
valuedocument.defaultView.getComputedStyle(element).getPropertyValue(property); - Using document fragments for DOM manipulation without costly re-rendering
document.createDocumentFragment(); - Using local storage to save state and usage of
JSON.stringify()andJSON.parse() - Reading data from local JSON files
- CSS transforms, transitions, and animations
-webkit-transform, -webkit-transition, -webkit-keyframes - Serializing animation with the
"transitionEnd"event - Using a body class to change the appearance of the entire app at once (see the "Night colors" image below)
- Tricks with images: image masks, border images, linear and radial gradients (using
-webkit-gradient), and SVGs - HTML5 Audio tags for various audio and sound requirements (for Background audio, Click sound, Game losing sound, Game winning sound etc,).
Use of Chrome API(I18n)
To internationalize, all of the user-visible strings are put into a file named “messages.json” (under a directory named “_locales/LocaleCode”, LocalCode is a representation code like, “en” for English), where you name each user-visible string and put it into a messages file. The extension's manifest, CSS files, and JavaScript code use each string's name to get its localized version.
How to retrieve the messages ? In js/getMessages.js file, the below function “initGetMessage” provides a function window.getMessage()>, with the same API as the window.chrome.i18n.getMessage()function, if the Chromium function exists (such as running as an extension within Chromium or Google Chrome), the implementation simply uses that function.
function initGetMessage ()
{
    if (window.getMessages) {
        return;
    }

    if (window.chrome && window.chrome.i18n && window.chrome.i18n.getMessage) {
        window.getMessage = chrome.i18n.getMessage;
    }
    else {
        var request = new XMLHttpRequest();
        request.open("GET", "_locales/en/messages.json", false);  // TODO: synchronous for now
        request.send();
        var requestStr = request.responseText;
        try {
	    messages = JSON.parse(requestStr);
            window.getMessage = fallbackGetMessage;
        }
        catch(err) {
	    console.log("Unable to read fallback messages from _locales/en_US/messages.json");
            window.getMessage = errorGetMessage;
        }
    }
}
If not (statements under “else”), we fallback on simple implementation that provides most of the Chromium functionality (but with some simplifications on message argument handling).
Use of Computed Style
In the “.css” document (hangonman.css, start.css or figure.css ), for each style property there is a CSS value explicitly provided. This is the value you will get if you check a HTMLElement's style object. In many cases, the value will be an empty string (""), if there is no explicit mention of the property in any CSS file. In some cases, you need to know the "computed value", which is the value computed by the rendering engine based on current window size, etc. In js/hangonman.js, we calculate the computed value with the following code (this does not work on all browsers in exactly the same way):
function getStyle (elem, prop)
{
    return document.defaultView.getComputedStyle(elem).getPropertyValue(prop);
}
Use of DOM- Document Fragments
This method is very efficient,when you're performing multiple operations that add to or modify the document tree. Instead of directly modifying the document tree each time (very inefficient), it's much better to use a temporary "whiteboard" that is created by createDocumentFragment()to perform all your operations first before finally inserting the result to the document tree.
The function “createDocumentFragment()” ,Creates an empty document fragment. The result is a temporary container for creating and modifying new elements or attributes before introducing the final result to your document tree.
Whenever you change the DOM (add an element, change a class, etc), some or all of the view is re-rendered. In Hang On Man, we create divs dynamically for each letter of the alphabet, to support languages with a different number of letters. One approach is to wait until the DOM content is ready, then append a series of letter divs to the document, each with its own collection of classes and style values. This works, but would require many rendering passes, delaying the final appearance of the application. In Hang On Man, we use the concept of document fragments to create a DOM subtree outside of the document, adding the whole thing at one time, incurring only one render pass. The fragment can be constructed even before the DOM is ready, allowing computation to start once the script is loaded.
 var fragment = document.createDocumentFragment();
for (i = 0; i < num; ++i) {
    var child = document.createElement("div");
    addStylesAndClasses(child);
    fragment.appendChild(child);
}
Once the DOM is loaded:
var parent = document.getElementById("parent");
parent.appendChild(fragment);
With this, all the children of the fragment are now direct children of the parent (the fragment is never actually part of the DOM).
Use of Local Storage
The game state is saved persistently with the localStorage object. In js/hangonman.js, there are functions, initGameState(), restoreGameState(), and saveGameState(),that write to and read from this object as below. Below is the “restoreGameState”function for understanding.
function restoreGameState ()
{
    if (localStorage && localStorage["com.intel.hom.word"] &&
	localStorage["com.intel.hom.gameInProgress"] && (localStorage["com.intel.hom.gameInProgress"] === "true"))
    {
	wrongGuesses = localStorage["com.intel.hom.wrongGuesses"] || "";
	rightGuesses = localStorage["com.intel.hom.rightGuesses"] || "";
	word = localStorage["com.intel.hom.word"];
	gameType = localStorage["com.intel.hom.gameType"] || 0;
	gameInProgress = true;
    }
    else {
	initGameState();
    }
}
Since localStorage information is not sandboxed per application, we preface each datum with "com.intel.hom." (hom == Hang On Man) to avoid clashes.
Note that arrays and other complex data structures can be stored in local storage by marshalling to and from strings, using JSON.stringify() and JSON.parse(). Below function “restoreSettings()” uses them.
function restoreSettings ()
{
    try {
        useSounds = JSON.parse(localStorage["com.intel.hom.useSounds"]);
    }
    catch (e) {
        useSounds = true;
        localStorage["com.intel.hom.useSounds"] = JSON.stringify(useSounds);
    }
}
Use of JSON files
The game ,Hang On Man uses several word lists. Players can select for different sets of words (animals, nations, wine, bodyparts, common phrases, etc).
Each set is stored in a separate JSON file. We read these files using XmlHttpRequest()in conjunction with the JSON parse method. Below code shows, how the word lists are read.
This example uses JSON files to save localization strings and define web app manifest file
You'll find a lot more information about JASON at Read more.
function readwordlist(item)
{
    var file = "data/"+item.src;
    var request = new XMLHttpRequest();
    request.open("GET", file, true);
    request.onload = function(e) {
        var requestStr = this.responseText;
        try {
	    item.data = JSON.parse(requestStr);
        }
        catch(err) {
	    console.log("Unable to read wordList: "+file);
        }
    }
    request.send();
}
In the below function “initWordLists()”, we read all lists (wordLists.length) synchronously and in series.
function initWordLists (wordLists)
{
    var newGameList = document.getElementById("newGame_list");
    var gameTypeLabel = document.getElementById("game_type");
    for (var i = 0; i < wordLists.length; ++i) {
        var item = wordLists[i];
        if (item.hasOwnProperty("src")) {
            readwordlist(item);
        }
        var titleString = getMessage(item.title);
        var gameElem = document.createElement("div");
        var cl = gameElem.classList;
        gameElem.index = i;
        cl.add("newGame_type");
        addButtonEffects(gameElem);
        if (i == gameType) {
            cl.add("selected");
            gameTypeLabel.innerText = titleString;
        }
        gameElem.innerText = titleString;
        gameElem.addEventListener("click", selectGameType, false);
        newGameList.appendChild(gameElem);
    }
}
An obvious next step in speeding the initial app load time would be to load these lists on demand and in the background, using asynchronous requests or even a webworker. One point to consider, when developing applications with XHRs, is that pages loaded with the file://uri scheme are not allowed to request files from different domains, even from localhost (local files). Ways to work around this security check are:
Start a local web server and access your app with a http:// uri rather than a file:// uri, Load your app as an extension [Chromium only]
Use the --disable-web-security switch went running chromium-browser. [Chromium only].
Use of CSS Transforms, Transitions, and Animations
A transition steps between two values of a property over time. In this case, we go from invisible (opacity is zero) to shown (opacity is one). As the div fades in, it goes from large (3x) to normal size. The transition is triggered by adding the "shown" class to the element. Note, also, that z-index changes from 0 to 20, so that when it is invisible,it is also stacked behind other divs, so it does not capture mouse events.
#letters {
    z-index: 0;
    opacity: 0;
    -webkit-transform: scale(3, 3);
    -webkit-transition: opacity 2s ease-in, -webkit-transform 2s ease-in;
}

letters.shown {
    z-index: 20;
    opacity: 1;
    -webkit-transform: scale(1, 1);
}
Here are examples of two animations occurring at the same time, but with different durations.The effect here is for the birds in the game to hover with small, apparently random movements.
@-webkit-keyframes move-horiz {
  0% {left: 0px;
      -webkit-transform: skewX(0deg);}
  50% {-webkit-transform: skewX(1deg);
       left: 5px; }
  75% {-webkit-transform: skewX(.5deg);
       left: 2px;}
  100% {-webkit-transform: skewX(-.75deg);
        left: -3px;}
}

@-webkit-keyframes move-vert {
  0% {top: 0px;}
  50% {top: 5px;}
  100% {top: -5px;}
}

.dialog.shown .inner {
  -webkit-animation: move-horiz 2.5s infinite alternate ease-in-out,
                     move-vert 1.6s infinite alternate ease-in-out;
}
In some cases, we need to know when a transition is complete. For the clouds scudding across the sky, once each cloud has reached the side and its movement has ended, they are destroyed with a call to destroyCloud(). Note, also, the use of the classList property to manipulate classes in a standard HTML5 way.
var cloudElem = document.createElement("div");
var classList = cloudElem.classList;
classList.add("cloud");
cloudElem.addEventListener('webkitTransitionEnd', destroyCloud, false);
Use of Body classes
The term "body classes" refers to the use of a class on the body element or some outer element to control the appearance of many child elements. In Hang on Man, we can apply a nocturnal theme just by adding the "night" class to <body>.
You’ll find below code in css/hangonman.css file.
.night #container {
    background-image: -webkit-gradient(radial,
       center bottom, 1,
       center bottom, 600,
	from(rgb(254, 220, 112)),
       color-stop(0.60, rgb(228, 188, 222)),
	to(rgb(22,41,118)));
}
.night #skyline {
    background-image: none;
    background-color: #333;
    -webkit-mask-size: contain;
    -webkit-mask-position: left bottom;
    -webkit-mask-repeat: no-repeat;
    -webkit-mask-image: url("../images/skyline.png");
}
.night .cloud {
    background-image: -webkit-gradient(linear, left top, left bottom,
                                       from(rgb(254, 220, 112)), to(rgb(217,86,78)));
}
The above classes are for“night” and which would be used under below condition (In initDialogs function in hangonman.js file),
    var now = (new Date()).getHours();
    var morning =  6; // 6am
    var evening = 18; // 6pm
    bodyElem = bodyElem || document.querySelector("body");
    if ((now >= evening) || (now < morning)){
        bodyElem.classList.add("night");
    }
A simplified example:
<body>
  <div id="sky">
    <div class="cloud"></div>
    <div class="cloud"></div>
    ...
  </div>
</body>

#sky {
  background-image: url("daysky.png");
}

.cloud {
  background-color: white;
}

.night #sky {
  background-image: url("nightsky.png");
}

.night .cloud {
  background-color: gray;
}
Use of images for Background, Mask and Border (Tricks with images)
Gradients as background:
Most of the major browsers now supporting CSS3 gradients and this wide browser support makes them more appealing.The advantage here is, with CSS3 gradients you can also specify fallbacks (i.e images), so that browsers that don't support them just use the image instead.
Also, a good choice because of below reasons:
- Fewer HTTP requests
- CSS gradients are scalable
The following lines of code shows, how the CSS radial and linear gradients are defined in the Hang on man application.
background-image: -webkit-gradient(radial,
                  center bottom, 1,
                  center bottom, 600,
                  from(#bce9fd),
                  color-stop(0.60, #43c0fa),
                  to(#3384c0));

background-image: -webkit-gradient(linear, left top, left bottom,
from(rgb(254, 220, 112)), to(rgb(217,86,78)));
Note: Browsers that support CSS3 gradients, don't load the fallback images.
Using an Image as a mask:
To apply a mask using an image (such as .png or .svg image),pass the URL of the image into the -webkit-mask-image property.
The -webkit-mask-image property uses the native size of the mask image.
#skyline {
    background-color: #333;
    -webkit-mask-image: url("../images/skyline.png");
}
Using Images for Border:
The border-image property allows you to take a small image and place across a much larger element. You can take an image and stretch it across a button or a whole page.
To apply the border-image, we use the CSS -webkit-border-image: url(borderImage.png) <slice_height> <slice_width> <type>;
Where, type = whether the border is repeated, rounded or stretched (repeat / round / stretch).
The application uses this property in several places to enable graphics to stretch to accommodate translation strings of different lengths. For example, the "New Game" dialog,which looks like a bed sheet held by two birds, is stretched to the width of the longest category. The "New Game" > and "Quit" buildings, on either side of the screen, are also stretched ,but use the "round" method to show an integral number of building windows across the width of the building.
#newGame.control {
    border-width: 94px 20px 5px 20px;
    -webkit-border-image: url("../images/building1.svg") 94 20 5 20 round round;
}

.dialog .inner {
    border-width: 145px 95px 35px 75px;
    -webkit-border-image: url("../images/sheet2.png") 145 95 35 75 stretch stretch;
}

Using Scalable Vector Graphics (SVG)
#myElement {
  background-image: url("../images/cloud.svg");
}
Use of HTML5 Audio Support
The HTML5 audio tag can be used to add audio/sounds files to your application without using script or add-on controls to play audio files. There is no mention of audio formats to be supported by browsers in the current HTML5 draft specification. But most commonly used audio formats are ogg, mp3 and wav.
You can see below code in index.html file, which uses audio tag for the background audio. The audio tag is used with preload and loop attributes.
<audio class="background" loop="true" preload="auto"><source src="audio/Background.ogg" type="audio/ogg" /></audio>
In hangonman.js file, in function “window.addEventListener",the background audio will be started when the page load event is received. The audio is paused when the focus isn’t there on the application.
backgroundSound = document.querySelector("audio.background");
window.addEventListener("load", function (event)
{
    var infocus = true;

    if (useSounds) {
        backgroundSound.play();
    }

    window.onblur = function() {
        if(infocus)
        {
            infocus = false;
            if (useSounds)
            {
                backgroundSound.pause();
                if (dialogSound&&isDialogUp)
                {
                    dialogSound.pause();
                }
            }
        }
    };

    window.onfocus = function() {
        if(!infocus)
        {
            infocus = true;
            if (useSounds)
            {
                backgroundSound.play();
                if (dialogSound&&isDialogUp)
                {
                    dialogSound.play();
                }
            }
        }
    };

}, false);
Sceenshots
Below are the screenshots of the hang on man application.
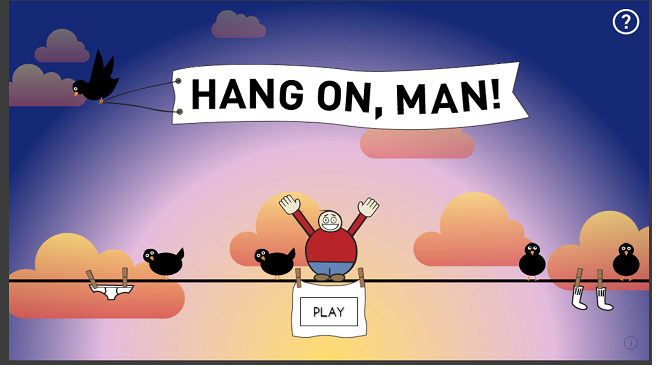
Fig 1: This is how it looks when the application is loaded initially.
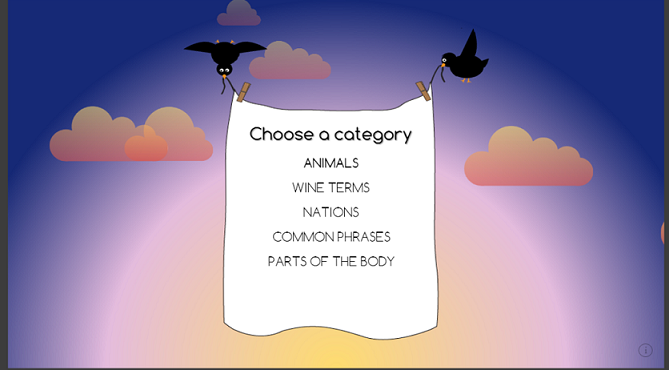
Fig 2: The menu to select the game mode.
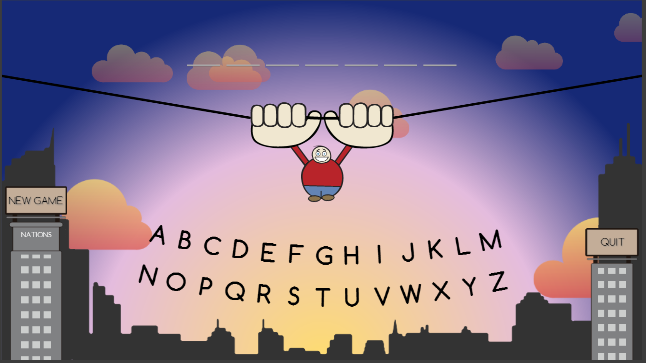
Fig 2: We see this page , when a game mode is selected.