How to use Tiled Map Editor with Cocos2d-html5
PUBLISHED
Introduction
Tiled Map Editor is a great tool for creating game levels and tiled maps. The Tiled application is written in C++, with the help of the Qt application framework and it is free. It allows the developer to create orthogonal as well as isometric tiled maps. Maps are saved as TMX files which are just XML-based formats, so they are easy to read and they work with varying game engines.
The official Tiled web site:
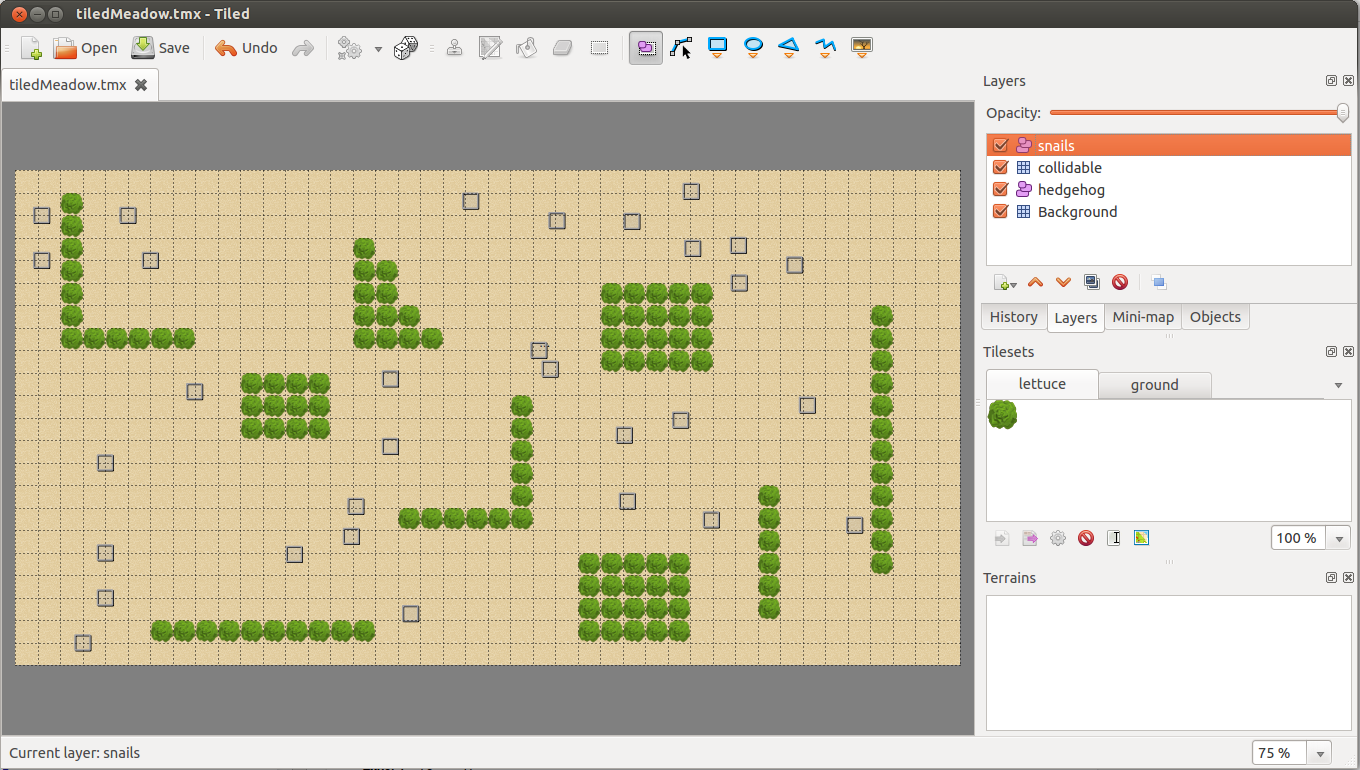 Fig 1: Tiled Map Editor
TMX maps are already supported by many different game engines such as:
- Cocos2d
- Cocos2d-iPhone
- Cocos2d-html5
- AndEngine
- melonJS
- sprite.js
- Unity 3D
The full list can be found under the following address:
https://github.com/bjorn/tiled/wiki/Support-for-TMX-maps
You can always install the newest version of Tiled Map Editor by going to its official website and following the installation guides. The Tiled application should work on most popular operating systems:
- Windows
- Mac OS
- Linux: Ubuntu, Fedora, openSUSE and CentOS
Creating a TMX Map
Creating new maps and levels is really easy with Tiled. The following tutorial will show how to create maps and use some fancy Tiled features. Since we used Tiled in our sample application RunSnailRun, we will use the application we created as an example.
First of all open Tiled and hit the “New” button in the top left corner. A window will pop up with your new map settings.
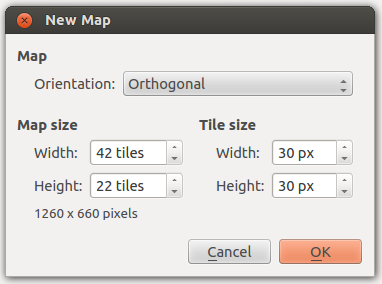 Fig 2: New Map menu
You can set how many tiles the map should have and how big those tiles should be. You should take into account that not all map sizes are possible and you should design your map at the beginning of writing your game.
In RunSnailRun we used a map with the size of 42x22 tiles. This is 1260x660 pixels. We designed it so to leave some space for padding and the game logo which is displayed outside the map area. After you click ok you will see a new tiled map:
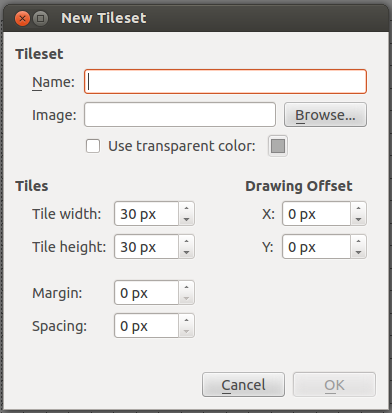
![]() Fig 3: New tiled map
Fig 3: New tiled map
You now need to fill the map with tilesets (images) and objects. Just as in Cocos2d-x and in most graphical programs you build a map in Tiled using layers. The best approach is to use the layers to gather all the identical tilesets or all object that share the same properties. For example our map in RunSnailRun has a layer for the background and another layer for collision elements (lettuce). Snails and the hedgehog are of a different type, they are objects.
At the start the first layer is already created. Its name is usually: Tile Layer 1. You can change the name by double clicking on it. After you change it to for example “Background” you can start filling it up. To do this you need to import some tilesets, which are just some images.
- Open Map menu and then click “New Tileset”.
- Click Browse and find the image that you want to add.
- Click Ok.
On the right side in the Tilesets panel you will see that your image is imported. You can now select the tiles and place them on the map.
On the top panel you will find many useful options like:
- Stamp Brush: This option will cause placing only one tileset on the map.
- Bucket Fill Tool: With this option set you will fill the whole map with the specified tileset.
- Eraser: This will erase the selected tile.
- Rectangular select: You can use this to select an area so that all the modifications will only be applied inside this area
After you create the background you can also add some collision objects on the map, so the player will not be able to walk all around the map. You can do this in two ways. In the first approach you can create a collidable layer in which you will place all the tilesets like rocks, rivers, trees that will be collidable. Cocos2d-x can read the tiles’ positions from specified layers and you can check if the player wants to move onto a collidable tile and you can stop him.
The other way is to create one layer for each type of terrain, so there will be a layer of trees, a layer of rocks, etc. You will then create another, separate layer with a transparent tileset. You can specify which tiles are not to be crossed by the player by placing transparent tilesets on these tiles.
In RunSnailRun there is only one type of collision object, the lettuce. That is why we decided that there will be no additional layers. We created one level called “collidable” and placed the lettuce inside this level.
As mentioned before, the snails and the hedgehog are objects. This means that they are not displayed as images, but they store the position and some properties of the element. In our application we place snail objects and the hedgehog object on the map and then using Cocos2d-x we read their position and create sprites.
In order to create an object layer in Tiled you need to open the Layer menu and click “Add Object Layer”. You now set the name for the object layer. In our case we created two objects layers, one for snails and the other for the hedgehog. After you create the object layer you can create objects. By now it should look like this:
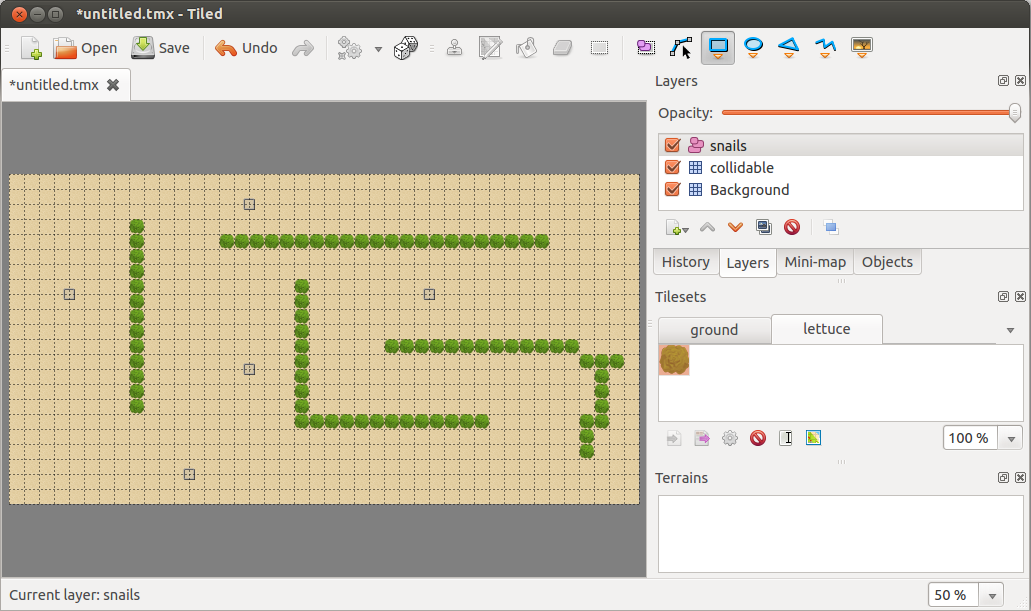 Fig 4: A map created with Tiled comprised of two tile layers and one object layer
You now need just to save the map and place it somewhere inside your game folder.
Using TMX maps in Cocos2d-x
In Cocos2d-x there is a special class that allows you to load the TMX file as a map. Furthermore, this class has some additional functions that help deal with the TMX map properties. It can access layers, single grids and read their properties. Here is a code snippet from the RunSnailRun application on how to load a map generated by the Tile application:
classes.maps.TiledMeadow = cc.TMXTiledMap.extend({
    ctor : function() {
        this._super();
        this.initWithTMXFile("images/tiledMeadow.tmx");
    }
});
var tiledMap = new classes.maps.TiledMeadow();
As you can see the TiledMeadow class extends TMXTiledMap and loads the tiledMeadow.tmx file when created.
When you add a tiledMap object to a layer the map you created, it will be displayed, but only the tile layers will be displayed. Object layers such as snails will not appear neither will there be any mechanism for checking the collision against the lettuce. You must do it yourself. Here is how we have done it in our sample application.
After we loaded the TMX file we can use some existing functions to read the map properties. For example we can read all the collidable tiles and create rectangles that reflect them.
initObstacles : function() {
    this.obstacles = [];
    var mapWidth = this.getMapSize().width;
    var mapHeight = this.getMapSize().height;
    var tileWidth = this.getTileSize().width;
    var tileHeight = this.getTileSize().height;
    var collidableLayer = this.getLayer("collidable");
    var i, j;
    for (i = 0; i < mapWidth; i++){
        for (j = 0; j < mapHeight; j++){
            var tileCoord = new cc.Point(i, j);
            var gid = collidableLayer.getTileGIDAt(tileCoord);
            if(gid) {
                var tileXPositon = i * tileWidth;
                var tileYPosition = (mapHeight * tileHeight) - ((j+1) * tileHeight);
                var react = cc.rect(tileXPositon, tileYPosition, tileWidth, tileHeight);
                this.obstacles.push(react);
            }
        }
    }
}
Cocos2d-x allows you to access any layer from the map just by calling the getLayer() function with the name of the layer that you want to check. You can also access the grids inside the layer using the getTileGIDAt() function to which you must pass the position of the grid.
We iterated through the whole map and using the aforementioned functions we checked where the “collidable” tiles are. After finding each collidable tile we created rectangles that will later be used for collision detection.
Using a similar approach we read all the snails’ positions. Here is the code snippet:
initSnails : function() {
    if (this.tiledMap) {
        var objectGroupSnails = this.tiledMap.getObjectGroup("snails");
        var objectSnails = objectGroupSnails.getObjects();
        this.numberOfSnails = objectSnails.length;
        var that = this;
        objectSnails.forEach(function(objectSnail) {
            var snail = new classes.sprites.Snail();
            snail.setPosition(new cc.Point(objectSnail.x, objectSnail.y));
            that.snails.push(snail);
            that.addChild(snail, 1);
        });
    }
}
This time we used the getObjectGroup() function to access the group containing all the snails. We iterated through each snail from this list. For each snail we read its position by referring to the x and y parameter on the tiled map and created a sprite and placed it on the Cocos2d-x layer on the same position. In the same way we also placed the hedgehog on the Cocos2d-x layer.
Collision detection
All snails and the hedgehog are now displayed according to their position defined on the TMX map created by Tiled. The next problem is that when all those animals will start moving they will walk wherever they want. They will walk into each other and nothing will happen. We need some kind of collision detection mechanism. This problem was already described in the previous article (Cocos2x-html5 game framework in Tizen applications: Follow-up), but I will repeat myself for the sake of article consistency. I will also extend the collision detection with new cases.
Since we already have rectangles reflecting collision objects (lettuce) and we can easily create rectangles for snails and the hedgehog we can use all these rectangles to check if they intersect each other when the objects on the map move. In the main game loop during objects movement we can check if any of these rectangles collide and trigger some action, for example if a snail rectangle will want to move onto a lettuce rectangle we can stop it. This is what the update function looks like in the RunSnailRun application:
update : function(dt) {
    var that = this;
    this.moveAndCheckForObstacles(this.hedgehog, dt);
    this.snails.forEach(function(snail) {
        that.moveAndCheckForObstacles(snail, dt);
    });
    this.collisionDetection();
}
As you can see we try to move the hedgehog and snails and we check if they bump into any obstacles which in this case are heads of lettuce. In order to check if an object runs into an obstacle we use the moveAndCheckForObstacles function:
moveAndCheckForObstacles : function(object, dt) {
    var newPosition = object.move(dt, this.keyboardArrows);
    var newReactangle = cc.rect(newPosition.x+2 - object.width / 2, newPosition.y+2 - object.height / 2, object.width-4, object.height-4);
    if (!this.isCollisionInArray(newReactangle, this.tiledMap.obstacles)) {
        object.setPosition(newPosition);
    }
}
This function is very simple and works as follows:
- It tells the object to calculate its new position.
- It creates a new rectangle, using the acquired position, defining where this object would be after its movement.
- It calls the isCollisionInArray function to check if this new rectangle would collide with any of the rectangles defined in an array (in this case this is the array with all the heads of lettuce created when the TMX map was loaded).
- If there is no collision it sets the object on the new position.
The isCollisionInArray function takes two arguments: an object and an array. It iterates through the array and checks whether any item from the array collides with the passed object by calling the Cocos2d-x function cc.rectIntersectsRect. It looks like this:
isCollisionInArray : function(item, array) {
    for (var i = 0; i < array.length; i++) {
        if (cc.rectIntersectsRect(item, array[i])) {
            return true;
        }
    }
    return false;
}
All the objects added in the object layer using the Tiled application will collide against the heads of lettuce. You can change the position of the lettuce and all these mechanisms should still work.
Summary
The Tiled Map Editor is a very useful and simple tool that lets you create TMX maps. You can create objects and define the properties for objects and layers and you use these properties in a game engine, such as Cocos2x-HTML5. If you are creating a game application you should really consider using the Tiled application.