Managing a Project
PUBLISHED
You can create an RT project in Tizen Studio. Additionally, you can create application resources within the project and build the project.
Creating a Project
The Tizen RT Project Wizard is a Tizen Studio for RT tool that is used to create an RT project.
You can create projects from a remote Git repository.
Creating Projects from a Remote Git Repository
To create a project from a remote Git repository:
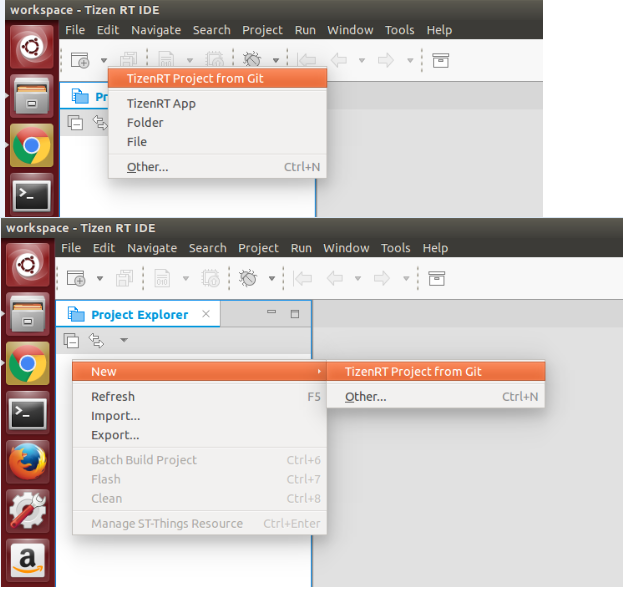
- To open the Tizen RT Git Project Wizard, use one of the following:
- In the Tizen Studio for RT menu, select File > New > TizenRT Project from Git.
- In the Tizen Studio for RT toolbar, click the New icon (
 ) drop-down list and select TizenRT Project from Git.
 - Right-click in the Project Explorer view, and select New > TizenRT Project from Git.
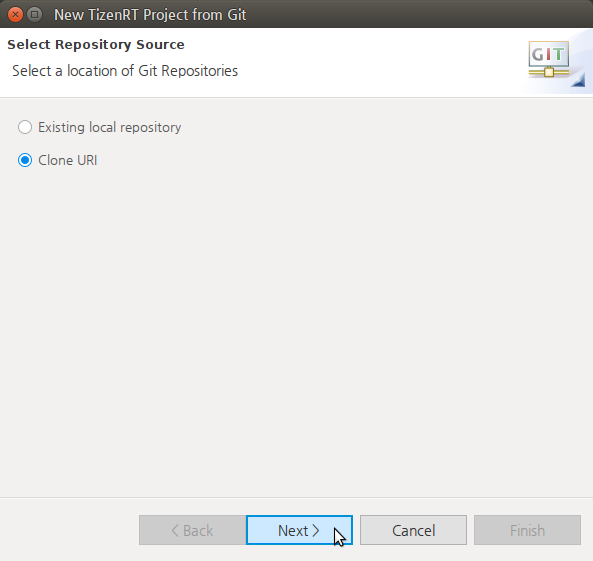
- In the TizenRT Git Project Wizard, you can select the Git import method:
- If you want to import from a new repository, clone its URI.
- If you already cloned the Git repository you want, use an existing local repository.
Using the Clone URI Option
To import a project from a new repository:
- Select a Clone URI and click Next.
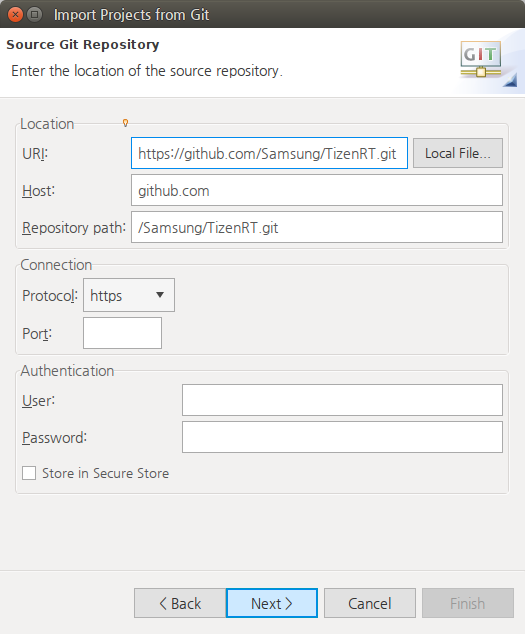
- Enter the basic location information to connect to the Git repository and click Next.
You can use a public Git URL, such as https://github.com/Samsung/TizenRT.git or git://github.com/Samsung/TizenRT.
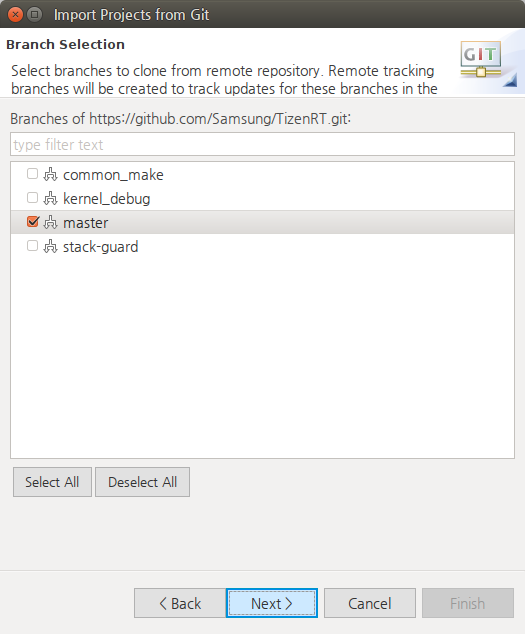
- Select branches to clone from the remote repository and click Next.
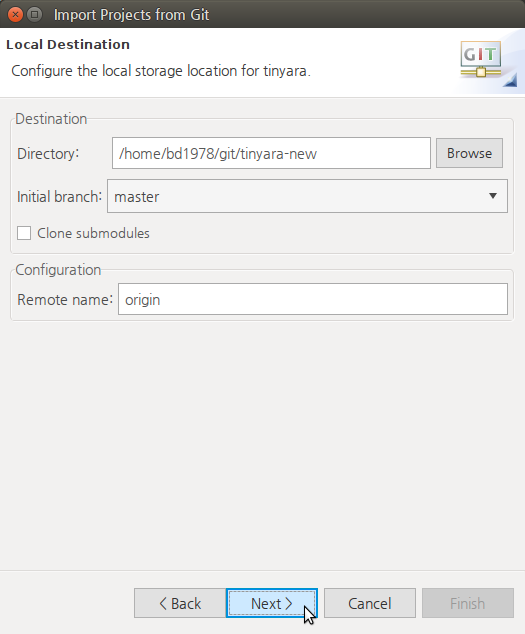
- Configure the local storage location and the initial branch, and click Next.
- Select the specific directory under the
Working Treedirectory to import the project, and click Next.If you want to import the overall
Working Treeas a new project, select the rootWorking Treedirectory.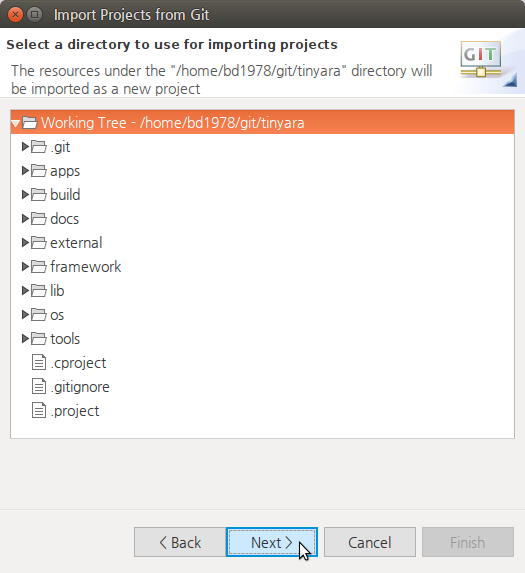
- Enter the name of the project and click Finish.
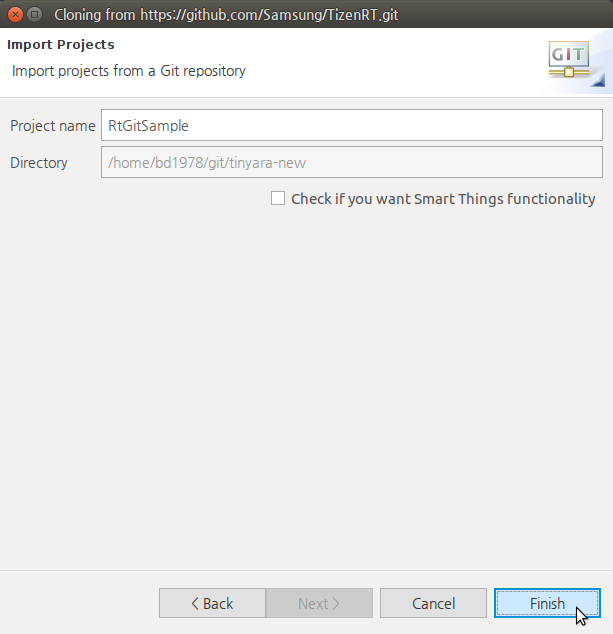
The new project is shown in the Project Explorer view.
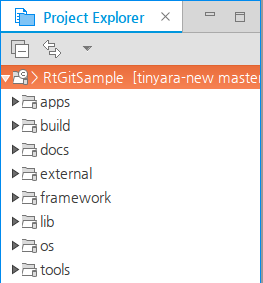
Using the Existing Local Repository Option
To import a project from an existing repository:
- Select the Existing local repository and click Next.
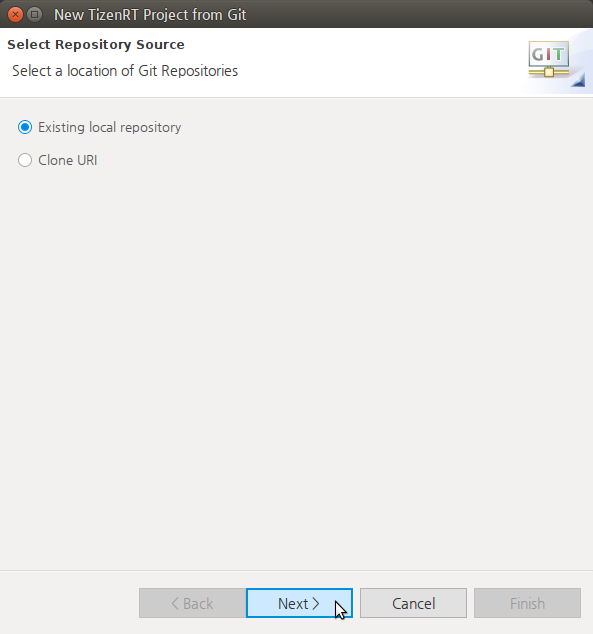
- Add local repositories by clicking Add.
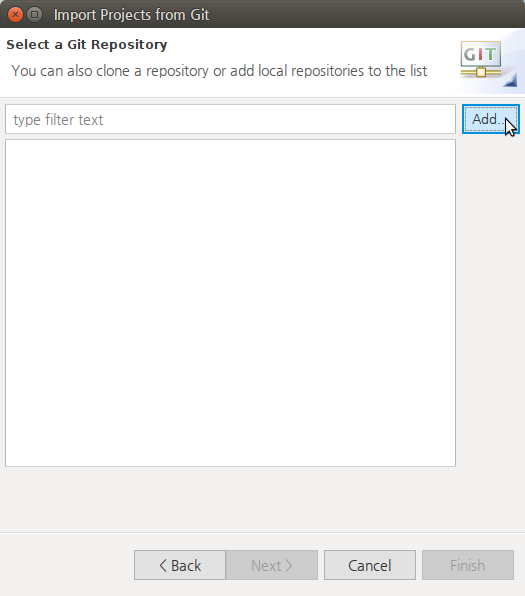
- Search for a local Git repositories on the file system by clicking Browse to set the directory, and click Search.
After the search, select the repositories and click Finish.
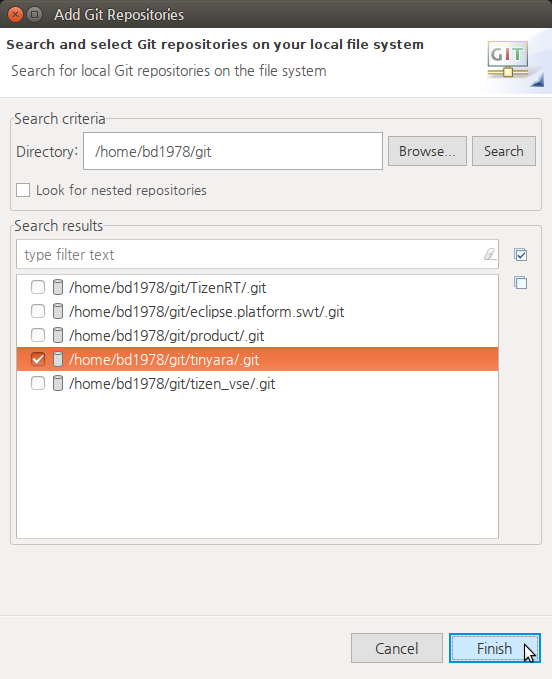
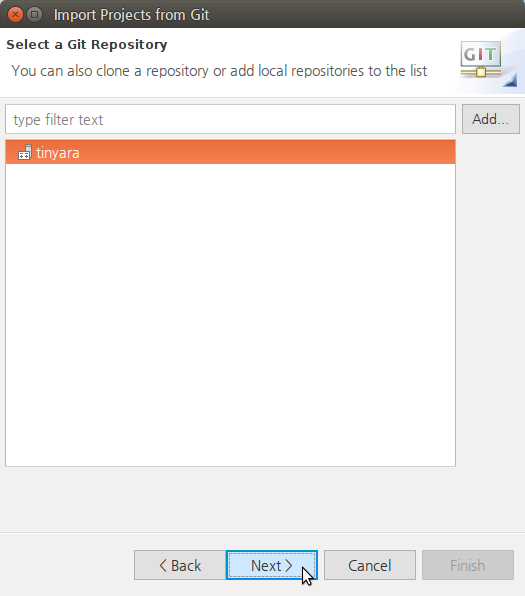
- Select the repository to clone and click Next.
- Select the specific directory under the
Working Treedirectory to use for importing the project, and click Next.If you want to import the overall
Working Treeas a new project, select the rootWorking Treedirectory.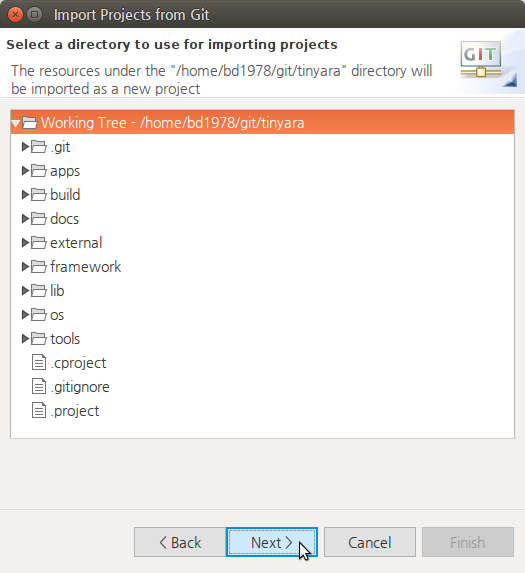
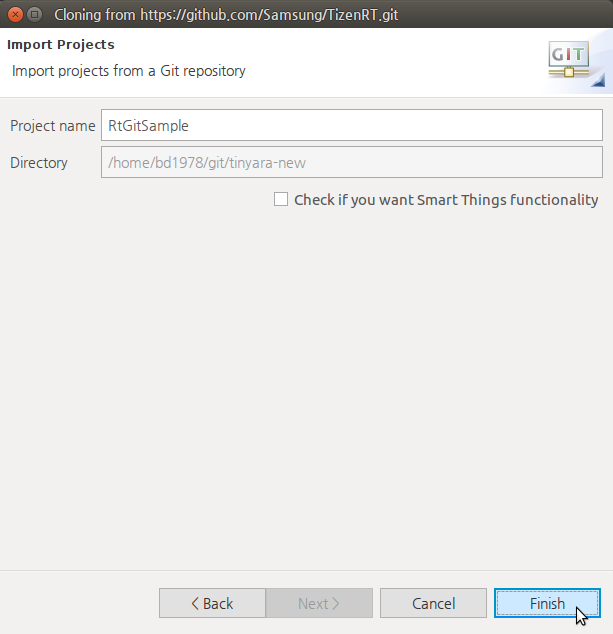
- Set the project name and click Finish.
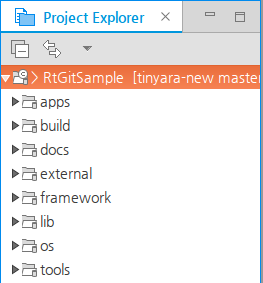
The new project is shown in the Project Explorer view.
Creating Your Application
The Tizen RT App Wizard is a Tizen Studio for RT tool that is used to create RT application resources.
When you create a new application, the basic file sets needed for application development are added.
To create a new application with a template within a selected project:
- Select the project to which you want to add the application.
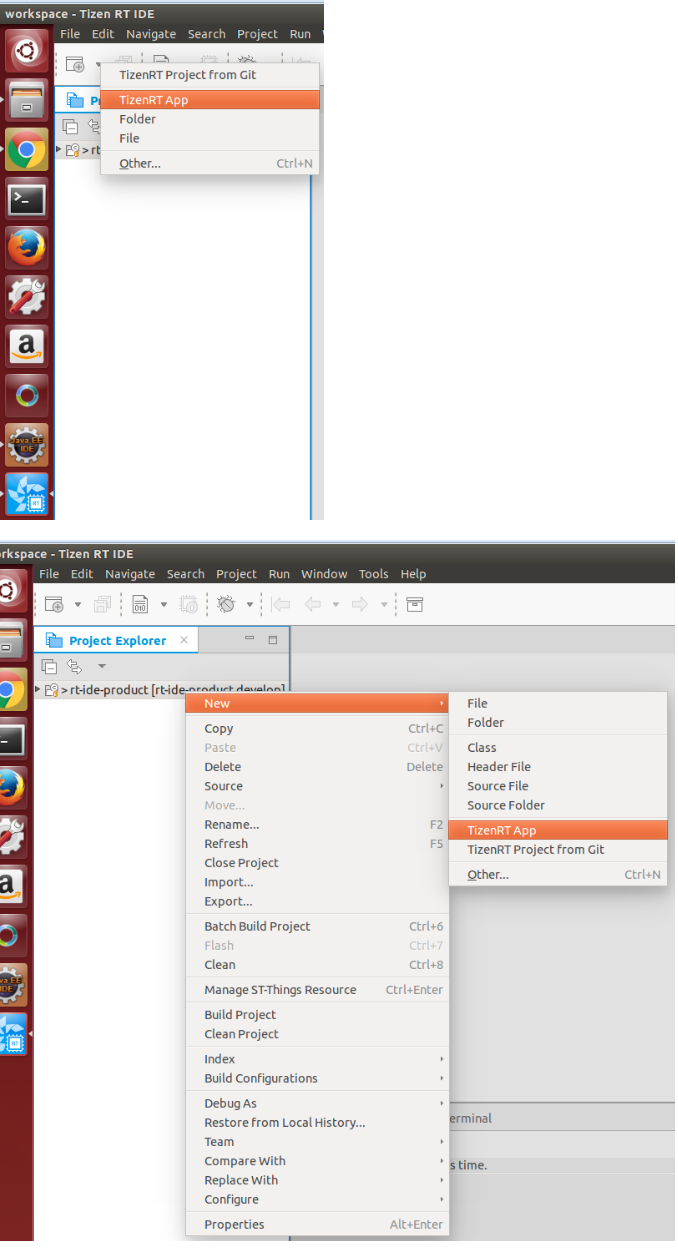
- To open the Tizen RT App Wizard, use one of the following:
- In the Tizen Studio for RT menu, select File > New > TizenRT App.
- In the Tizen Studio for RT toolbar, click the New icon (
 ) drop-down list and select TizenRT App.
 - Right-click in the Project Explorer view, and select New > TizenRT App.
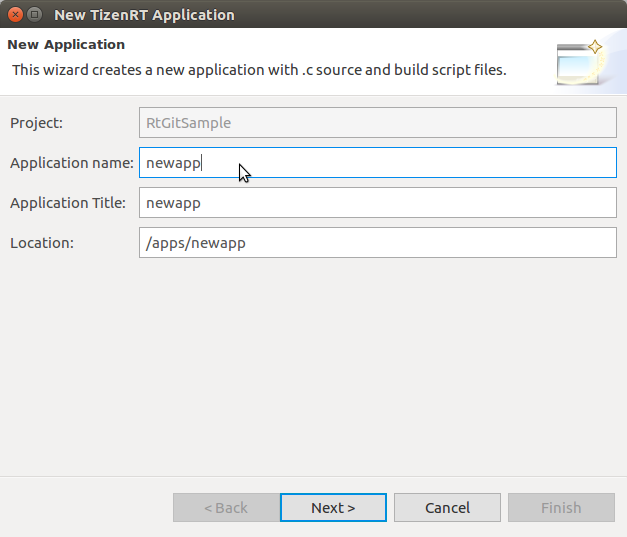
- In the New TizenRT Application Wizard, enter the name of the application, and click Next.
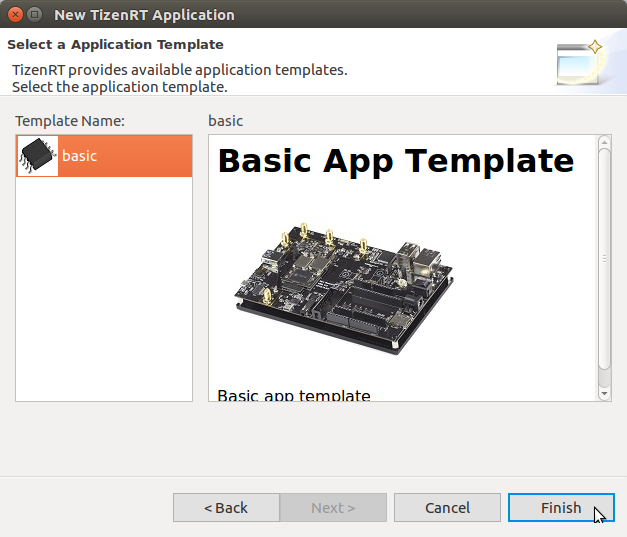
- In the Select a Application Template page, select the application template and click Finish.
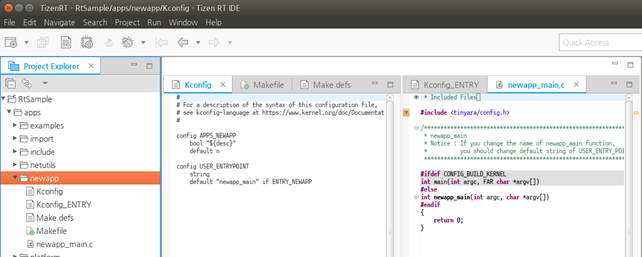
The created application template is shown in the Project Explorer view within the project.
You can code the required application features within the added template. Open the project sources in the Code Editor.
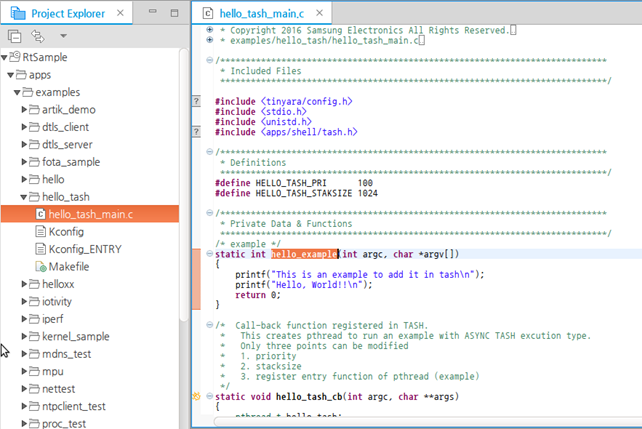
Tizen Studio for RT provides various features to ease code writing and improves your coding productivity when developing your applications:
- The API assist helps you to write code quickly by completing the names of the APIs automatically when writing a part of the API name.
- The API hover displays information about API functions, API-related types, and macros for the native framework.
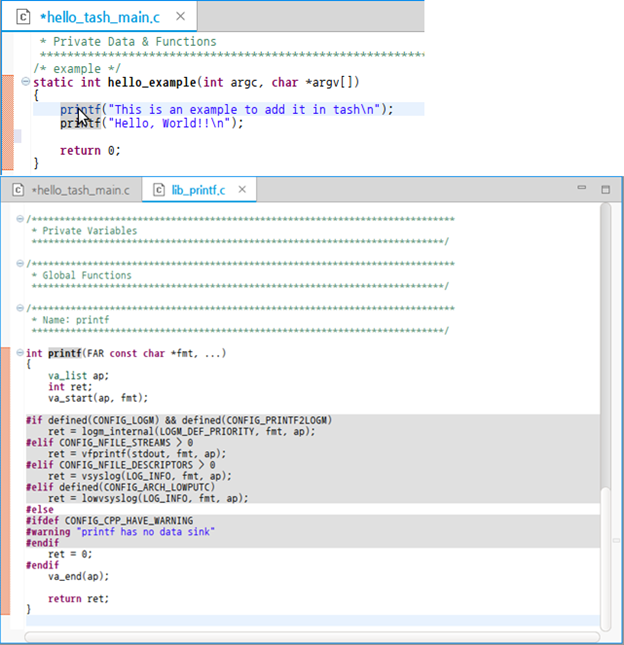
- The API link helps you to check the original content of a linked API quickly.
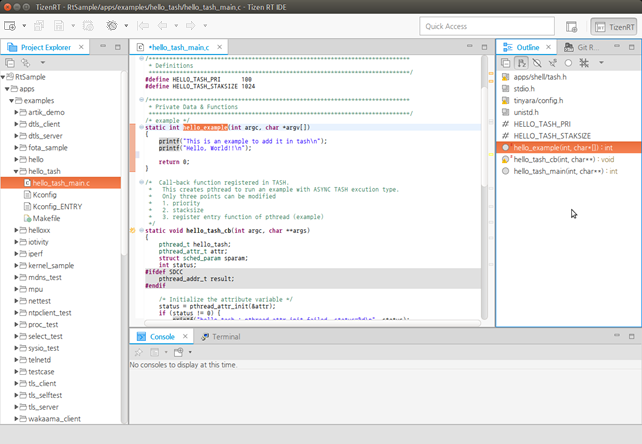
- The Outline view allows you to see the structure of the code currently open in the Code Editor.
Using API Assist
When you write code, the API assist feature provides API suggestions to complete the code faster.
To receive the API suggestions manually, type at least one letter of content, and press Ctrl + Space. The suggestion list appears. Use the arrow keys to select a suggestion from the list, and press Enter to complete the code.
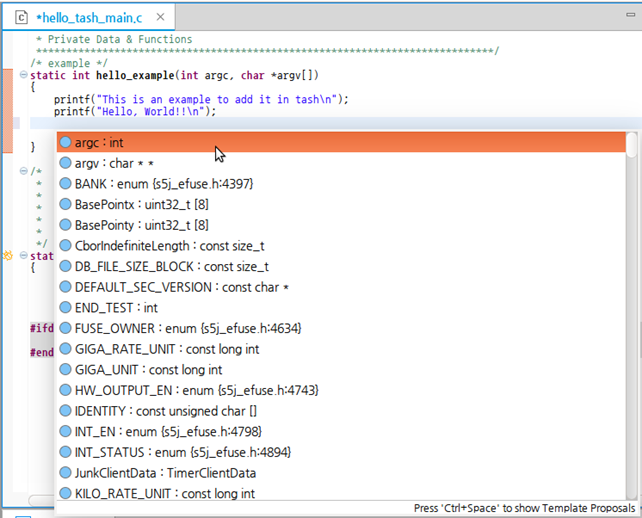
If you already use the Ctrl + Space shortcut key in the Ubuntu system for other purposes, such as the keyboard input source change, you must change to another shortcut, or you can change the API assist key in the Tizen Studio menu: Window > Preference > General > Keys > Content Assist.
Using API Hover
When you hover over an API function in the Code Editor, a popup window appears below the function. In that window, you get detailed information about the API function, such as a brief description, defined parameters, return value type, and exception information.

Using API Link
When you hover over an API function in the Code Editor, you can move to the original content of the hovered API by pressing the F3 key or Ctrl + Mouse click.
Using Outline View
The Outline view displays the structure of the code that is currently opened in the Code Editor.
Building the Project
You must build your project before flashing or debugging it.
To build the Tizen RT project:
- Select the project in the Project Explorer view.
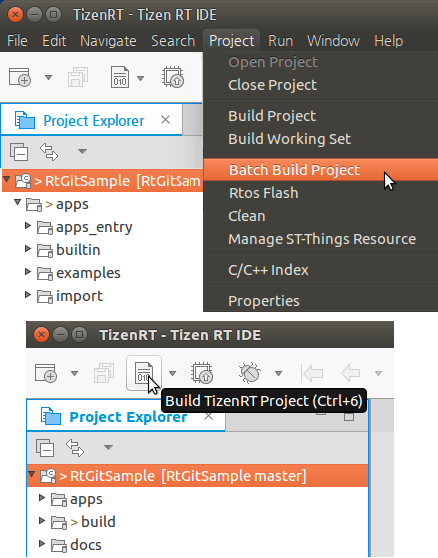
- To build the selected project, use one of the following:
- In the Tizen Studio for RT menu, select Project > Batch Build Project.
- In the Tizen Studio for RT toolbar, click the Build TizenRT Project icon (
 ).
).
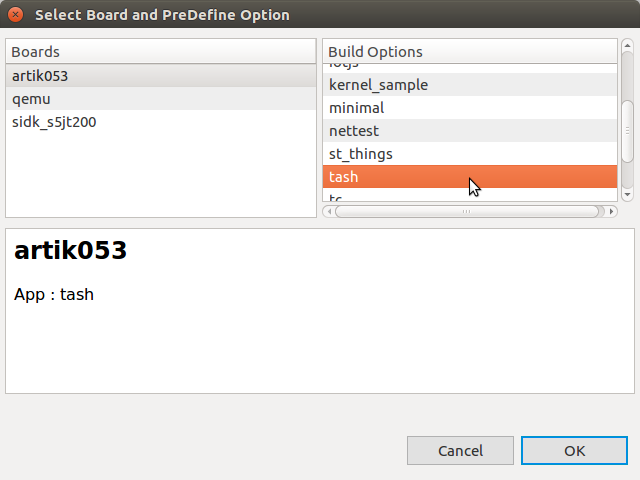
- In the Build TizenRT Project Wizard, select the board and build option for building your project, and click Build.
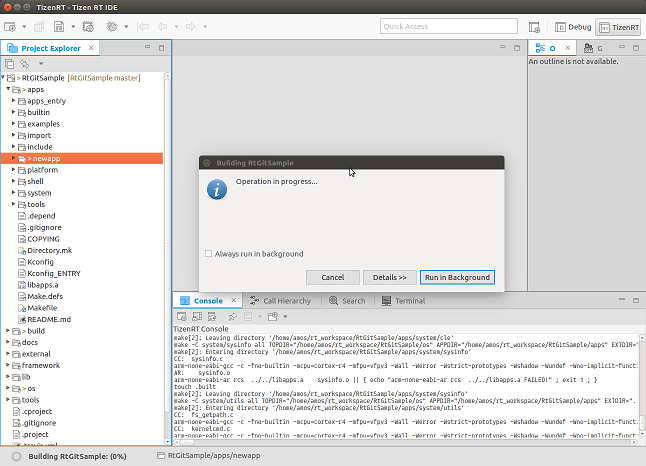
You can view the build progress dialog box.
You can check the build logs in the Console view.
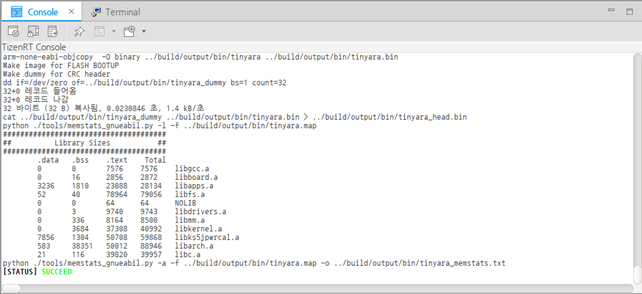
Selecting Applications for Running
If you want to configure only certain applications to run on the board, set those applications as the entry point with the Application Manager:
- Click the arrow next to the Build TizenRT Project icon (
 ) and select Application Manager in the drop-down menu.
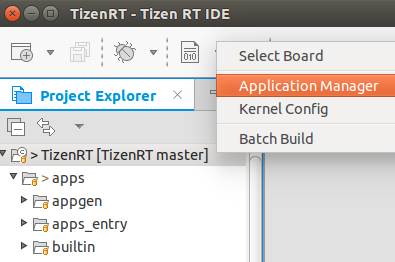
- In the Application Manager dialog box, select the check box for the application you want within a list of applications, and click Set Entry.
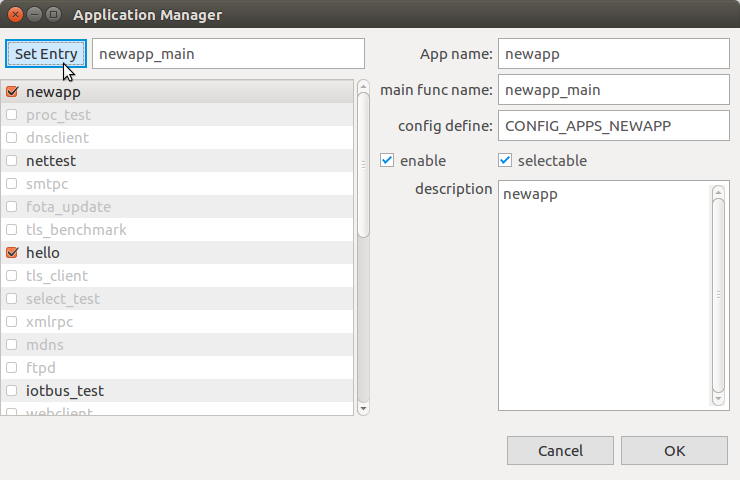
The entry point name next to the Set Entry button changes.
- Click OK.
Modifying the Kernel Config
In the Build TizenRT Project Wizard, you can modify the kernel configuration for the build.
To modify the kernel configuration:
- Click Kernel Config.
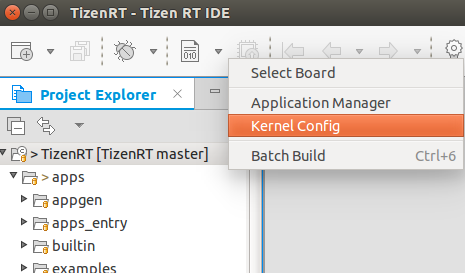
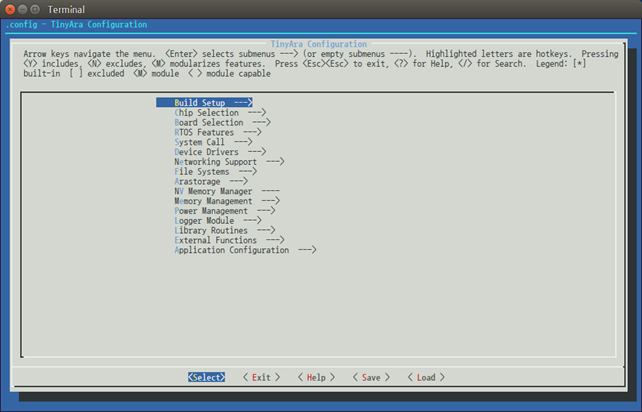
- Change the settings, click Save, and Exit.
