Tizen UX Conversion Tutorial: Picture Gallery Tutorial - Part 1
PUBLISHED
Tizen UX Conversion Tutorial: Picture Gallery Tutorial - Part 1
Description
This article is part one of a two part series.This article explains how to create Picture Gallery UI using Tizen platform and how to display thumbnails to gallery screen. The article applies only for systems based on Tizen platform.
Pre-conditions
To develop Picture Gallery UI 'jquery.js' and 'web-ui-fw.js' must be included inside 'script' tag of HTML 'head'.
<ul>
  <li>src="tizen-web-ui-fw/latest/js/jquery.js"</li>
  <li>src="tizen-web-ui-fw/latest/js/tizen-web-ui-fw-libs.js"</li>
  <li>src="tizen-web-ui-fw/latest/js/tizen-web-ui-fw.js" data-framework-theme="tizen-white" data-framework-viewport-scale="false"</li>
</ul>
Picture Gallery HTML Page1
There are three sections in each HTML page:
<ul>
  <li><a>Header</a></li>
  <li><a>Content</a></li>
  <li><a>Footer</a></li>
</ul>
Picture Gallery Header
The header is placed at the top of the page with fixed position. 'div' block should be created with a specific 'data-role=header' property and page title must be displayed inside header. For the search bar(HTML page1), data-role attribute is not required. For search field, type is set to 'search'.
<div data-role="header" data-position="fixed" id="hdr_pics">
  <div id="hdr_content">
    <span id="pgtitle" <Picture Gallery</span>
  </div>
  <input id="search1" class="search1" type="search" name="search" id="search-basic" value="" data-mini="true" />
</div>
Picture Gallery Content
In Content section(Page1), create a division in which image elements are placed.Click on the image,next page will display with full size of image. Define style in CSS and apply style for all images.
<div data-role="content">
  <a href="#imgshow" data-transition="slide">
    <img src="images/pic1.jpg" alt="Nightwish - Imaginarium"/>
  </a>
  <a href="#imgshow" data-transition="slide" >
    <img src="images/pic2.jpg" alt="Nightwish - Imaginarium"/>
  </a>
</div>
Picture Gallery Footer
The Tab bar widget(on footer) is used to wrap all buttons in footer, data-style is set to "toolbar".
<div data-role="footer" data-position="fixed">
  <div data-role="tabbar">
    <ul>
      <li><a  id="ui-link1">Recents</a></li>
      <li><a id="ui-link2">Contact</a></li>
      <li><a  id="ui-link3">Cancel</a></li>
    </ul>
  </div>
</div>
Picture Gallery HTML Page2
User clicks on image and full size image is displaying in another HTML page as shown below.
<div data-role="page"  id="imgshow"  data-theme="a">
  <div data-role="header" data-position="fixed" id="hdr_pics">
    <span id="pgtitle" >Picture Gallery</span>
  </div>
  <div data-role="content" data-theme="a" id="showimage">
  </div>
  <div data-role="footer" data-position="fixed" id="imageshowfooter">
    <div data-role="tabbar">
      <ul>
        <li><a  id="ui-link4">Add</a></li>
        <li><a id="ui-link5">Cancel</a></li>
        <li><a href="#gallerypage" id="ui-link6">Back</a> </li>
      </ul>
    </div>
  </div>
</div>
Picture Gallery CSS file
Background image for Page Header and Footer can be changed as shown below
#hdr_pics{
	background:url(../images/grey.png);
}
#imageshowfooter{
		background:url(../images/grey.png);
}
To change Page Title style, specify the styles as shown below and apply to title "div" element.
#pgtitle{

	font-size:20px;
	font-weight:bold;
	font-family:Arial;
	margin-left:0%;
	color:black;
}
Create style for Input search field as shown below:
.input-search-bar{
	width:300px;
	background-color:#e5e0e3;
	margin-left:5px;
}
Create style for picture gallery image as shown below:
#content img{
	width:32%;
	height:28%;
}
Picture Gallery JavaScript file
Override tizen search widget by removing cancel button before loading to page.
$('.ui-input-cancel').remove();On Selecting any image in Picture Gallery, new page is loaded with picture in Full-View in javascript file as shown below. User can navigate to Picture Gallery using "Back" Button
$("#content img").bind("vclick",function(event, ui){
    	var src = $(this).attr("src");
    	var alt = $(this).attr("alt");
    	$("#showimage").empty().append('< a href="#gallerypage" > < img src="' + src + '" style="width:100%;         height:100%;"/> </a>' );
    	});
Following code is used to hide the current application:
$("#ui-link3").on('click', function(){
	        var app = tizen.application.getCurrentApplication();
	        app.hide();
	    });
Screenshots
Below are the screenshots of the Picture Gallery.
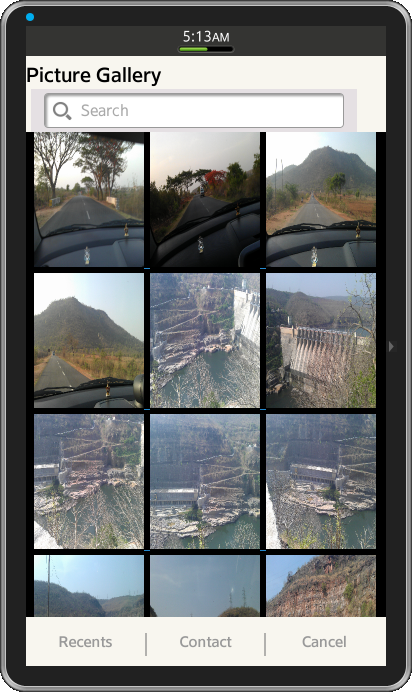 Figure-1: Picture gallery View
 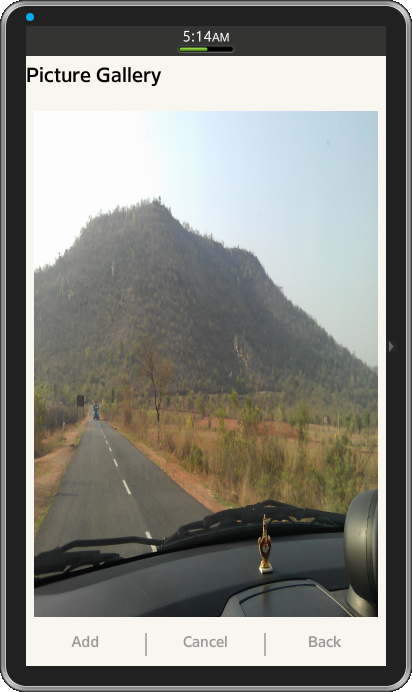 Figure-2: Full image View