


In this lesson we will teach you how to create a scroller container, fill the boxes, created in the previous lesson, with image pages, and use the standard layout as a page. Next, we will consider how to put the boxes in the created scroller. And use the scroller properties to implement page scrolling.
First of all, add the scroller and place it in the conformant instead of the box, and the box itself will be placed in the scroller for further scrolling.
Add a pointer to the scroller to the main widgets structure:
Evas_Object *scroller;You will get the following contents of the structure with graphical components:
typedef struct _UIData {
   Evas_Object *win;
   Evas_Object *conform;
   Evas_Object *scroller;
   Evas_Object *box;
} UIData;
Implement the following function to create a scroller, and place a box in it. You have already done similar things in previous lessons.
static void
_scroller_create(UIData *ui)
{
   ui->scroller = elm_scroller_add(ui->conform);

   _box_create(ui);
   elm_object_content_set(ui->scroller, ui->box);

   evas_object_show(ui->scroller);
}
Now change parent element for the box. Instead of conformant, pass the scroller to the function in order to save the correct hierarchy, since it is necessary to automatically remove the box in case the scroller is deleted. Make changes to the next function:
static void
_box_create(UIData *ui)
{
   ui->box = elm_box_add(ui->scroller);

   ...
}
Change the conformant content: replace the box with the scroller.
static void
_conformant_create(UIData *ui)
{
   ...

   _scroller_create(ui);
   elm_object_content_set(ui->conform, ui->scroller);

   ...
}
Add content to the box. First, take the following 5 images and use them as content.


Let's create two functions for loading and displaying image widgets as it was done in Lesson18.
There is a function to get the full path by the given image name in the res/folder of the project.
static void
_file_abs_resource_path_get(char *res_file_path, char *abs_path, int buf_size)
{
   char *res_dir_path = app_get_resource_path();

   if (res_dir_path)
     {
        snprintf(abs_path, buf_size, "%s%s", res_dir_path, res_file_path);
        free(res_dir_path);
     }
}
And here is a function for creating the image widget itself:
static Evas_Object *
_image_create(Evas_Object *parent, char *image_name)
{
   Evas_Object *image = elm_image_add(parent);

   char abs_path_to_image[PATH_MAX] = {0,};
   _file_abs_resource_path_get(image_name, abs_path_to_image, PATH_MAX);
   elm_image_file_set(image, abs_path_to_image, NULL);

   evas_object_size_hint_weight_set(image, EVAS_HINT_EXPAND, EVAS_HINT_EXPAND);
   evas_object_size_hint_align_set(image, EVAS_HINT_FILL, EVAS_HINT_FILL);

   evas_object_show(image);

   return image;
}
Create the layout with the standard style.
Use elm/layout/body_thumbnail/default style, described in Lesson 12.
Prepare the following function, which will create the layout object, as well as the image and place them in the elm.icon zone.
static Evas_Object *
_page_layout_create(Evas_Object *parent, int image_index)
{
   Evas_Object *page_layout = elm_layout_add(parent);
   elm_layout_theme_set(page_layout, "layout", "body_thumbnail", "default");
   evas_object_size_hint_weight_set(page_layout, EVAS_HINT_EXPAND, EVAS_HINT_EXPAND);
   evas_object_size_hint_align_set(page_layout, EVAS_HINT_FILL, EVAS_HINT_FILL);
   evas_object_show(page_layout);

   const int MAX_NAME_LENGTH = 10;
   char image_name[MAX_NAME_LENGTH] = {0,};
   snprintf(image_name, MAX_NAME_LENGTH, "%d.png", image_index);
   Evas_Object *image = _image_create(page_layout, image_name);
   elm_object_part_content_set(page_layout, "elm.icon", image);

   return page_layout;
}
Let’s name images 0.png, 1.png ... 4.png, so the function takes the image index as the second parameter to create the desired image. Next, in the loop, by using this function, create page elements, and it will be convenient to pass the loop counter.
Add elements to the box, by using the function:
elm_box_pack_end();Add all 5 pages to the box:
static void
_box_create(UIData *ui)
{
   ...

   for (int i = 0; i <= 4; ++i)
     {
        Evas_Object *page_layout = _page_layout_create(ui->box, i);
        elm_box_pack_end(ui->box, page_layout);
     }

   ...
}
Let's run the application and see the result.
Apparently, the content of the box is located on the left; this is because we did not specify the weight parameters for the box. Because of this, it automatically takes up the minimum size, which in this case, is equal to the width of the layout, used as the contents for the box.
Also, let's change the orientation of the content from vertical to horizontal.
Call the following two functions right after the box creation.
static void
_box_create(UIData *ui)
{
   ...

   elm_box_horizontal_set(ui->box, EINA_TRUE);
   evas_object_size_hint_weight_set(ui->box, EVAS_HINT_EXPAND, EVAS_HINT_EXPAND);

   ...
}
Below you may see the result.
It is almost perfect. But you can see that the first and the last image do not crawl to the center of the screen. In order to fix it, you need to add some indentations on the beginning and on the end of the box. Let's implement indentation by creating two simple, transparent rectangles. And let's set the size that will be calculated dynamically during the page size change event. Below is shown schematically why you need to add indents (green rectangles).

So, let's add a function that will create such a rectangle, and then use it to add spaces on the beginning and on the end of the box.
static Evas_Object *
_padding_item_create(Evas_Object *parent)
{
   Evas_Object *padding = evas_object_rectangle_add(evas_object_evas_get(parent));

   evas_object_size_hint_weight_set(padding, EVAS_HINT_EXPAND, EVAS_HINT_EXPAND);
   evas_object_size_hint_align_set(padding, EVAS_HINT_FILL, EVAS_HINT_FILL);

   return padding;
}
To add a rectangle, use the following function:
evas_object_rectangle_add();This function, unlike the Elementary functions, creates a primitive object that does not have special behavior like buttons or lists that support smart callbacks. Although, primitive objects support simple events, such as EVAS_CALLBACK_MOUSE_DOWN or EVAS_CALLBACK_SHOW.
Now you should, based on the content, set the size of these indents. Since when you start create objects for indenting, you can not know what size to set, you should wait for the page size change event (layout with the image), and then take the size.
Use the function above to create and place widgets for indenting in the box. Add them after all the pages will be created, using the functions to add content to the beginning and to the end of the box.
Add to the structure with the main widgets, pointers to the indentation widgets, so that we can access them in the callback for resizing.
Evas_Object *padding_start;
Evas_Object *padding_end;
will get the following contents of the structure with graphical components:
typedef struct _UIData {
   Evas_Object *win;
   Evas_Object *conform;
   Evas_Object *scroller;
   Evas_Object *box;
   Evas_Object *padding_start;
   Evas_Object *padding_end;
} UIData;
Create and add indents:
static void
_box_create(UIData *ui)
{
   ...

   // Creating pages with images

   ui->padding_start = _padding_item_create(ui->box);
   elm_box_pack_start(ui->box, ui->padding_start);

   ui->padding_end = _padding_item_create(ui->box);
   elm_box_pack_end(ui->box, ui->padding_end);

   ...
}
Now implement the callback function for the last page resizing event:
static void
_layout_resize_cb(void *data , Evas *e, Evas_Object *page_layout, void *event_info)
{
   int page_width;
   int page_height;
   int container_width;
   int container_height;
   UIData *ui = data;

   evas_object_geometry_get(page_layout, NULL, NULL, &page_width, &page_height);
   evas_object_geometry_get(ui->scroller, NULL, NULL, &container_width, &container_height);

   int padding_size = (container_width - page_width) / 2;
   evas_object_size_hint_min_set(ui->padding_start, padding_size, container_height);
   evas_object_size_hint_min_set(ui->padding_end, padding_size, container_height);
}
In another words, you get the difference between the width of the container and the width of the page and divide the result in half. This will be the size of the indents.
Use the following function to get the geometry of the object (x, y coordinates of the top-left corner, height and width).
evas_object_geometry_get(object, &x, &y, &width, &height);Finally, register the handler for the last page resizing event. Let's edit the function of creating a box and its contents.
static void
_box_create(UIData *ui)
{
   ...

   Evas_Object *page_layout;
   for (int i = 0; i <= 4; ++i)
     {
        page_layout = _page_layout_create(ui->box, i);
        elm_box_pack_end(ui->box, page_layout);
     }

   evas_object_event_callback_add(page_layout, EVAS_CALLBACK_RESIZE, _layout_resize_cb, ui);

     ...
}
Let’s look at the result.
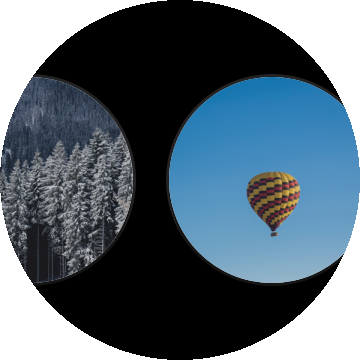
The scroller container can be used for pageview, which means that during scrolling, it will always stop the scrolling area on the top of the page. You can specify different page sizes and a page scroll limit.
For example, in this application, as shown in the following screenshot, you can stop scrolling, in the any point of the content.
Let's set up the scroller for page scrolling so that the content of the pages always stops on the middle of the area, using the function:
elm_scroller_page_size_set(Evas_Object *obj, Evas_Coord width, Evas_Coord height);The function takes the size of the page, which represents a “step” in pixels with which the area will be scrolled in the scroller.
In this case, you can call this function when callback for the event of last page changes, was modified. That is exactly where you’ve previously calculate the indent size. Add the call to the end of the handler function, where you already have the page sizes.
static void
_layout_resize_cb(void *data , Evas *e, Evas_Object *page_layout, void *event_info)
{
   ...

   elm_scroller_page_size_set(ui->scroller, page_width, page_height);
}
Look at the result.
Sometimes there is a need to get the event of changing the current page. For wearable devices, in the implementation of the scroller this signal is not provided, so you will have to implement it by yourself, by subscribing the scroll event of the scroller, and checking, in the handler, whether the current page has changed.
You should have the following event handler:
static void
_scroll_cb(void *data, Evas_Object *scroller, void *event)
{
   static int prev_h_page = 0;
   int cur_h_page         = 0;

   elm_scroller_current_page_get(scroller, &cur_h_page, NULL);
   if (cur_h_page != prev_h_page)
     {
        dlog_print(DLOG_DEBUG, "Lesson21", " New active page: %d", cur_h_page);

        prev_h_page = cur_h_page;
     }
}
Here the function of getting the sequence number of the current page of the scroller was used:
elm_scroller_current_page_get(const Evas_Object *obj, int *h_number, int *v_number);The function takes a scroller, for which it is required to get the values and pointers to Integer variables, in which the ordinal numbers (horizontally and vertically) for the page should be written.
As a result, display in the log information about the current page changes, since now you do not have anything to which you can attach an event.
To use the logging, do not forget to add the header file inclusion.
#include <dlog.h>Now after creating this widget, register the handler for the scroller.
static void
_scroller_create(UIData *ui)
{
   ...

   evas_object_smart_callback_add(ui->scroller, "scroll", _scroll_cb, ui);

   ...
}
That's what you supposed to receive.
In the next lesson, we will attach this scroller event to the indicator of a page changes.
The complete source code of this tutorial is available here WearLesson021.