Sample Web Application development using Command Line Interface
PUBLISHED
Introduction
A command-line interface (CLI) is a form of interacting with a computer program where the user issues commands to the program in the form of successive lines of text (command lines). Tizen also provides SDK with Command Line Interface (CLI) for developing Tizen applications without using the Tizen Studio IDE. It includes the entire development process from creating the project to running the application.
In this document, we will take a tour on a sample web application development using CLI from scratch.
Steps to do
Step 1: Download & Install CLI
Download Tizen Studio 1.0 with CLI (command line interface) installer for the appropriate platform.
Link: https://developer.tizen.org/development/tizen-studio/download
To Install enter the chmod +x command to apply the execute permission to the installer file. (On Ubuntu and Mac OS® X)
Then, execute the installer by entering the command based on the following syntax:
tizen-web-cli-<version> [options] [<directory path>]
Example command:
$ tizen-web-cli_TizenSDK_2.4.0_Rev8_ubuntu-64.bin --accept-license ~/tizen-sdk
Prerequisites: https://developer.tizen.org/development/tizen-studio/download/installing-tizen-studio/prerequisites
Installation Guide: https://developer.tizen.org/development/tizen-studio/download/installing-tizen-studio#cli
Updating Tizen Studio: https://developer.tizen.org/development/tizen-studio/download/installing-tizen-studio/updating-tizen-studio
Step 2: Add the CLI directory path to the $PATH environment variable
The CLI is located in the $<TIZEN_SDK_HOME>/tools/ide/bin/ directory. For developing an application using the CLI, add the CLI directory path to the $PATH environment variable using the following command:
$ export PATH=$PATH:~/tizen-sdk/tools/ide/bin
$ tizen version
 Tizen CLI 1.2.3
Step 3: List down Available Application templates
‘list’ command is used to list down available project templates:
tizen list <option> :
native-project Show native project template list
web-project Show web project template list
rootstrap Show rootstrap list tizen list
list web-project command would list down all the web project templates available.
Example Command:
$ tizen list web-project
Output:
-----------------------------------------------------
Starting web-project
-----------------------------------------------------
[PROFILE]            [TEMPLATE]
mobile-2.3           WebSinglePageApplication
mobile-2.3           WebBasicApplication
mobile-2.3           WebNavigationApplication
mobile-2.3           WebMasterDetailApplication
mobile-2.3           WebMultiPageApplication
mobile-2.3.1         WebBasicApplication
mobile-2.4           WebBasicApplication
wearable-2.3         WebBasicapplication
wearable-2.3.1       WebWebIMEapplication
wearable-2.3.1       WebBasicapplication
-----------------------------------------------------
Finished web-project
Step 4: Create Tizen web project
To create a tizen web project ‘tizen create’ command is used with the parameters:
-p Profile name.
-t Template name.
-n Project name.
-- Destination directory
Example Command:
$ tizen create web-project -n testProject -p mobile-2.4 -t WebBasicApplication -- ~/workspace/
Output:
-----------------------------------------------------
Starting web-project
-----------------------------------------------------
Project Location: ~/workspace/testProject
-----------------------------------------------------
Finished web-project
Step 5: Build web project
‘build’ command builds the Tizen native or Web project.
-- Specifies the project directory
Example Command:
$ tizen build-web -- ~/workspace/testProject
Output:
-----------------------------------------------------
Starting build-web
-----------------------------------------------------
Build Web Application:  100% (10/10)
BUILD SUCCESSFUL
Output path: ~/workspace/testProject/.buildResult
Excluded: [.build/*, .build, .sign/*, .sign, webUnitTest/*, webUnitTest, .externalToolBuilders/*, .externalToolBuilders, .buildResult/*, .buildResult, .settings/*, .settings, .package/*, .package, .tproject, .project, .sdk_delta.info, .rds_delta, *.wgt, .tizen-ui-builder-tool.xml]
-----------------------------------------------------
Finished build-web
Total time: 00:00:00.404
Step 6: Clean web project
‘clean’ command cleans the Tizen project. If you clean the project, all build output directories under the project root path will be removed (Debug, Release, and .buildResult).
Example Command:
$ tizen clean -- ~/workspace/testProject
Output:
-----------------------------------------------------
Starting clean
-----------------------------------------------------
web-app clean success.
-----------------------------------------------------
Finished clean
Step 7: Edit Source Code
To edit the HTML, CSS, js files or to create new files you have to change the directory to the project directory. Then open the files using editor to edit source code.
Example Command:
$ cd ~/workspace/testProject
~/workspace/testProject$ ls
config.xml  css  icon.png  images  index.html  js
~/workspace/testProject$ gedit index.html
Step 8: Generating Certificate
‘certificate’ command generates a Tizen certificate for the application. To upload the application to the Tizen store or install the application to a Tizen device, Tizen certificate must be generated.
-a alias name* -p password* -c country code -s state -ct city
-o organization -u unit -n username -e email -f filename*
-- output path
(*) marked parameters are mandatory.
Example Command:
$ tizen certificate -a certAuthor -f certFile -p 12345
Output:
-----------------------------------------------------
Starting certificate
-----------------------------------------------------
No path option. Will be generated on '~/cli-data/keystore/author'.
Working path: ~/cli-data/keystore/author
Generating a certificate with
  File name = certFile
  Container Password = *****
  Alias = certAuthor
  Key Password = *****
  Internal Certificates Directory = ~/tizen-sdk/tools/certificate-generator
'certFile' has been generated in '~/cli-data/keystore/author'.
-----------------------------------------------------
Finished certificate
Step 9: Managing Security Profiles
Tizen packages an application with signing profile.
‘security-profiles’ command manages security profiles, which is a set of signing certificates (author certificate, distributor certificate). Sub commands for tizen security profiles are Add, list and remove.
Security-profiles Add command takes the parameters:
-n profile name -a author certificate path -p password
-d distributor certificate path -dp distributor password
Example Command:
$ tizen security-profiles add -n ProName -a ~/cli-data/keystore/author/certFile.p12
-p 12345
Output:
-----------------------------------------------------
Starting add
-----------------------------------------------------
Loaded in '~/cli-data/ide/keystore/profiles.xml'.
author path: ~/cli-data/keystore/author/certFile.p12
author password: *****
distributor1 path: ~/tizen-sdk/tools/certificate-generator/certificates/distributor/tizen-distributor-signer.p12
distributor1 password: *************************
distributor1 CA path: ~/tizen-sdk/tools/certificate-generator/certificates/distributor/tizen-distributor-ca.cer

Wrote to '~/cli-data/ide/keystore/profiles.xml'.
Succeed to add 'ProName' profile.
If want to sign by this, add the file of security profiles in CLI configuration
  like 'tizen cli-config "profiles.path~/cli-data/ide/keystore/profiles.xml"'.
-----------------------------------------------------
Finished add
To list down security profiles ‘list’ command is used.
Example Command:
$ tizen security-profiles list
Output:
-----------------------------------------------------
Starting list
-----------------------------------------------------
Loaded in '~/cli-data/ide/keystore/profiles.xml'
========================================
Name
========================================
MyProfile123
ProName
-----------------------------------------------------
Finished list
Step 10: Packaging the web application with Signing
Tizen web application is packed as .wgt file. Package is used to install, uninstall or update application. Package is zip archive file, and it includes source codes of application and signature data. To publish application in the app store, application should be packed inside .wgt file.
tizen package command takes following parameters:
-t Package type
-s Security profile name for signing.
-- Build output path
Example Command:
~$ tizen package -t wgt -s ProName -- ~/workspace/testProject
Output:
-----------------------------------------------------
Starting package
-----------------------------------------------------
Author certficate: ~/cli-data/keystore/author/certFile.p12
Distributor1 certificate : ~/tizen-sdk/tools/certificate-generator/certificates/distributor/tizen-distributor-signer.p12
Excludes File Pattern: {.manifest.tmp, .delta.lst}
Ignore File: ~/workspace/testProject/.manifest.tmp
Package File Location: ~/workspace/testProject/testProject.wgt
-----------------------------------------------------
Finished package
Step 11: Create and Run an Emulator for app deployment
Emulator Manager allows the developer to easily generate emulator instances from a pre-defined platform and template. Emulator manager can be launched from
<Tizen Studio dir>/tools/emulator/bin/em-cli
Emulator manager cli commands to list available platforms:
list-platform list of available platforms
list-template list of available device templates
list-vm list of all virtual machines created
~$ cd ~/tizen-sdk/tools/emulator/bin
list available platform & templates:
~/tizen-sdk/tools/emulator/bin$ ./em-cli list-platform
mobile-2.4

~/tizen-sdk/tools/emulator/bin$ ./em-cli list-template
360x480 Wearable
Wearable Circle
320x320 Wearable
HD Mobile
WVGA Mobile
HD1080 TV
Create emulator:
~/tizen-sdk/tools/emulator/bin$ ./em-cli create -n testDevice -p mobile-2.4 -t HD-Mobile
New virtual machine is created
List VM and Launch:
~/tizen-sdk/tools/emulator/bin$ ./em-cli list-vm
emu1
CLI1
testDevice

~/tizen-sdk/tools/emulator/bin$  ./em-cli launch -n testDevice

Launch command : "~/tizen-sdk/platforms/tizen-2.4/common/emulator/bin/emulator.sh" --conf "~/cli-data/emulator/vms/testDevice/vm_launch.conf"
The VM is launched
Step 12: Install the app package on a target
‘install’ command is used to install a tizen application package to device or emulator.
-n tizen package file name
-t target name
-- directory path of the package file.
Example command:
~$ tizen install -n testProject.wgt -- ~/workspace/testProject/
Output:
-----------------------------------------------------
Starting install
-----------------------------------------------------
Transferring the package...
Transferred the package: ~/workspace/testProject/testProject.wgt -> /opt/usr/apps/tmp
Installing the package...
--------------------
Platform log view
--------------------
path is /opt/usr/apps/tmp/testProject.wgt
__return_cb req_id[31990002] pkg_type[wgt] pkgid[eDX93dNgkh] key[start] val[install]
__return_cb req_id[31990002] pkg_type[wgt] pkgid[eDX93dNgkh] key[install_percent] val[4]
……………………………………..
………………………………………
__return_cb req_id[31990002] pkg_type[wgt] pkgid[eDX93dNgkh] key[install_percent] val[23]
__return_cb req_id[31990002] pkg_type[wgt] pkgid[eDX93dNgkh] key[install_percent] val[100]
__return_cb req_id[31990002] pkg_type[wgt] pkgid[eDX93dNgkh] key[end] val[ok]
spend time for pkgcmd is [1046]ms
Installed the package: Id(eDX93dNgkh)
Tizen application is successfully installed.
-----------------------------------------------------
Finished instal
Step 13: Running the Application on a Target
tizen run command is used to run a tizen application package on a target. Package Id is required to run the application on device.
-p Package ID installed on the target.
-t target device name
Example command:
~$ tizen run -p eDX93dNgkh
Output:
-----------------------------------------------------
Starting run
-----------------------------------------------------
[Name]: testProject
[Type]: wgt
[appId]: eDX93dNgkh.testProject
Launching the Tizen application...
--------------------
Platform log view
--------------------
result: launched
Tizen application is successfully launched.
-----------------------------------------------------
Finished run
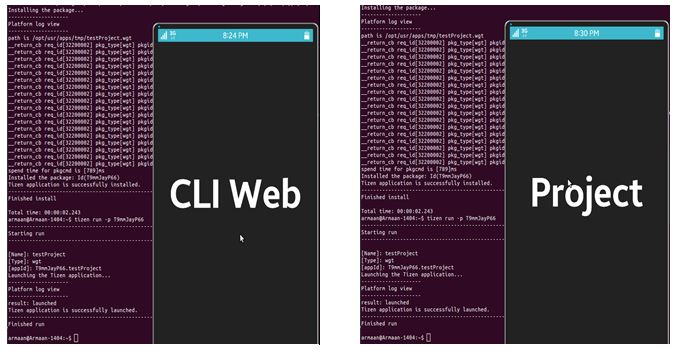
Screenshot of the Tizen web project: