Native widget in Tizen 2.4 mobile
PUBLISHED
Introduction
In this article you will learn by example, how to create a Tizen 2.4 mobile native widget and how to share data between a widget, service and a UI application.
In short words, a widget in Tizen is a small application which is displayed on the home screen of a device. Typically we use a clock widget, weather widget, sticky note widget, recent contacts widget etc. Widgets can be created using the Tizen Native API and they can be distributed in the Tizen Store only when accompanied by a regular UI application.
In this article, we would like to present you a combined project which detects shake events and displays how many such events occurred in the mobile device. The project will consist of the service, UI and widget applications.
The concept of a service & UI applications implementing that scenario was explained in the previous articles from the “Create a native service” series (see the next paragraph), so in this article we will focus only on the creation of the widget itself and data exchange between the widget, the regular application and the service.
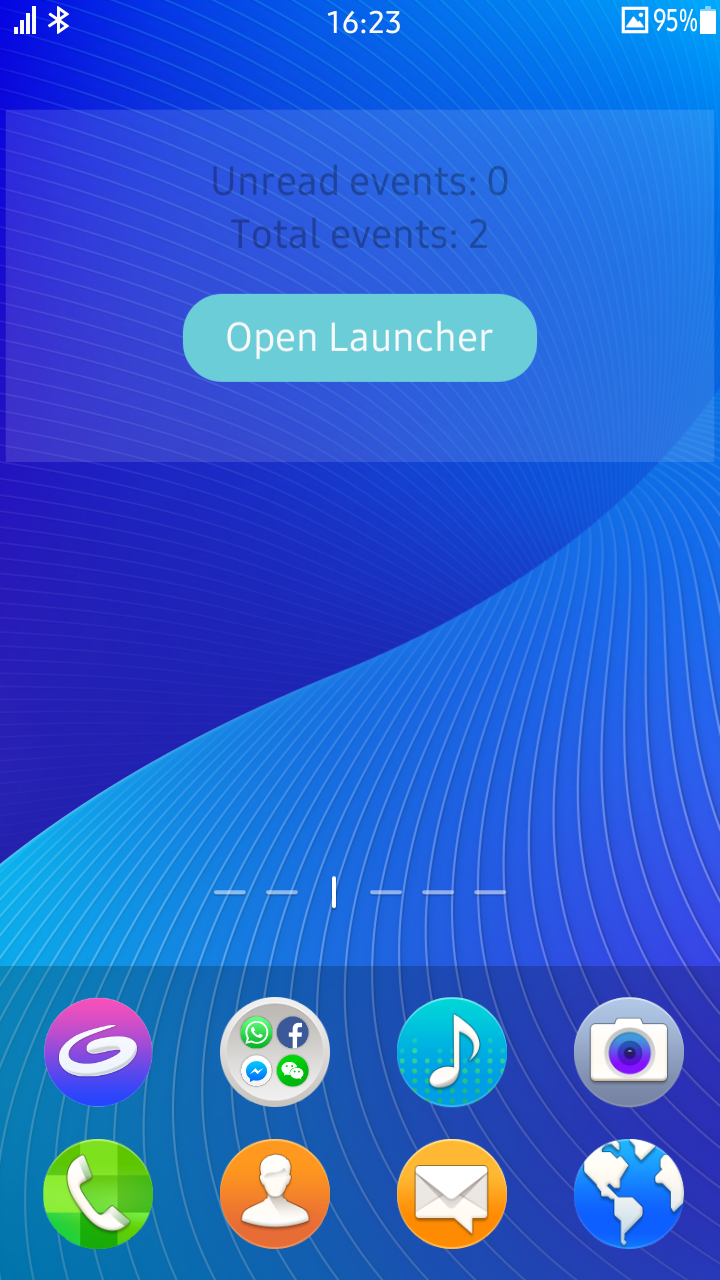
Figure 1 - Widget
Prerequisites
This article is a spin-off of the “Create a native service for Tizen wearables” series and a direct continuation of the “Badge API usage in the native service for Tizen Mobile” article.
As this article will focus on widget development as well as on Preference and Badge API usage, to fully understand the attached source code you should know how a service and UI applications work and how they can interact with each other.
Part 1 of the series, which explains a simple service running in the background:
https://developer.tizen.org/community/tip-tech/creating-native-service-tizen-wearables-part-1
Part 2, describing a simple UI combined into one package with the service:
Badge API usage in service & UI application:
https://developer.tizen.org/community/tip-tech/badge-api-usage-native-tizen-2.4-mobile-applications
Also it is recommended that you familiarize yourself, at least theoretically, with the basics and life cycle of a Tizen widget:
Preparation steps and code arrangement
Running the attached code
The code attached to this article is the complete source code of the created service, the UI app and the widget. You can import them to your SDK and after creating the Combined Package they should be ready to use when you have a properly set mobile device using Tizen 2.4.
Modifying the code from previous articles
The source code attached to this article is the modified version of the code described in the “Badge API usage in service & UI application” https://developer.tizen.org/community/tip-tech/badge-api-usage-native-tizen-2.4-mobile-applications article, which is extended by adding the widget.
Only the parts of the code that have been added or modified will be discussed in this article. You can follow this article and do modifications to the previous applications or you can just examine the attached source code.
Interaction between the project components
The graphic below illustrates how the project components described in this article are going to interact with each other. All the sub-projects (service, UI application and the widget) will share data about shake events through the App Preference using a key-value pair database. App Control API will be used to launch service and application, the App Manager API will help to inform about current service status, and the Badge API will allow the service to show the number of unread events by the UI application icon.

Figure 2 - The project components and interaction between them
Steps to do
Step 1. Using Preference API as a way to share data between the service and the UI application
- Headers, constants
- MyService
- MyServiceLauncher
Step 2. My Service Widget: Creating the widget
- Widget project
- Headers, constants
- UI
- Widget functionality
- Running the UI app
- Event numbers: Subscribing to preference change (on app create)
- Event numbers: Refreshing all widget instances on change
Step 3. Bonus: Reflecting the service status in the UI launcher app
Step 1: Using Preference API as a way to share data between the service, UI application and widget
In this article we reuse MyService and My Service Launcher apps which were counting shake events. They were described in the older article. However they didn’t have a convenient mechanism of sharing shake events data between them. Adding a widget application to the project will complicate things even more. So the first thing we should do is to enrich the existing applications with an easy to use, but clearly-organized data-sharing mechanism. We have used the Preference API before and it will be the suitable solution this time too…
Note: The “Preference” word can be a bit misleading. Notice that we don’t use Preference API to keep “user preferences” in this case. The number of shake events can be considered to be rather “application data” rather than any kind of “preference”. However we use Preference API as it is convenient and good to store any simple data and share them between all applications in the package.
- Headers, constants
Both in MyService and in My Service Launcher you have to include the header:
#include <app_preference.h> // Tizen header for storing shared data accessible for all applications in a package
Then in both applications we define the key names for the data to be stored.
#define PREF_KEY_UNREAD_EVENTS "unread_events" // the preference key representing the number of shake events that happened since the last opening of the launcher
#define PREF_KEY_TOTAL_EVENTS "total_events" // the preference key representing the total number of shake events that occurred since the installation of the package
Note: We will have to repeat some parts of the code in the applications. This could be omitted by creating a shared library, but it is a subject for a separate article.
- MyService
Now we have to modify the sensor event handling function in MyService to increment the number of shake events and store it in the Preferences.
// In sensor_event_callback():

//…

// Here we increment the number of unread events by 1
// We update the event number only when sound playback was successfully started.
int unread_events = 0, read_events = 0;
if ((preference_get_int(PREF_KEY_UNREAD_EVENTS, &unread_events) == PREFERENCE_ERROR_NONE)
&&(preference_get_int(PREF_KEY_TOTAL_EVENTS, &read_events) == PREFERENCE_ERROR_NONE))
{
    unread_events++;
	read_events++;
	if ((preference_set_int(PREF_KEY_UNREAD_EVENTS, unread_events) == PREFERENCE_ERROR_NONE)
		&& (preference_set_int(PREF_KEY_TOTAL_EVENTS, read_events) == PREFERENCE_ERROR_NONE))
	{
		dlog_print(DLOG_INFO, LOG_TAG, "Preferences updated.");
	}
	else
	{
		dlog_print(DLOG_ERROR, LOG_TAG, "Preferences update failed!");
	}
	// Updating the My Service Launcher application badge...
	update_badge(unread_events, MYSERVICELAUNCHER_APP_ID);
}
else
{
	dlog_print(DLOG_ERROR, LOG_TAG, "Error reading events preference!");
}
Here is the function for setting the badge along the icon of My Service Launcher application. It takes a number to be displayed and the application ID as parameters, so it is quite universal. Badge API usage was described with more details in the previous article.
// Refurbished badge update function.
// Used instead of increment_badge() from the previous article.
// Instead of keeping the events number on the badge only, we store it in the preferences
// and show the badge along the icon of an application with a given app_id.
void update_badge(unsigned int display_value, const char *app_id)
{
    unsigned int is_displayed = 0; // Is the badge displayed? 0 means false, 1 means true.

	// We check if the badge is currently displayed.
	if (badge_get_display(app_id, &is_displayed) != BADGE_ERROR_NONE)
	{
		// If the function fails, we create a badge from scratch.
		dlog_print(DLOG_INFO, LOG_TAG, "Updating the badge failed! Seems the badge does not exist... Creating badge...");

		// Now we will add a badge. Notice that when you add a badge to the application,
		// it will persist between the application and/or service launches and the device reboot until you remove it.
		// In our example we will remove the badge from My Service Launcher on the MyService termination.

		if (badge_add(app_id) != BADGE_ERROR_NONE)
		{
			dlog_print(DLOG_ERROR, LOG_TAG, "Badge creation failed! Leaving function...");
			return;
		}

		// Setting initial value for the variable used later...
		is_displayed = 0;
	}

	dlog_print(DLOG_INFO, LOG_TAG, "Setting and showing the badge...");

	// When the badge exists, but is currently not displayed, it's time to turn on the badge.
	// In our case it means that since last "shake" event occurrence,
	// the My Service Launcher application was opened and the badge visibility was turned off
	// or the badge was just created.
	if (is_displayed == 0)
	{
		// Setting badge display to 1 (showing the badge):
		if (badge_set_display(app_id, 1) != BADGE_ERROR_NONE)
		{
			dlog_print(DLOG_ERROR, LOG_TAG, "Cannot set badge display!");
		}
	}
	// Now we update the badge count..
	if (badge_set_count(app_id, display_value) != BADGE_ERROR_NONE)
	{
		dlog_print(DLOG_ERROR, LOG_TAG, "Updating badge failed!");
	}
}
- MyServiceLauncher
To use app preference to store shake events number we must properly initialize the stored values.
We check if preferences with the given keys already exist. If they cannot be found, we initialize them with 0.
void initialize_preferences()
{
    bool unread_exists = false;
	bool read_exists = false;
	if ((preference_is_existing(PREF_KEY_UNREAD_EVENTS, &unread_exists) == PREFERENCE_ERROR_NONE)
		&&(preference_is_existing(PREF_KEY_TOTAL_EVENTS, &read_exists) == PREFERENCE_ERROR_NONE))
	{
		if (unread_exists == false)
		{
			if (preference_set_int(PREF_KEY_UNREAD_EVENTS, 0) == PREFERENCE_ERROR_NONE)
			{
				dlog_print(DLOG_INFO, LOG_TAG, "Unread events preference was not present, setting to default false value...");
			}
			else
			{
				dlog_print(DLOG_ERROR, LOG_TAG, "Error creating unread events preference!");
			}
		}
		if (read_exists == false)
		{
			if (preference_set_int(PREF_KEY_TOTAL_EVENTS, 0) == PREFERENCE_ERROR_NONE)
			{
				dlog_print(DLOG_INFO, LOG_TAG, "Read events preference was not present, setting to default false value...");
			}
			else
			{
				dlog_print(DLOG_ERROR, LOG_TAG, "Error creating read events preference!");
			}
		}

	}
	else
	{
		dlog_print(DLOG_INFO, LOG_TAG, "Error creating event preferences!");
	}
}
We call the initialization on the creation of the application.
//in app_create():
// ...

    initialize_preferences();
Then, as we consider opening of the My Service Launcher application as “reading” shake events information, when opening the application, we reset the value under unread events key to 0.
As we may open the application or just bring the already opened app from background, we do this on the application resume. When called in this place, the resetting will occur both when application starts and when it only resumes.
//in app_resume():

     if (preference_set_int(PREF_KEY_UNREAD_EVENTS, 0) == PREFERENCE_ERROR_NONE)
 	{
 		dlog_print(DLOG_INFO, LOG_TAG, "Unread events set to 0!");
 	}
 	else
 	{
 		dlog_print(DLOG_ERROR, LOG_TAG, "Error when setting unread events to 0!");
 	}
Step 2: My Service Widget: Creating the widget
- Widget project
In Tizen Studio we click the “New” button, then we choose Template --> Mobile 2.4 --> Native --> Widget.
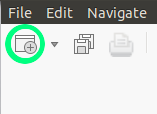
Figure 3 - "New" button
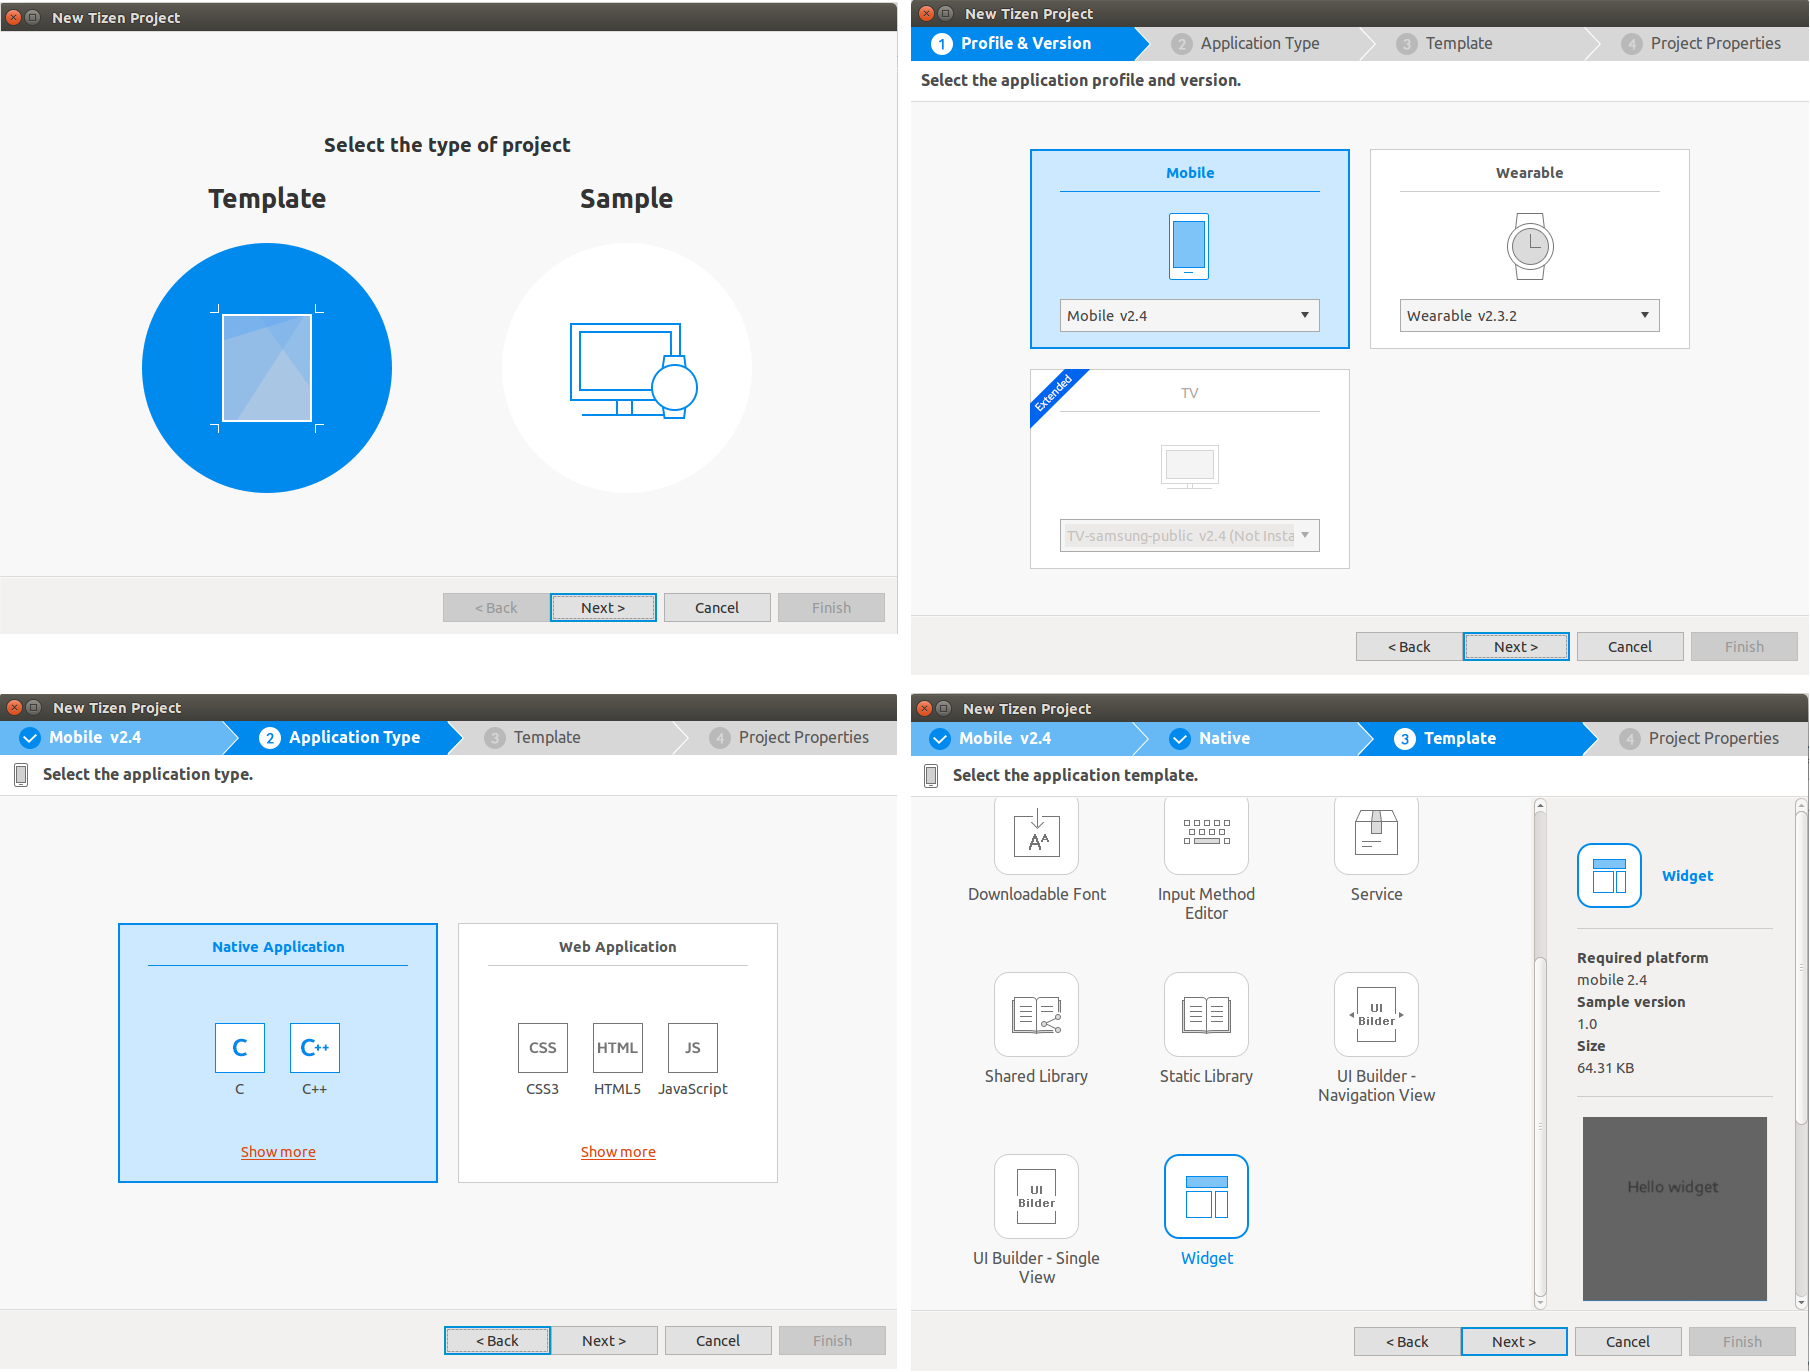
Figure 4 - New widget - steps
Then, after choosing the project properties such as widget project name and location, we open the tizen-manifest.xml file and in the “Advanced” section we choose the widget size and the preview image. The preview image is a simple png graphic file which shall represent a widget miniature in the choice menu with widgets. We used for this task a slightly modified screenshot of our widget UI.
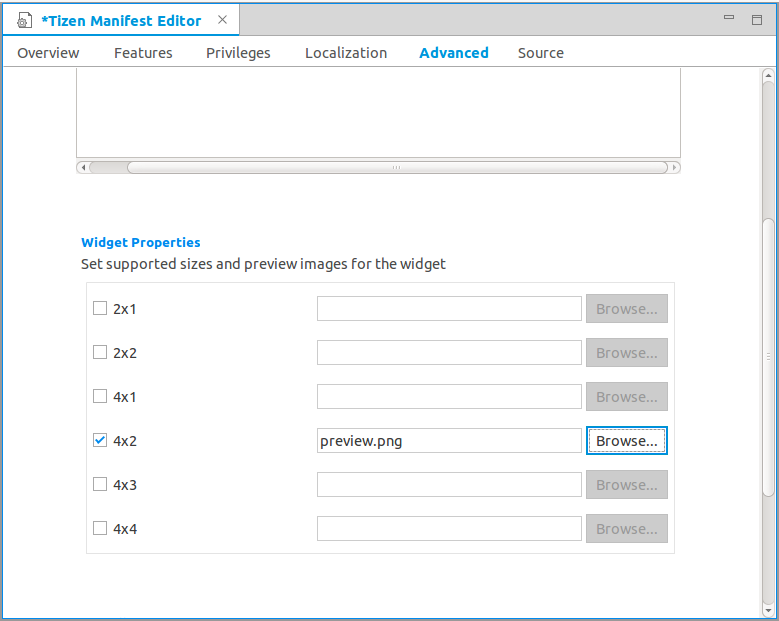
Figure 5 - Choosing the widget size in the manifest file
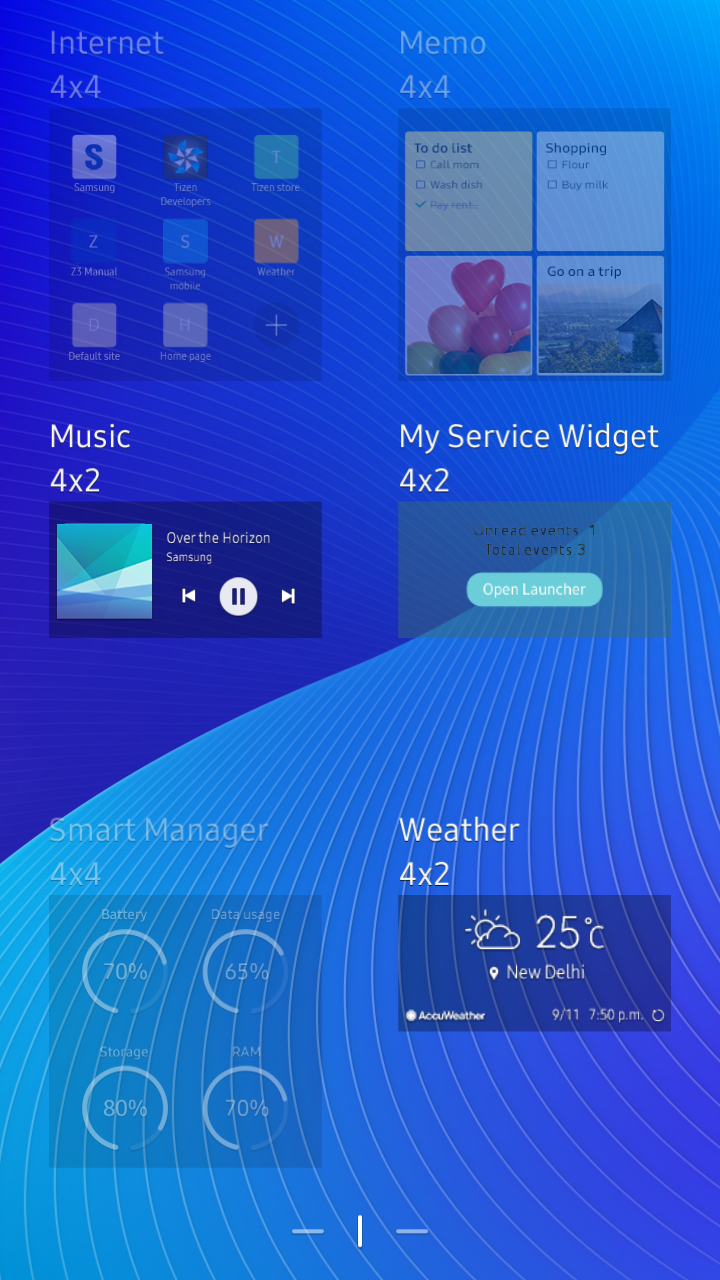
Figure 6 - Our widget preview image as seen in the widget choice menu
When the project is created, don’t forget to add it to the combined project (the complete project should contain MyService, My Service Launcher and My Service Widget). Then you build the complete project by building the My Service Launcher.
- Headers, constants
Just as in MyService and in My Service Launcher applications, in our widget we have to include the header for the Preference API and some constant values which we are going to use.
#include <app_preference.h>

#define PREF_KEY_UNREAD_EVENTS "unread_events" // the preference key representing the number of shake events that happened since the last opening of the launcher
#define PREF_KEY_TOTAL_EVENTS "total_events" // the preference key representing the total number of shake events that occurred since the installation of the package

#define MYSERVICELAUNCHER_APP_ID "org.example.myservicelauncher" // an ID of the UI application of our package
#define MAX_LABEL_LENGTH 256
- Widget UI
Our widget is going to be very simple. We just want to display only information about unread shake events and total events as well as a shortcut to My Service Launcher. That’s why our widget UI visible elements will be two labels and a button. We will use only the Elementary library to build dynamic UI (no EDC file).
// UI elements for the widget instance
 typedef struct widget_instance_data {
     Evas_Object *win;
 	Evas_Object *conform;
	Evas_Object *label_unread_events;
	Evas_Object *label_total_events;
	Evas_Object *button;
 } widget_instance_data_s;
We build the UI for each widget instance separately.
static int
widget_instance_create(widget_context_h context, bundle *content, int w, int h, void *user_data)
{
	widget_instance_data_s *wid = (widget_instance_data_s*) malloc(sizeof(widget_instance_data_s));
	if (wid == NULL)
	{
		dlog_print(DLOG_ERROR, LOG_TAG, "failed to allocate the widget instance data!");
		return WIDGET_ERROR_FAULT;
	}

	int ret = WIDGET_ERROR_NONE;

	if (content != NULL)
	{
		/* Recover the previous status with the bundle object. */
	}

	/* Window */
	ret = widget_app_get_elm_win(context, &wid->win);
	if (ret != WIDGET_ERROR_NONE)
	{
		dlog_print(DLOG_ERROR, LOG_TAG, "failed to get window. err = %d", ret);
		free(wid);
		return WIDGET_ERROR_FAULT;
	}

	evas_object_resize(wid->win, w, h);
To fill the unread and total events labels with data we are going to retrieve them from the Preference DB.
    int unread_events_number = 0, total_events_number = 0;

	char label_text_unread[MAX_LABEL_LENGTH] = {0};
	char label_text_total[MAX_LABEL_LENGTH] = {0};

	if (preference_get_int(PREF_KEY_UNREAD_EVENTS, &unread_events_number) == PREFERENCE_ERROR_NONE)
	{
		dlog_print(DLOG_INFO, LOG_TAG, "Geting the unread events preferences...");
		snprintf(label_text_unread, MAX_LABEL_LENGTH, "Unread events: %d", unread_events_number);
	}
	else
	{
		dlog_print(DLOG_ERROR, LOG_TAG, "Error reading the unread events preferences!");
		snprintf(label_text_unread, MAX_LABEL_LENGTH, "Error reading the unread events number!");
	}

// Now we do the same for the total events: we fill  label_text_total[] with the preference value for PREF_KEY_TOTAL_EVENTS.
// ...
As our label strings for unread and total events are ready, we can continue building our UI. We fill the labels with the strings we have built and pack them to the Elementary box.
    Evas_Object *bg = elm_bg_add(wid->win);
	evas_object_size_hint_weight_set(bg, EVAS_HINT_EXPAND, EVAS_HINT_EXPAND);
	evas_object_color_set(bg, 106, 205, 216, 32);
	elm_win_resize_object_add(wid->win, bg);
	evas_object_show(bg);

	wid->conform = elm_conformant_add(bg);
	evas_object_size_hint_weight_set(wid->conform, EVAS_HINT_EXPAND, EVAS_HINT_EXPAND);
	elm_win_resize_object_add(wid->win, wid->conform);
	evas_object_show(wid->conform);

	Evas_Object *box = elm_box_add(wid->conform);
	elm_box_horizontal_set(box, EINA_FALSE);
	elm_box_align_set(box, 0.5, 0.5);
	elm_object_content_set(wid->conform, box);
	evas_object_show(box);

	/* Label - unread events*/
	wid->label_unread_events = elm_label_add(wid->conform);
	evas_object_size_hint_min_set(wid->label_unread_events, w / 1.5, h / 4);
	evas_object_size_hint_max_set(wid->label_unread_events, w, h / 4);
	elm_box_pack_end(box, wid->label_unread_events);
	evas_object_show(wid->label_unread_events);
	elm_object_text_set(wid->label_unread_events, label_text_unread);

	/* Label - total events*/
	wid->label_total_events = elm_label_add(wid->conform);
	evas_object_size_hint_min_set(wid->label_total_events, w / 1.5, h / 4);
	evas_object_size_hint_max_set(wid->label_total_events, w, h / 4);
	elm_box_pack_end(box, wid->label_total_events);
	evas_object_show(wid->label_total_events);
	elm_object_text_set(wid->label_total_events, label_text_total);
Now, what is left is a button for launching the My Service Launcher UI application. Again it is a simple Elementary button with connected smart callback launching the My Service Launcher app. Finally we show the widget window, set a customized UI data as a tag in the widget context and the widget instance building is finished.
    /* Button */
	wid->button = elm_button_add(wid->conform);
	evas_object_smart_callback_add(wid->button, "clicked", button_clicked_cb, NULL);
	evas_object_size_hint_min_set(wid->button, w / 2, h / 4);
	evas_object_size_hint_max_set(wid->button, w / 2, h / 4);
	evas_object_size_hint_weight_set(wid->button, EVAS_HINT_EXPAND, EVAS_HINT_EXPAND);
	evas_object_size_hint_fill_set(wid->button, EVAS_HINT_FILL, EVAS_HINT_FILL);
	elm_object_text_set(wid->button, "Open Launcher");
	elm_box_pack_end(box, wid->button);
	evas_object_show(wid->button);

	/* Show window after base gui is set up */
	evas_object_show(wid->win);

	widget_app_context_set_tag(context, wid);
	return WIDGET_ERROR_NONE;
} // end of widget_instance_create() function
We will not discuss the button_clicked_cb() (a callback connected to the button) in this article, as it contains simple App Control launch of the application. The similar launch is described in the code snippet here.
That is how our widget will look like on the device home screen:
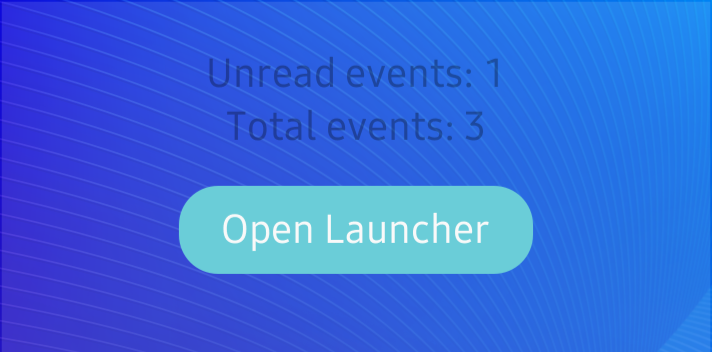
Figure 7 - The widget UI
4. Widget functionality
Initializing the preferences in case of widget’s first run.
This step is implemented the same way as in My Service Launcher application using the initialize_preferences() function. See Step 1 point c. Initializing the preferences is very important, because we want to subscribe for the preference value change, as we want to refresh the values displayed by the widget. When the preferences don’t exist, we won’t be able to do that.
We do this in widget_app_create() function which is called at the start of the widget process.
Event numbers: Subscribing to preference change (on app create)
Our widget would be useless if it did not display the up-to-date values. How to do that? The simplest way in our case is to make use of the Preference API functions allowing us to subscribe for preference changes. So we ask our widget process to listen for any change in unread or total events change in the Preference DB. Doing things this way means we don’t need to modify neither MyService nor My Service Launcher. If they make changes in the Preferences that are interesting us – we will know about changes at once.
// In widget_app_create():
//…
    initialize_preferences();  // we call preference initialization in case the preferences don’t exist

	if ((preference_set_changed_cb(PREF_KEY_UNREAD_EVENTS, on_unread_events_changed_cb, NULL) == PREFERENCE_ERROR_NONE)
	&& (preference_set_changed_cb(PREF_KEY_TOTAL_EVENTS, on_total_events_changed_cb, NULL) == PREFERENCE_ERROR_NONE))
	{
		dlog_print(DLOG_INFO, LOG_TAG, "Preference change callbacks added!");
	}
	else
	{
		dlog_print(DLOG_ERROR, LOG_TAG, "Error occurred when setting preference change callbacks!");
	}

// …
 }
Note that we subscribe for a change callback only once in the widget process. We don’t need to do it in each widget instance.
Event numbers: Refreshing all instances on change
What happens when the change is made to the preferences that we are interested in? The callback will be called. When it happens we must refresh the label whose value changed. However we must keep in mind that there may be many widget instances displayed on the device. That’s why we use widget_app_foreach_context() to reach and modify all existing instances of our widget.
See this on the example of unread events number change. We do exactly the same for total events number change – only things different are the name of the preference key and the name of the label to be updated.
void on_unread_events_changed_cb (const char *key, void *user_data)
{
    int value = 0;

	if (preference_get_int(key, &value) != PREFERENCE_ERROR_NONE)
	{
		dlog_print(DLOG_ERROR, LOG_TAG, "Error reading preference!");
		value = 0;
	}
	if (widget_app_foreach_context(refresh_unread_events_label_cb, &value) == WIDGET_ERROR_NONE)
	{
		dlog_print(DLOG_INFO, LOG_TAG, "Refreshing UI for all widget instances.");
	}
	else
	{
		dlog_print(DLOG_ERROR, LOG_TAG, "Refreshing UI failed!");
	}
}

// do the same in on_total_events_changed_cb()
Now see the callback to be called for each widget instance. We do here almost the same we did when we put the texts into the label when creating the widget instance. We passed as user data the new value to be displayed on the label.
bool refresh_unread_events_label_cb(widget_context_h context, void *data)
{
    widget_instance_data_s *wid = NULL;
	widget_app_context_get_tag(context,(void**)&wid);

	int *no_events = (int*)data;

	char label_text[MAX_LABEL_LENGTH];
	snprintf(label_text, MAX_LABEL_LENGTH, "Unread events: %d", *no_events);
	elm_object_text_set(wid->label_unread_events, label_text);

	return true;
}
We do exactly the same for the total events number change – the only thing different is the name of the label to be updated.
Step 3: Bonus: Reflecting the service status in the UI launcher app
Now we would like to add in one more improvement to the UI application we made. Now the My Service Launcher will display also the current status of the service.
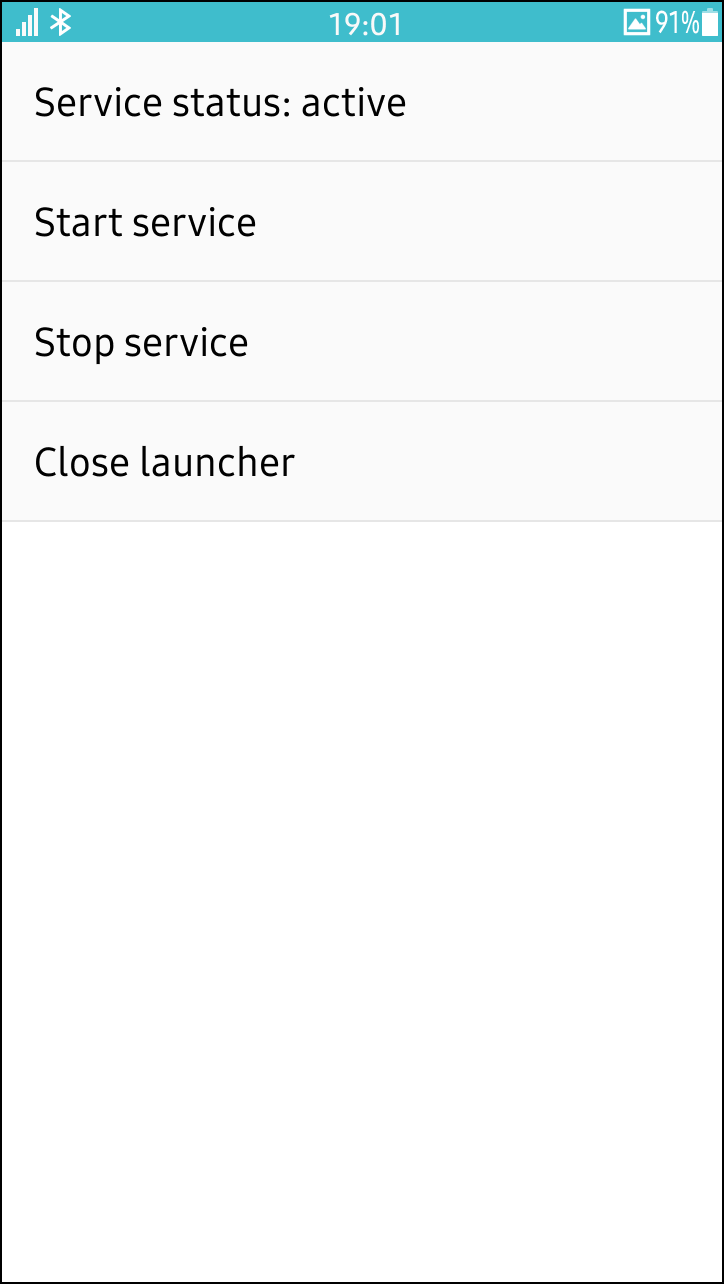
Figure 8 - Service status information in My Service Launcher
How is it done?
First, we add an additional item to the elm_list. In the first element of the list we will display the status of MyService. Then we use the Application Manager to get the information about the status of MyService. If the service is running, we show the appropriate information.
// Add app_manager.h header
#include <app_manager.h> // Tizen header with the API for getting information on applications' status

// In create_base_gui: add the service status item
elm_list_item_append (ad->list, "Service status: unknown", NULL, NULL, NULL, NULL);

// in app_resume():
// Check the service status and update the list item adequately
//...
     appdata_s *ad = data;
//...

 	Elm_Object_Item *service_status_label = elm_list_first_item_get(ad->list);

 	bool is_service_running = false;
 	int err = app_manager_is_running(MYSERVICE_APP_ID, &is_service_running);
 	if (err == APP_MANAGER_ERROR_NONE && is_service_running == true)
 	{
 		elm_object_item_text_set(service_status_label, "Service status: active");
 	}
 	else
 	{
 		if(err == APP_MANAGER_ERROR_NONE)
 		{
 			dlog_print(DLOG_INFO, LOG_TAG, "No error!");
 		}
 		elm_object_item_text_set(service_status_label, "Service status: inactive");
 	}
Summary
In this article we have shown you an example usage of a widget application. We presented how to create a widget application and add it to the combined project of a service, UI and widget application. We have also explained how to easily exchange information between those three subprojects using the Preference API and how to update all widget instances when the preference value changes. We hope this article will help you in creating simple and easy home screen widgets that can be a useful addition to your application.