Creating a native service for Tizen wearables – part 1
PUBLISHED
Introduction
This article is a first article of the “Create a native service for Tizen wearables” series. You will learn how to create a simple service running in the background on a wearable device.
The example service described in this article will monitor the device’s sensors and play a sound when the accelerometer reading on any of the axes shows equal or more than 15m/s2. It simply means the sound will be played when you shake your smartwatch in any direction. However, basing on the code examples from this article series, you should be able to create a different service to fit your needs. This code example can be also easily ported to mobile device.
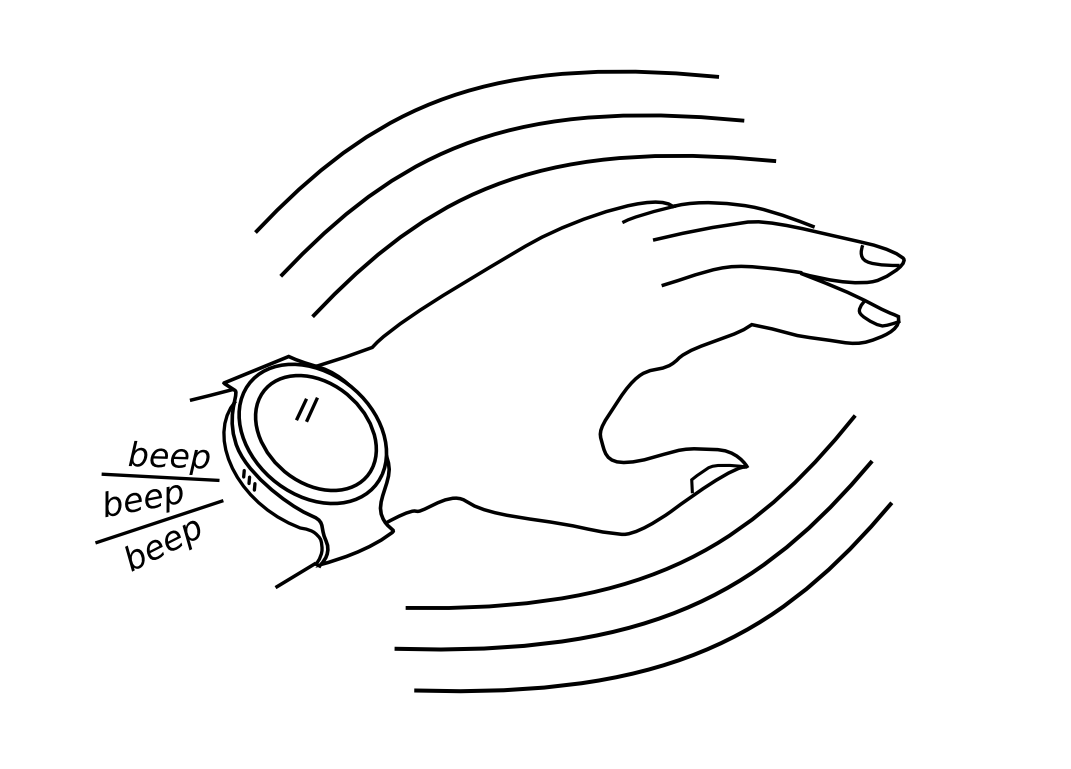
Figure 1 – Intended behavior of the presented service
The part one of the series will help you create a service that can be loaded on a device using the Tizen SDK. As standalone services are not allowed in Tizen Store, the instruction how to create a launcher application and distribute it as the Combined Package will be described in the next articles.
Prerequisites
Basic knowledge of development for a wearable device and setting up a device is recommended.
As the example code from this article uses the Sensor and Player APIs, it’s good if you already know how to work with Sensor and Player modules of the Tizen Native C API. If not, please have a look at the following code snippets:
https://developer.tizen.org/community/code-snippet/native-code-snippet/getting-data-accelerometer
https://developer.tizen.org/community/code-snippet/native-code-snippet/play-mp3-file-phone-storage
It should be enough to understand what is happening in the presented application, but if you need more information on Sensor and Player API usage, you can refer to the following links:
https://developer.tizen.org/development/tutorials/native-application/system/sensor
https://developer.tizen.org/development/tutorials/native-application/multimedia/player
You can also look here to understand basics about Service applications:
Code arrangement
The attached code is a complete source code of the created service. You can import it to your SDK and it should be ready to use and deploy when you have a properly set wearable device. You can also follow the steps described in the article and create the Service application on your own.
The source code is based on an SDK template, so only the parts of the code that have been added to the template are discussed in this article.
Steps to do
Step 1. Preparation
- Create a template wearable service application
- Include headers and define the service application data structure
Step 2. Starting up a service
- Check sensor support
- Set up a player
- Set up a sensor listener
Step 3. When a sensor event occurs
- Read sensor data and stop the sensor listener when the criteria are met
- Play a sound
- Restart the sensor listener when the sound playback is completed
Step 4. Cleaning up
Step 1: Preparation
- Create a template wearable service application
First, using the SDK File menu we choose the New Tizen Native Project and in the Template tab we select Service in the WEARABLE-2.3.1 group. We type in the project name and press “Finish”.
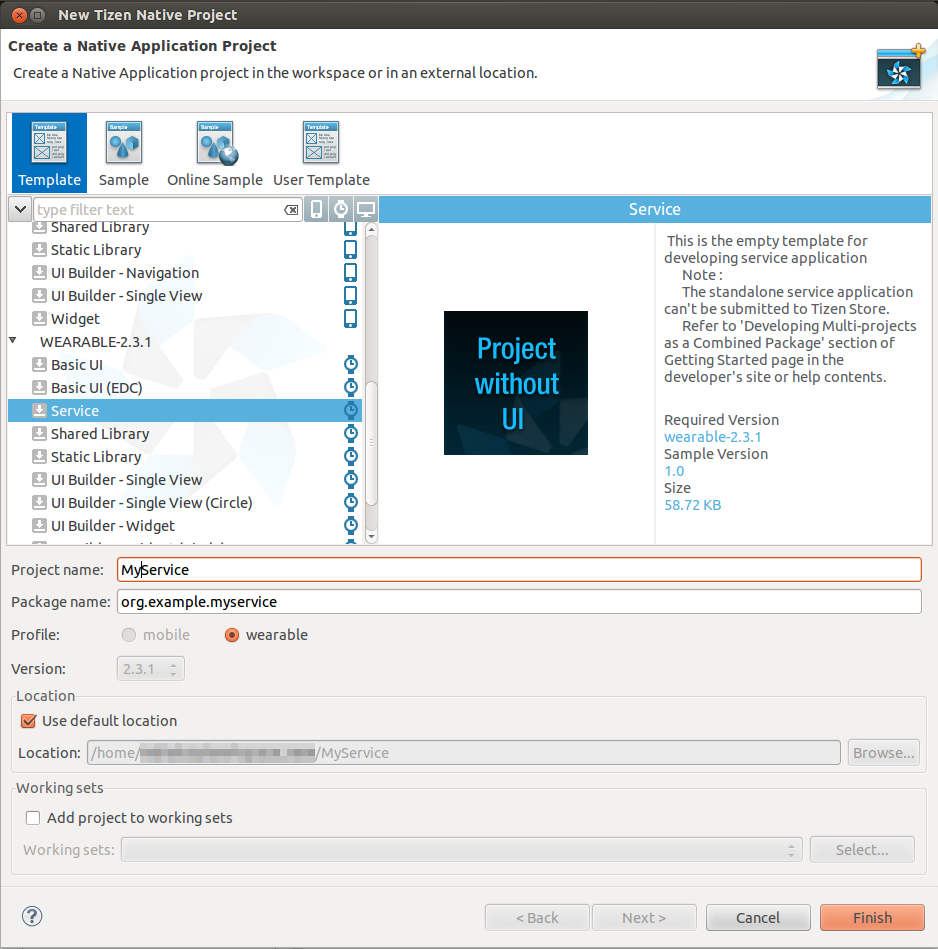
Figure 2 – Choosing wearable Service
- Include headers and define the service application data structure
As we will use the Sensor and Player APIs, we must add the appropriate headers. Some standard headers will be needed for memory management and string manipulations. Additionally, we define some constant values which will be used in the code.
#include <tizen.h> // standard header from the template
#include <service_app.h> // standard header from the template
#include "myservice.h" // a header automatically created along with the template

// headers that will be needed for our service:
#include <sensor.h>
#include <player.h>
#include <stdlib.h>
#include <stdio.h>

// some constant values used in the app
#define MAX_PATH_SIZE 4096 // max file path size
#define ACCELEROMETER_SHAKE_THRESHOLD_VALUE 15 // the value read on any accelerometer axis to be considered the shake event
#define ALARM_SOUND_FILENAME "alarm.ogg"    // the name of the sound file that will be used as an alarm sound
Some data must be exchanged between functions. That’s why we create a structure which can store the current state of the application. We will pass this data to various functions as a parameter.
// application data (context) that will be passed to functions when needed
typedef struct appdata
{
    sensor_h sensor; // sensor handle
    sensor_listener_h listener; // sensor listener handle
    player_h player; // player handle
    char sound_path[MAX_PATH_SIZE]; // a path to a sound file that is used as an alarm
} appdata_s;
We declare appdata_s structure in the main() function and pass it as a parameter when launching the main loop of our service application.
int main(int argc, char* argv[])
{
// we declare ad as a structure appdata_s defined earlier
    appdata_s ad = {0,};
// we keep the template code below…
//(…)
// …and then modify the line below to pass an address of ad
    return service_app_main(argc, argv, &event_callback, &ad);
}
Step 2: Starting up a service
All steps for the service startup must be done in the service_app_create() function.
First of all we extract the application data from the parameter passed to the function.
bool service_app_create(void *data)
{
    // Extracting application data
    appdata_s* ad = (appdata_s*)data;
    dlog_print(DLOG_INFO, LOG_TAG, "Starting sensor service...");

// to be continued…
- Check the sensor support
We should make sure that the accelerometer is supported on the device. If it isn’t available there is no point in starting the service so in that case we terminate the application.
// continuing service_app_create() function definition…

    bool sensor_supported = false;
    if (sensor_is_supported(SENSOR_ACCELEROMETER, &sensor_supported) != SENSOR_ERROR_NONE || sensor_supported == false)
    {
        dlog_print(DLOG_ERROR, LOG_TAG, "Accelerometer not supported! Service is useless, exiting...");
        service_app_exit();
        return false;
    }
// to be continued…
- Set up the player
Now we have to set the parameters for the player to be used when a sensor event occurs. The player should be ready before sensor listener starts. We should place the sound file “alarm.ogg” in the “res/” subfolder of the project folder, from where it will be copied into the device during program installation. We allocate the memory for player, set the sound file path and set the callback to be executed when the sound playback is completed. The playback_completed_cb() definition will be provided in the next paragraph. We will also explain there why it is so useful in our case.
// continuing service_app_create()…

    // Preparing a path to the sound file.
    // Here we get the path to a resource folder where we will find the
    // sound file provided in the "res" folder of the application source code.
    char *resource_path = app_get_resource_path();
    if (resource_path != NULL)
    {
        snprintf(ad->sound_path, MAX_PATH_SIZE, "%s%s",  resource_path, ALARM_SOUND_FILENAME);
        free(resource_path);
    }
    if (player_create(&(ad->player)) == PLAYER_ERROR_NONE
        && player_set_uri(ad->player, ad->sound_path) == PLAYER_ERROR_NONE
        && player_set_completed_cb(ad->player, playback_completed_cb, ad) == PLAYER_ERROR_NONE)
    {
        dlog_print(DLOG_INFO, LOG_TAG, "Player created.");
    }
    else
    {
        dlog_print(DLOG_ERROR, LOG_TAG, "Error when creating player!");
    }

// to be continued…
- Set up the sensor listener
Now we will set up the main point of our service – the sensor listener. First we get the handle to a default sensor. Then we create a listener listening to this sensor and set a callback to be executed when a sensor event occurs. To have an access to player in the callback we passed ad structure as a last parameter to the sensor_listener_set_event_cb(). It will be retrieved in the callback as user data. “200” means 200 milliseconds interval between subsequent sensor events. Setting the option SENSOR_OPTION_ALWAYS_ON means that the sensor events will occur all the time – even when the smartwatch screen is off.
// continuing service_app_create()…

// Preparing and starting the sensor listener for the accelerometer.
    if (sensor_get_default_sensor(SENSOR_ACCELEROMETER, &(ad->sensor)) == SENSOR_ERROR_NONE)
    {
        if (sensor_create_listener(ad->sensor, &(ad->listener)) == SENSOR_ERROR_NONE
            && sensor_listener_set_event_cb(ad->listener, 200, sensor_event_callback, ad) == SENSOR_ERROR_NONE
            && sensor_listener_set_option(ad->listener, SENSOR_OPTION_ALWAYS_ON) == SENSOR_ERROR_NONE)
        {
            if (sensor_listener_start(ad->listener) == SENSOR_ERROR_NONE)
            {
                dlog_print(DLOG_INFO, LOG_TAG, "Sensor listener started.");
            }
        }
    }
    return true;
}
Step 3: When a sensor event occurs
- Read the sensor data and stop the sensor listener when the criteria are met
Let’s see how to implement an event callback which is to be executed every 100 ms as it was set in sensor_listener_set_event_cb() call.
As usually we extract the application data from the user_data parameter. Then we double-check if the sensor event retrieved is a valid accelerometer event. If so, we check if there is an acceleration reading exceeding 15 m/s2 in any direction (it means absolute value of 15 on any of the fields in event->values[] array). We just chose 15 arbitrarily; it is sufficiently higher than the gravitational acceleration (9,81 m/s2), so when the smartwatch is left idle in any position or moved delicately, the threshold is not crossed. However you can set your threshold value as you wish. We used macro definition for constant value of 15 to easily change it when needed.
Then, when the threshold criteria are met, we stop the sensor listener. The explanation for this is that while playing sound we don’t need to monitor the sensors. We don’t want either to play the sound many times at one moment or restart playback over and over again in case of constant shaking. We want to stop the listener, let the player play a sound until the end, then start listening and, if needed, play the sound again. As you remember, when we were setting up the player on application startup, we had set a completion callback using the player_set_completed_cb().
void sensor_event_callback(sensor_h sensor, sensor_event_s *event, void *user_data)
{
    // Extracting application data
    appdata_s* ad = (appdata_s*)user_data;

    sensor_type_e type = SENSOR_ALL;
    if((sensor_get_type(sensor, &type) == SENSOR_ERROR_NONE) && type == SENSOR_ACCELEROMETER)
    {
        if (event->values[0] >= ACCELEROMETER_SHAKE_THRESHOLD_VALUE
            || event->values[1] >= ACCELEROMETER_SHAKE_THRESHOLD_VALUE
            || event->values[2] >= ACCELEROMETER_SHAKE_THRESHOLD_VALUE
            || event->values[0] <= -ACCELEROMETER_SHAKE_THRESHOLD_VALUE
            || event->values[1] <= -ACCELEROMETER_SHAKE_THRESHOLD_VALUE
            || event->values[2] <= -ACCELEROMETER_SHAKE_THRESHOLD_VALUE)
        {
            dlog_print(DLOG_INFO, LOG_TAG, "Event occurred!");
            // We stop the sensor listener, because until the sound playback
            // is finished we don't need to monitor sensors.
            if (sensor_listener_stop(ad->listener) == SENSOR_ERROR_NONE)
            {
                dlog_print(DLOG_INFO, LOG_TAG, "Sensor listener temporarily stopped!");
            }
            else
            {
                dlog_print(DLOG_INFO, LOG_TAG, "Something went wrong! Sensor listener could not be stopped!");
            }
- Play a sound
Here we play the sound and restart the sensor listener in case of playback failure.
            // Starting playback:
            player_state_e state = PLAYER_STATE_NONE;
            if ((player_prepare(ad->player) == PLAYER_ERROR_NONE)
                && (player_get_state(ad->player, &state) == PLAYER_ERROR_NONE)
                && (state == PLAYER_STATE_READY))
            {
                dlog_print(DLOG_INFO, LOG_TAG, "Player is ready.");
                if (player_start(ad->player)== PLAYER_ERROR_NONE)
                {
                    dlog_print(DLOG_INFO, LOG_TAG, "Player started!");
                }
                else
                {
                    dlog_print(DLOG_ERROR, LOG_TAG, "Starting player failed! Restarting sensor listener...");
                    if (sensor_listener_start(ad->listener) == SENSOR_ERROR_NONE)
                    {
                        dlog_print(DLOG_INFO, LOG_TAG, "Sensor restarted.");
                    }
                    else
                    {
                        dlog_print(DLOG_ERROR, LOG_TAG, "Restarting sensor failed!");
                    }
                }
            }
            else
            {
                dlog_print(DLOG_ERROR, LOG_TAG, "Player is not ready! Player state: %d", state);
                dlog_print(DLOG_ERROR, LOG_TAG, "Restarting sensor listener...");
                if (sensor_listener_start(ad->listener) == SENSOR_ERROR_NONE)
                {
                    dlog_print(DLOG_INFO, LOG_TAG, "Sensor restarted.");
                }
                else
                {
                    dlog_print(DLOG_ERROR, LOG_TAG, "Restarting sensor failed!");
                }
            }
        }
    }
}
- Restart the sensor listener when the sound playback is completed
The callback for completed playback was already registered on the application startup. Now let’s see how it is implemented. When playback is completed it means we can start listening for accelerometer readouts again. That’s why we restart our sensor listener with the sensor_listener_start() and reset the player using the player_unprepare().
void playback_completed_cb(void *user_data)
{
    // Extracting application data
    appdata_s* ad = (appdata_s*)user_data;

    dlog_print(DLOG_INFO, LOG_TAG, "Sound playback completed.");
    if (sensor_listener_start(ad->listener) == SENSOR_ERROR_NONE)
    {
        dlog_print(DLOG_INFO, LOG_TAG, "Sensor listener started again.");
    }
    // Playback completed, we should reset the player:
    if (player_unprepare(ad->player) == PLAYER_ERROR_NONE)
    {
        dlog_print(DLOG_INFO, LOG_TAG, "Player unprepared.");
    }
    else
    {
        dlog_print(DLOG_ERROR, LOG_TAG, "Error when unpreparing!");
    }
}
Step 4: Cleaning up
On application termination we just do a simple cleanup.
void service_app_terminate(void *data)
{
    // Extracting application data
    appdata_s* ad = (appdata_s*)data;

    //Stopping & destroying sensor listener
    if ((sensor_listener_stop(ad->listener) == SENSOR_ERROR_NONE)
        && (sensor_destroy_listener(ad->listener) == SENSOR_ERROR_NONE))
    {
        dlog_print(DLOG_INFO, LOG_TAG, "Sensor listener destroyed.");
    }
    else
    {
        dlog_print(DLOG_INFO, LOG_TAG, "Error occurred when destroying sensor listener or a sensor listener was never created!");
    }

    //Stopping & destroying player
    if (player_destroy(ad->player) == PLAYER_ERROR_NONE)
    {
        dlog_print(DLOG_INFO, LOG_TAG, "Player destroyed.");
    }
    else
    {
        dlog_print(DLOG_ERROR, LOG_TAG, "Error when destroying player or a player was never created!");
    }
}
Summary
Now you know how to create a sensor-reading service working in background. You can run this service on a wearable device using the Tizen SDK, but it is not a ready application package, as standalone services cannot be uploaded to the Tizen Store. This article was the first of a “Create a native service for Tizen wearables” series. The rest of the steps needed to create a complete service application will be explained in upcoming articles.
Was this document helpful?
We value your feedback. Please let us know what you think.