Matter.js – a 2D physics library in Tizen
PUBLISHED
Introduction
For many years we had only one choice if we needed a 2D physics library for our projects. This choice was called Box2D. It was versatile, quite easy to use, with many options and had many users, so getting support information was convenient. You could see this library being ported to JavaScript, Flash or even a C version used in Java and many more.
Today we want to show you Matter.js. It is also a 2D physics library for JavaScript and works very well with the Tizen Platform. We want to explain how to create a basic Tizen project, utilizing Matter.js and Tizen Studio (new name for Tizen IDE). We will show you how to add various object types, how to create constraints, assign bitmaps to physical objects and so on. All of this is summarized in the attachment, containing the source code of our application and accompanying this article (fig.1).
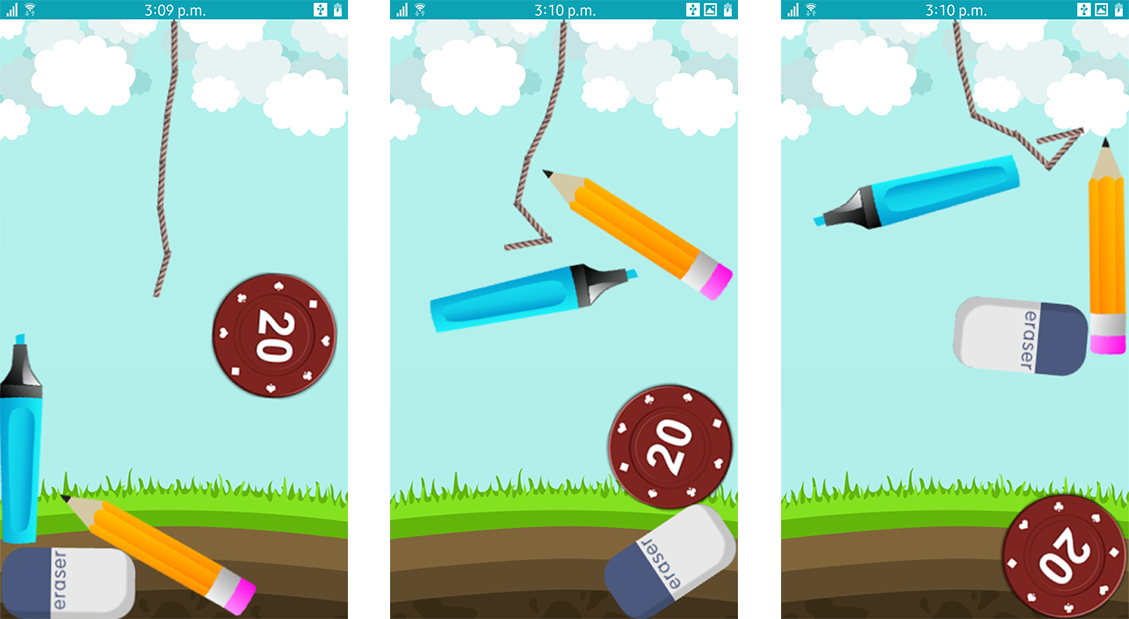
Figure 1 – Our Matter.js sample Tizen application
Matter.js basic scene setup
First of all we need to get the Matter.js library itself. You can find it and clone or download directly from GitHub – https://github.com/liabru/matter-js#install . There are also options to install it using bower and npm.
After downloading you should add your library using the <script src=””> tag, like in the example below.
<script src="matter.js" type="text/javascript"></script>
Having done that, you can create the basics of the matter.js physics scene. First of all, it is important, that you should execute your code inside the window.onload function. Inside of your HTML file you should use some kind of container to hold the physics simulation in. We have chosen to use the <body> for that cause. So we fetched it using the document.querySelector(“body”) and assigned it to a JS variable.
// Fetch the HTML element
   var body = document.querySelector("body");
The next thing to do for our convenience is to assign Matter.js aliases to JavaScript variables for easier usage, like in the example below. As you can conclude from those aliases, we will be using an Engine inside a World, with Bodies with Constraints and Composites with firing Events. We won’t be using here all of them, but we are showing it to you just for getting the general idea about aliases.
// Assign Matter.js aliases to variables for easier usage
   var Engine = Matter.Engine,
		World = Matter.World,
		Body = Matter.Body,
		Bodies = Matter.Bodies,
		Composite = Matter.Composite,
	        Composites = Matter.Composites,
	        Constraint = Matter.Constraint,
	        MouseConstraint = Matter.MouseConstraint,
	        Events = Matter.Events;
After declaring the aliases it is the time to setup the physics engine. The code snippet below shows how to do it. You can see that alongside physics option values which we are assigning, like the density, frictionAir, restitution or friction, we are also manipulating rendering options like the width and height of the physics simulation area, as well as the background image or the visibility of the debug indicators, like wireframes, angle indicators and so on. In our example we have provided a bg.png image located in the images folder to be used as our background.
var engine = Engine.create(body,{
        	density: 0.0005,
	        frictionAir: 0.06,
	        restitution: 0.3,
	        friction: 0.06,
	    	  render: {
		    		    options: {
		    		      showAngleIndicator: false,
		    		      isStatic: true,
		    		      wireframes: false,
		    		      width: 360,
		    		      height: 640,
		    		      background: 'images/bg.png',
		    		      visible: false
		    		    }
	    		    }
	        });
After that we should setup some bodies for our physics world. And our first bodies should be static because we want them to be the borders of our physics simulation area. We don’t want our non-static bodies to fall off our view, so we need to make unmovable obstacles preventing them from doing that. For the purpose of our “scene walls” we will use four rectangle type bodies as shown below.
// Static bodies - walls
        var ceiling = Bodies.rectangle(0, -28, 720, 60, { isStatic: true, render: { visible: false} });
	var ground = Bodies.rectangle(40, 650, 720, 60, { isStatic: true, render: { visible: false} });
	var wallLeft = Bodies.rectangle(-28, 310, 60, 650, { isStatic: true, render: { visible: false} });
	var wallRight = Bodies.rectangle(388, 310, 60, 650, { isStatic: true, render: { visible: false} });
As you can see every new rectangle body is created using the Bodies alias and invoking a rectangle function which takes in parameters of the body to be created and then stores them in a variable. The first two parameters are the x and y position of the body on the stage. The third and fourth parameters are the width and height of our new rectangular body. The last things we are doing here is we pass into the options object information that we want the body to be unmovable ( isStatic ) and that we don’t want it to be visible while rendering ( visible: false ).
Now we are ready to put into our simulation a movable, dynamic body. For the purpose of our example we will demonstrate it on a rectangle body with a texture assigned to it. You can see how to accomplish that in the following code snippet.
   var pencil = Bodies.rectangle(130, 200, 39, 227, {
                render: {
	                   sprite: {
	                      texture: 'images/p1.png'
	                   }
	                }
	        });
Everything above is the same like when initializing our “wall” bodies, except the isStatic and visible options. As well as in the render value we specified a sprite and then a texture path targeting the p1.png file which is located in the images folder and can be seen in figure 1. Also please note that the Matter.js default engine measurement units are pixels. Unlike in Box2D which uses its own measuring units, in Matter.js it is very easy to create textures for physical bodies because they share the same pixel measurement unit.
We would also like to touch and control the physical bodies with the mouse cursor or by tapping and dragging them around the screen. In order to achieve that, we have to create a mouse constraint. As you can see it’s fairly easy and we just need to invoke the create function on the MouseConstraint alias with passing the engine variable, in which the created constraint should be set.
// Mouse constraint (touching and moving bodies)
   var mouseConstraint = MouseConstraint.create(engine);
After declaring all of our physical objects we need now to add them to our world. We are doing that by using the World alias and invoking the add function. Then as the first parameter we pass in the engine.world variable and the next one to pass is an array of physical objects declared earlier. In our case it will be ceiling, ground, wallLeft, wallRight, pencil and, of course, the mouseConstraint.
// add all of the bodies to the world
   World.add(engine.world, [pencil, ceiling, ground, wallLeft, wallRight, mouseConstraint]);
The last thing to do is to run the Engine.
// Fire up the 2D engine
   Engine.run(engine);
Our complete code should look like this:
window.onload = function() {

    function init(){

            // Fetch the HTML element
	    var body = document.querySelector("body");

	    // Assign Matter.js aliases to variables for easier usage
	    var Engine = Matter.Engine,
		    World = Matter.World,
		    Bodies = Matter.Bodies,
	            MouseConstraint = Matter.MouseConstraint;

	    // Create the simulation engine, describe parameters and sets the rendering options
	    var engine = Engine.create(body,{
	    	density: 0.0005,
	        frictionAir: 0.06,
	        restitution: 0.3,
	        friction: 0.06,
	    	render: {
		    	    options: {
		    		 showAngleIndicator: false,
		    		 isStatic: true,
		    		 wireframes: false,
		    		 width: 360,
		    		 height: 640,
		    		 background: 'images/bg.png',
		    		 visible: false
		            }
	    		}
	        });

	    // Static bodies - walls
	    var ceiling = Bodies.rectangle(0, -28, 720, 60, { isStatic: true, render: { visible: false} });
	    var ground = Bodies.rectangle(40, 650, 720, 60, { isStatic: true, render: { visible: false} });
	    var wallLeft = Bodies.rectangle(-28, 310, 60, 650, { isStatic: true, render: { visible: false} });
	    var wallRight = Bodies.rectangle(388, 310, 60, 650, { isStatic: true, render: { visible: false} });

	    // Dynamic bodies
	    var pencil = Bodies.rectangle(130, 200, 39, 227, {
	        render: {
	            sprite: {
	              texture: 'images/p1.png'
	            }
	          }
	        });

	    // Mouse constraint (touching and moving bodies)
	    var mouseConstraint = MouseConstraint.create(engine);

	    // add all of the bodies to the world
	    World.add(engine.world, [pencil, ceiling, ground, wallLeft, wallRight, mouseConstraint]);

	    // Fire up the 2D engine
	    Engine.run(engine);

	}

	init();

        // add eventListener for tizenhwkey
           document.addEventListener('tizenhwkey', function(e) {
                 if (e.keyName === "back") {
                   try {
                       tizen.application.getCurrentApplication().exit();
                   } catch (ignore) {}
                 }
           });
};
So we finally managed to run the Matter.js engine and we can see the pencil object flying around (fig.2). And we can even manipulate it, by dragging and throwing it around. Wonderful!

Figure 2 – a simple Matter.js example
Physics debugging
It is worth mentioning here that while working with not very complicated scenes you can directly attach textures and other enhancements to your physics scene. But in most cases it is advised first to create all the necessary objects, constraints, forces, etc. and then test them using them with shapes without textures (fig.3). Then, if the physics model is satisfactory in terms of performance on the target device, you should add textures and additional mechanisms. But if you need a pure approach and want a minimal burden of the physics model on your target device CPU then we recommend turning on the wireframe mode on the Matter.js engine. You can do that by changing the wireframes parameter in Matter.js engine to true, just like in the example engine setup below (fig.4).
var engine = Engine.create(body,{
        	density: 0.0005,
	        frictionAir: 0.06,
	        restitution: 0.3,
	        friction: 0.06,
	    	render: {
		    		    options: {
		    		      showAngleIndicator: false,
		    		      isStatic: true,
		    		      wireframes: true,
		    		      width: 360,
		    		      height: 640,
		    		      visible: true
		    		    }
	    		    }
	        });

Figure 3 – example for debugging shapes In Matter.js (wireframes set to false)

Figure 4 – another example for debugging shapes In Matter.js (wireframes set to true)
Summary
In this article we showed you how you can start your adventure with Matter.js and Tizen. We have showed you how to setup a template Matter.js project. Then we have described how to setup the main engine, where in HTML we should initialize the engine, how to create bodies and constraints. We have also explained what for are the static and dynamic bodies and we described how to use the debug mode in Matter.js. We hope that this article will be helpful for you in familiarizing yourself with Matter.js. Please have a look at both sample projects attached to the article and play around with them. One is a simple Matter.js boilerplate, while the other one uses more complex scenarios, presented on figure 1.
For more information on how to create composites like chains, stacks, events and so on, we encourage you to venture through the official Matter.js web site.
Was this document helpful?
We value your feedback. Please let us know what you think.