First steps with Unity in Tizen – part 3
PUBLISHED
Introduction
In the previous article we have described in general the main components of the Unity3D Editor and we added and configured few 3D objects creating the visual side of the application. The next step will be adding some interactivity using the scripting language. Yes, this time we will focus on coding.
Prerequisites
It is recommended to read the previous part of article series before going further:
First Steps with Unity in Tizen – Part 2
Scripts
In general, scripts are instructions for selected components, so you can control them in your application. Responses to a key press, touch or any other gesture can be easily programmed. In Unity scripts are assets so you create them using the Assets list. You can write your code in C# or JavaScript, but in this tutorial we will present a solution in C# code. If you prefer JavaScript, which in Unity is called UnityScript, then the Unity Scripting API is available for both C# and JavaScript.
To organize your project structure properly we highly recommend to create a dedicated folder for script files. You can do that by creating a new folder in the Assets (Create -> Folder) and name it for example “Scripts”. To create your first script use the Create button in the Project tab, where the Assets list is available and choose C# Script. The Unity Editor should create a new script file. You can name it as you wish and then confirm by pressing the Enter key. If the newly created script is not in the Scripts folder you can drag and drop it to this folder.
If you want to add a script to your object, then you can do it in 3 different ways:
- Choose a proper object from the hierarchy list, then click on the Add Component button located at the bottom of the Inspector view and then select from the list Scripts the desired item and then choose a script
- Use the Add Component button. Then just start typing the name of the script and when it will be highlighted on the list just confirm the choice by pressing the Enter key
- Drag the proper script from the Assets list and drop in at the Add Component button in the Inspector view of the selected object
Camera control
The first component we will write the code for will be the camera. In this case we should create a new script and name it for example the CameraController. After creating that script, perform a double click on its icon to open it in code editor. You should see exact code as the code in the snippet below. This code is generated every time a new C# script file is being created:
using UnityEngine;
using System.Collections;

public class CameraController : MonoBehaviour {

    // Use this for initialization
    void Start () {

    }

    // Update is called once per frame
    void Update () {

    }
}
As you see Unity automatically created the class CameraController which inherits from the base class called MonoBehaviour. By default we get two methods to implement: Start() and Update(). Start() is used for initialization purposes, like assigning initial values for variables. Update() is called every time, when frame updates occur. So it is basically used in a situation related to the visual side of our application. For example when we want to change position of an object, respond to the user input, etc. More information about this can be found in the Creating and using Scripts chapter in the Unity Manual.
What we would like to allow the camera to do is to let the user rotate it vertically using touch gestures (swipes from up to down and down to up). Additionally we will allow to rotate it, but only in the range from -30 to 30 Euler angles on the X axis.
using UnityEngine;
using System.Collections;

public class CameraController : MonoBehaviour {

	private Vector3 lastPosition;
	private Quaternion lastRotation;

	void Start() {
		lastPosition = transform.position;
		lastRotation = transform.rotation;
	}

	void Update () {
		transform.RotateAround(Vector3.zero, Vector3.right, -Input.GetTouch(0).deltaPosition.y/3);
		if (transform.rotation.eulerAngles.x < -30 || transform.rotation.eulerAngles.x > 30) {
			lastPosition = transform.position;
			lastRotation = transform.rotation;
		} else {
			transform.position = lastPosition;
			transform.rotation = lastRotation;
		}
	}

}
Let’s start from the beginning. First we declared two variables of Vector3 type (used to determine object position in 3D space) and Quaternion (used to represent rotation data). These variables will be used to hold information about the last allowed position and rotation of the camera. In case when the camera will be in an inappropriate place we will be able to simply restore the saved information and put it back in it’s place.
In the Start() method we initiate values for private variables lastPosition and lastRotation. They will store values of the current position and rotation of the object by using the transform object attached to every GameObject in Unity3D. This script is attached to the Camera object. The transform variable represents information of this GameObject.
The next step is the implementation of the Update() method. In the beginning we will use the RotateAround() method to rotate the camera around the horizontal axis, passing through the origin point of our 3D world scene. The angle of rotation will be based upon the distance made by the users’ vertical swipe gesture length. The Input.GetTouch method returns an object representing the status of the touch event, deltaPosition – distance between touch start point and swipe end point, y – value for vertical axis.
After performing the Camera movement we check if it should be allowed by checking the rotation angle. If it is between the mentioned above range then we confirm the movement and update the values of lastPosition and lastRotation. Otherwise we restore the previous position data from these variables.
When we have our script ready, then we can save and add it to the Camera object. Now we can Build and Run the project on our Tizen device.
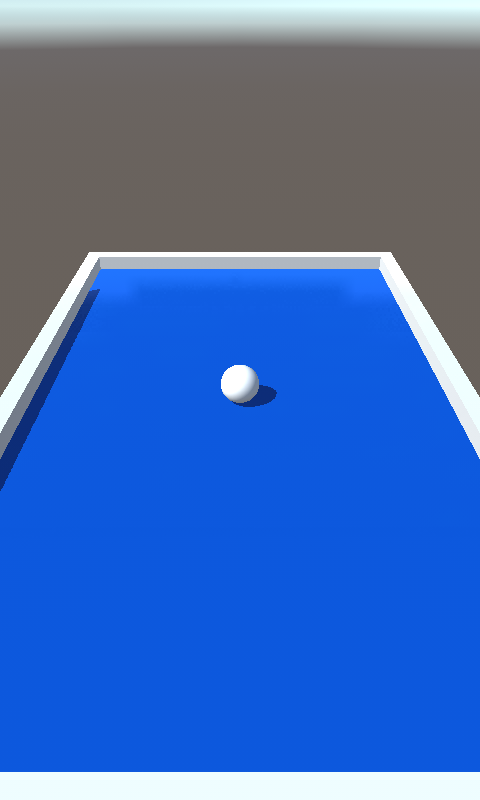
Figure 1. Application state after the camera movement
Player control
The implementation of the Camera movement is completed, but our ball is still in the same place and does not move. Now it is the time to move it using the device accelerometer sensor. Below you can find the code needed to perform that task:
using UnityEngine;
using System.Collections;

public class PlayerController : MonoBehaviour {

    public float speed;

    private Rigidbody rb;
	private Vector3 movement;
	private float moveX, moveY;
	private Vector3 cameraStartPosition;
	private Quaternion cameraStartRotation;

	void Start () {
        rb = GetComponent<Rigidbody>();
		cameraStartPosition = Camera.main.transform.position;
		cameraStartRotation = Camera.main.transform.rotation;
	}

    void FixedUpdate() {
		moveX = Input.acceleration.x;
		moveY = Input.acceleration.y;
		movement.Set(moveX, 0, moveY);
		rb.AddForce(movement * speed);
    }

	void OnMouseDown() {
		Camera.main.transform.position = cameraStartPosition;
		Camera.main.transform.rotation = cameraStartRotation;
	}

}
By looking at the variable declarations you can see that we haven’t used the Rigidbody type yet. It represents an object component, which is responsible for physics controlled motion in the Unity3D game engine. In our application it will be used on the sphere, enabling the usage of the gravity force and readouts from the accelerometer
In the Start() method we initiate the Rigidbody type variable (rb) by getting a previously added component through the object Inspector view. We also saved the initial position and rotation of the camera. You will probably ask why, but the answer will come soon.
In this implementation we are not using the Update() method, but FixedUpdate(). It should be used only when we operate on Rigidbody type objects. To move our ball we have to use the force on it. First of all we get the component of the force. We save the current reading from the device accelerometer in the horizontal (moveX) axis and the vertical (moveY) axis. Basing on it we compound them in the movement variable and use it as a parameter in the AddForce() method. Additionally we multiply it by the speed value to change the force value in order to achieve faster movement.
The last method we are implementing is the OnMouseDown(). Thanks to it, every time we tap on the sphere we will restore the camera view to the initial state.
Now after saving the PlayerController script and adding it to the Player object you can test it on your device. Remember that in order to properly use the application on your device, the display should be directed upward. Now the ball should move consistent to the gravity force vector.

Figure 2. Application look after ball movement
Please pay attention while manipulating the speed variable, which has public access. Thanks to it, after assigning the script to the object, you can observe and set its value in the Inspector view.

Figure 3. The Player Inspector view with public variable implementation in our script
Exiting the application
As a responsible developer you should allow the user to exit the application using a dedicated button. In case of Tizen devices, this button is the Back button. Below you can find the implementation:
using UnityEngine;
using System.Collections;

public class ExitScript : MonoBehaviour {

	void Update() {
		if (Input.GetKey("escape"))
			Application.Quit();
	}
}
As you see, the code for that action is simple, the script checks every time if the user has pressed the quit button and when detected it closes our application. You can add this script to any component on the scene. But the Camera object seems to be a reasonable choice.
Summary
You have completed all parts of this article series and you should be able to create interactions in a Unity application for your Tizen device. As always we encourage you to download the sample application attached to this article and freely modify the existing project. You can develop it, make it more complex and the most important thing, you will learn more. Please remember about the trainings at the Learn with Unity official website. We wish you good luck in developing your future Unity3D applications.
Was this document helpful?
We value your feedback. Please let us know what you think.