Cocos2d-html5 game framework in Tizen applications – Introduction
PUBLISHED
What is Cocos2d-html5? – Introduction
Cocos2d-x is an open-source cross-platform game framework designed for 2D graphical environment. It has been ported to many languages and mobile platforms including Android, iOS, Windows, etc.
Cocos2d-html5 is the JavaScript version of Cocos2d-x, designed for web browsers and based on HTML5 technology. Tizen provides best HTML5 compliant web app framework, so Cocos2d-html5 can be made to work on it easily. Cocos2d-html5 uses Canvas object to render the graphics.
Cocos2d-x is a very popular library. There are over 500 million games created using the Cocos2d-x framework.
This article is meant for making you understand, how to use the Cocos2d-html5 library in Tizen applications. A sample application called RunSnailRun, has been used here to demonstrate the same, here is a brief description of it.
Sample application and prerequisites
A sample game called RunSnailRun is provided to demonstrate the use of physics and game libraries. It uses Coco2d-html5 to handle game displaying. The aim of the game is to make the hedgehog eat all the snails in a limited time. The hedgehog is controlled by the player with the help of the device’s gyroscope or keyboard. The sample application is based on the jQuery Mobile 1.2.0 framework which allows you to create highly scalable web applications with an intuitive and coherent user interface. To be able to use the jQuery Mobile, your application must include the jQuery library as well.
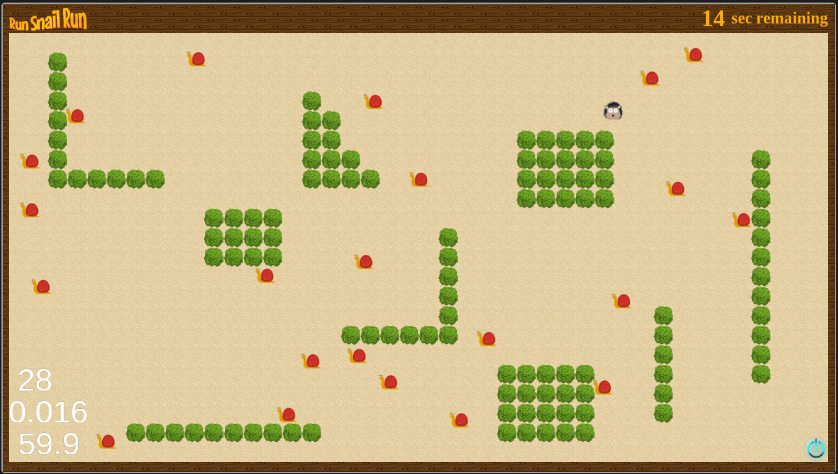 Fig 1: Game screen
The code samples use custom functions to send log messages to the console. They can be found in the application’s js/lib/tizen folder.
There are a few important guidelines that you need to know about Cocos2d-html5. In order to use Cocos2d-html5 library you only need to run cocos2d.js file. It dynamically loads all the Cocos2d-html5 sources. Your files need to be specified inside the appFiles array in cocos2d.js and they also will be loaded along with the Cococ2d-html5 sources. After everything is loaded you should start the game inside main.js file.
It is important to mention that all cocos2d-html5 configuration values (like frame rate or box2d) are set in cocos2d.js file whereas all game configuration properties (like game timeout) are set in game.js file.
NOTE: The sample application, attached to this article, requires a device supporting the DEVICE ORIENTATION event.
Inheritance model used by Cocos2d-html5
JavaScript does not have a classical object oriented inheritance approach. It is prototype based. This means that JS does not support classes out of the box. Fortunately the prototype base approach is very flexible and allows the creation of an environment with the normal object oriented inheritance, known from Java and C++.
This classical Java and C++ inheritance approach is applied in the Cocos2d-html5. When you look at the following sample source code you will see that it is very similar to the structure known from typical object oriented languages.
classes.sprites.Background = cc.Sprite.extend({
    width : 1280,
    height : 670,
    ctor : function() {
        this._super();
    }
});
In this example, the classes.sprites.Background class inherits from cc.Sprite. This of course means that all the fields and methods will be inherited, but as you can see there is a small difference in the structure. The constructor does not have the same name as the class, but it is called “ctor”. You can add more functions to the Background class, just as the constructor function is implemented.
There are neither private nor public properties, so all methods and fields are publically available.
The Background class object can be constructed just as follows:
this.background = new classes.sprites.Background();
This newly created background object is of the Background type, and also of the Sprite type and of all the types that Sprite inherits from.
Application anatomy: scenes, layers, sprites and more
Sprites
var snail = cc.Sprite.create("images/splash/snail.png");
Layers
Layers contain sprites, labels and other layers. They can be lied down on top of each other. They are the size of the drawable area and can be transparent. Layers receive events like keyboard input. Layers can also be used as backgrounds. You can create a layer like this:
var yellowBackground = cc.LayerColor.create(cc.c4b(255,255,0,255));
You can also extend the Layer class, so your object will inherit from layer and will have its methods and properties. You can then define your own constructor in which you add some sprites during level initialization:
classes.layers.Intro = cc.Layer.extend({
    ctor : function() {
        this._super();
        var snail = cc.Sprite.create("images/splash/snail.png");
        snail.setPosition(new cc.Point(0, 0));
        this.logo = cc.Sprite.create("images/splash/logo.png");
        this.logo.setPosition(new cc.Point(50, 50));
        this.addChild(snail, 4);
        this.addChild(this.logo, 2);
        return true;
    }
});
Scenes
var aScene = cc.Scene.create();
aScene.addChild(yellowBackground);
The following image explains more clearly the relations between scenes, layers and sprites:
 Fig 2: Cocos2d-x layer architecture
Above figure shows a single scene, consisting of three layers. The right one is a background and is just filled with green color. The other two layers have snail sprites. The Top Layer is placed on the top and so all elements drawn on this layer will be displayed on top of all elements that are inside the Middle and the Background Layer.
If you are familiar with graphic programs, like GIMP or Photoshop, then you will notice that layering the displayed image is a very handy and common approach.
When you create a Cocos2d-x based game, what you basically do is create sprites, layers and scenes and compose them to make a good playable game. For example, you can create one layer as background for your game and another one with some sprites for the player and enemies. Now each level will be a new scene composed of this background layer and the second layer holding your sprites in different positions and with different properties to change the difficulty. Thanks to this approach you can create new game levels very fast using previously created objects.
Director
Director is a singleton object that is used to manage transition/navigation between scenes. It can start a scene, switch between them and can inform about which scene is currently active. You can always get a reference to the Director by calling the following method:
var director = cc.Director.getInstance();
The director object allows setting such parameters as:
- Animation Interval:
director.setAnimationInterval(1.0 / 60);
- FPS display:
director.setDisplayStats(true);
You can also use the director to acquire the current viewport or pause and resume animation:
director.getWinSize();
director.pause();
director.resume();
At game start you can request the director to run an animation loop with a scene by calling the runWithScene function on the director object:
director.runWithScene(aScene);
This will start a rendering loop inside your game with a speed of 60 frames per second, unless you changed the animation interval to some other value. From now on, whenever the Cocos2d-x library will draw a new frame, it will call the update method inside layers. This means that you need to place all functions that render your layer inside its update function. For example, in the RunSnailRun application, the snails and hedgehog positions are updated in each frame using the update function:
 classes.layers.Level = cc.Layer.extend({
    //(...)
    update : function(dt) {
        var that = this;
        this.snails.forEach(function(snail) {
            that.moveAndCheckForObstacles(snail, dt);
        });
    },
    //(...)
Application
The application class is a component that represents your game. Before you can start anything you have to create an application object where you load all the resources and pass the id of the HTML5 Canvas object that will render the content. Here is a simplified version of the Application object from the RunSnailRun Application:
classes.Application = cc.Application.extend({
    config : game.config.cocos2dx,
    ctor : function(scene) {
        this._super();
        this.startScene = scene;
        cc.COCOS2D_DEBUG = this.config['COCOS2D_DEBUG'];
        cc.setup(this.config['tag']);
        cc.AppController.shareAppController().didFinishLaunchingWithOptions();
    },

    applicationDidFinishLaunching : function() {
        var that = this;
        // initialize director
        var director = cc.Director.getInstance();

        // turn on display FPS
        director.setDisplayStats(this.config['showFPS']);

        // set FPS. the default value is 1.0/60 if you don't call this
        director.setAnimationInterval(1.0 / this.config['frameRate']);

        //load resources and run
        cc.Loader.preload(game.config.resources, function() {
            var startSceneInstance = new that.startScene();
            director.replaceScene(startSceneInstance);
            game.setScene('intro', startSceneInstance);
        });
        return true;
    }
});
As you can see most of the director commands are called inside the applicationDiDFinishLaunching method. This function is called as soon as all the resources are loaded and the Cocos2d-x library is ready to work and render scenes. You may also notice that a lot of the configuration data is stored in a different object called “config”, because it is easier to keep all of the settings in one place.
Moving sprites – implementation of the move method
Sprites are the most basic and common element of any Cocos2d-x applications. As mentioned before they are just images. But thanks to the Cocos2d-x library, they are very mobile and flexible images. They can be easily modified, moved, rotated, animated etc.
Cocos2d-html5 enables you to perform the following operations on sprites:
- Scale: setScale(scale, scaleY)
- Move: setPosition(pos)
- Rotate: setRotation(rotation)
- Change opacity: setOpacity()
- Change anchor point: setAnchorPoint()
Most of these functions are understandable from the name, except for the last one. What is an anchor point? This is the point within an image which is a reference point for all sprite functions. So if an anchor point is set in the middle of an image, the rotation function will rotate the image around the middle point. If an anchor point is set in the top left corner, then setting a new image position will set the new position for the image’s top left corner. By default the anchor point is set in the middle.
Creating sprites is very simple. This is an example of a Snail sprite class from the RunSnailRun application:
classes.sprites.Snail = cc.Sprite.extend({
    width : 30,
    height : 30,
    x : 0,
    y : 0,
    vx : Math.random() - 0.5,
    vy : Math.random() - 0.5,
    ctor : function() {
        this._super();
        this.initWithFile("images/snail.png");
    },

    move : function() {
        this.x = this.getPosition().x;
        this.y = this.getPosition().y;

        this.vx += Math.random() * 0.5 - 0.25;
        this.vy += Math.random() * 0.5 - 0.25;

        this.x += this.vx;
        this.y += this.vy;

        return new cc.Point(this.x, this.y);
    }
});
As you can see the Snail class has its own constructor called “ctor” where the snail’s image is initialized. Every time the Snail object is created, the snail.png image is assigned to the object. Creating a Snail instance is as simple as this:
var snail = new classes.sprites.Snail();
Additionally the Snail class has its move method which calculates the new object position. This method is called during rendering. It returns a new snails’ position (to which the snail is moved).
Summary
Those were the most basic and important elements of Cocos2d. It should give you a general idea on how the Cocos2d library works. This article covers only the basics of cocos2d-HTML5, in the next part “Cocos2d-html5 game framework in Tizen applications: Follow-up” we will cover more details of cocos2d-HTML5.
Was this document helpful?
We value your feedback. Please let us know what you think.