Accessing Native Audio Playback and Recorder Controls in Web Applications
PUBLISHED
Accessing Native Audio Playback and Recorder Controls in Web Applications
This tutorial helps in understanding how to access the native (or standard) audio player controls like Play, pause, stop, seek and audio record controls like record, pause and stop recording in your web applications. This could be needed, when you want to create your own user interface in your application for the player controls and want to use the existing native media player instead of implementing a web audio player. The sample applications are implemented only for the audio playback and audio recording.
To cater our needs, we need to create a Tizen Hybrid application project , where the native application will be a service application without UI and will be running in the background. And the user interface design is done in the web application.
The Tizen’s MessagePort device API , provides the functionality for communicating with other applications and the same API is used in our application for communicating between web and native application.
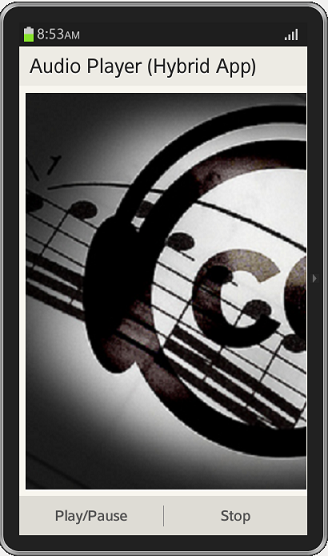
1. Audio Playback Hybrid Application
1.1 Web Application Implementation
In the init function we bind the UI control buttons for Play and stop with the respective functions handlers. And also we launch the native service application in the page initialization itself, so that you have the service ports available and ready to listen from the web application. The application API’s launch method is called to launch the native service application.
//First launch the service
   LaunchNativeService();
// Handle the play button
	$("#btn-play").bind("vclick", function(){
		audioPlayPause();
		return false;
	});
 //  Handle the stop button
	$("#btn-stop").bind("vclick", function(){
		stopPlayback();
		return false;
	});
As part of launching native service application, we need to check , if the service application is already running or need to be launched, you have to get the list of currently running or contexts of the applications as below,
function LaunchNativeService() {
  try {
    tizen.application.getAppsContext(onGetAppsContextSuccess, onGetAppsContextError);
  } catch (exc) {
    console.log("Get AppContext Error");
   }
}
On success, the onGetAppsContextSuccess method will have the context details of the currently running applications and if the service application is not running then the native service will be launched.
function onGetAppsContextSuccess(contexts) {
	for (var i = 0; i < contexts.length; i++) {
	    var appInfo = tizen.application.getAppInfo(contexts[i].appId);
	    if(appInfo.id == gServiceAppId){
		console.log("Running Service App found");
		ServiceAppFound=true;
		break;
	     }
	}
	if (ServiceAppFound) {
	    console.log("Service App found and ready to serve");
	    // Now initialize the message ports
	    console.log("Initializing message ports");
	    initMessagePort();
	}else{
	    console.log("Service app not ready, will launch the service now");
	    launchServiceApp();
	}
}
And on successful launch of the service application the message ports are initialized to communicate with the service application.
function launchServiceApp() {
	function onSuccess() {
	    console.log("Service App launched successfully!");
	    // Now initialize the message ports
	    console.log("Initializing message ports");
	    initMessagePort();
	}
	try {
	    console.log("Launching [" + gServiceAppId + "]");
	    tizen.application.launch(gServiceAppId, onSuccess, onError);
	} catch (exc) {
	    alert("launch exc:" + exc.message);
	}
}
As part of message port initialization, we create the local message port object instance and register a callback function onReceive to listen from the native service application.
gLocalMessagePort = tizen.messageport.requestLocalMessagePort(gLocalMessagePortName);
		gLocalMessagePortWatchId = gLocalMessagePort.addMessagePortListener( function(data, remote) { onReceive(data, remote);});
And to send messages to the native service application , we need to create a object instance of the RemoteMessagePort interface and use the sendMessage method to send the data.
gRemoteMessagePort = tizen.messageport.requestRemoteMessagePort(gServiceAppId, gServicePortName);

function sendCommand(command)
{
   gRemoteMessagePort.sendMessage([ { key:"command", value:command } ], gLocalMessagePort);
   console.log("Sending: " + command);
}
On receiving the message from the service application, the message data is retrieved as key-value pair and processed accordingly. In our case we just log to console, if the playback has started or stopped from the service. And if the message received is exit , then we just remove the message port listener.
for(var i in data) {
   if(data[i].key == "server")
   message = data[i].value;
   }
   console.log("Received : " + message);
   if(message == "started"){
	console.log("Playback using native media player started");
   }else if(message == "stopped"){
        console.log("Playback stopped");
   }else if(message == "exit"){
	 if(gRemoteMessagePort)
	    gRemoteMessagePort = null;
	 if(gLocalMessagePort) {			   gLocalMessagePort.removeMessagePortListener(gLocalMessagePortWatchId);
			gLocalMessagePort = null;
  	}
  }
1.2 Native Service Implementation
The Player class Tizen::Media::Player provides methods to play audio and video contents from local storage and server over RTSP or HTTP. The general controls like play, pause, resume, stop , controlling the volume and looping audio or video content and many more timing methods are supported. And the sample application demonstrates the audio playback with basic controls like, play, pause and stop.
Initializing the service application
In the NativePlayerService.cpp,we initialize the service message ports and the media player service in the OnAppInitializing method, as this is the function which will be invoked when the service app is in the initializing state.
// Initialize ServerMessagePort
__pMessagePort = new (std::nothrow) ServiceMessagePort();
TryReturn(__pMessagePort != null, false, "[E_FAILURE] Failed to create __pMessagePort.");
AppLog("__pMessagePort is created.");

r = __pMessagePort->Construct(LOCAL_MESSAGE_PORT);
TryReturn(IsFailed(r) != true, r, "[%s] Failed to construct __pMessagePort",     GetErrorMessage(r));
AppLog("__pMessagePort is constructed.");
Then, we create and initialize the media player object,
__pMediaPlayer = new (std::nothrow) MediaPlayerService();
TryReturn(__pMediaPlayer != null, false, "[E_FAILURE] Failed to create __pMediaPlayer.");
AppLog("__pMediaPlayer is created.");

// Initialize Media player
__pMediaPlayer->InitPlayer();
Handling the service request from the web application
The service message port’s OnMessageReceivedN method (in file ServiceMessagePort.cpp) is responsible for handling the requests from the web application and propagating it within the native service application. The method receives the remote message port (of the web application) information and the message to be handled as IMap instance, which contains unique keys and each key maps to a single value. Similarly the data is sent back to the web application as a HashMap instance.
Imap object instance to retrieve the request data from web application,
String *pData = static_cast<String *>(pMessage->GetValue(String(L"command")));
HashMap Object instance to send the data in key-value pairs to web application,
HashMap *pMap = new HashMap(SingleObjectDeleter);
pMap->Construct();
Below is how we retrieve the value of the data received and send a user event to the service application itself.
if (pData->Equals(String(L"start")))
{
    App* pApp = App::GetInstance();
    pApp->SendUserEvent(PLAYER_START, null);
    pMap->Add(new String(L"server"), new String(L"started"));
}
Handling the media playback service
The service application defines the handlers for the particular player request in OnUserEventReceivedN method, which is asynchronously called when the user event is sent by the SendUserEvent method.
The service receives the request in the form of events from the Message port handlers. Below are the two player requests handled in our sample application,
// Handle the media playback requests here
switch (requestId)
{
   case PLAYER_START:
 	AppLog("Player start request received");
	if (__pMediaPlayer != null)
	{
           AppLog("Invoking Mediaplayer start process now...");
	   __pMediaPlayer->PlayAudio();
	}
	break;

   case PLAYER_STOP:
	AppLog("Player start request received");
	if (__pMediaPlayer != null)
	{
           AppLog("Invoking Mediaplayer stop process now...");
	   __pMediaPlayer->StopAudio();
	}
	break;

   case PLAYER_EXIT :
	Terminate();
	break;
   default:
	break;
}
Let’s say ,audio start event has been trigged and the service application processes the event by invoking the PlayAudio method of the MediaPlayerService object (the real playback is handled in the mediaPlayerService interfaces) as below,
__pMediaPlayer->PlayAudio();
And the PlayAudio method is defined in MediaPlayerService class as below. If the playback is in progress and a call to this function will pause the playback, that means the same function toggles on play and pause.
result MediaPlayerService::PlayAudio(void)
{
    AppLog("Start play/pause function called");
    result r = E_SUCCESS;

   if (PlayerObj.GetState() == PLAYER_STATE_PLAYING)
   {
      // Pause the Playing
       r = PlayerObj.Pause();
       if (IsFailed(r))
       {
	  return r;
       }
      AppLog("Audio paused");
   }
   else if ((PlayerObj.GetState() == PLAYER_STATE_PAUSED)
         || (PlayerObj.GetState() ==  PLAYER_STATE_OPENED)
         || (PlayerObj.GetState() == PLAYER_STATE_ENDOFCLIP)
         || (PlayerObj.GetState() == PLAYER_STATE_STOPPED))
   {
       AppLog("Setting volume");
       PlayerObj.SetVolume(80);

       AppLog("Starting playback");
       r = PlayerObj.Play();
       if (IsFailed(r))
       {
         return r;
       }
    }
     return r;
 }
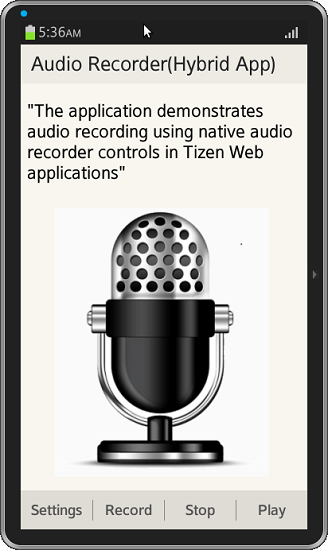
2. Audio Recorder Hybrid Application
2.1 Web Application Implementation
The audio recorder page provides options for record, settings, stop recording and playback the recorded clip. Below is how it is done in the page footer. When selected settings option, you will be prompted with a context pop to select the codec and quality for the recording. The methods for knowing users selections are provided in the javascript code, but not implimented to communicate to service. That’s simple to do, just like another commands as key-value pair as we did for start or stop recording options.And the message port implementaion to communicate with native service is same as explained for audio playback.
<div data-role="footer" data-position="fixed">
    <div data-role="tabbar" data-style="toolbar">
	<ul>
	   <li><a href="#btn-settings-menu" data-rel="popup">Settings</a></li>
	   <li><a id="btn-record">Record</a></li>
	   <li><a id="btn-recstop">Stop</a></li>
	   <li><a href="#recordPlay" >Play</a></li>
	</ul>
    </div>

    <div id="btn-settings-menu" data-role="popup" >
	<ul data-role="listview">
	   <li><a href="#quality" data-rel="popup" data-position-to="window">Quality</a></li>
	   <li><a href="#codec" data-rel="popup" data-position-to="window">Codec</a></li>
	</ul>
    </div>
</div><!-- /footer -->
2.2 Native Service Implementation
Initializing the recorder service
In NativeRecordService.cpp file,we create and initialize the audio recorder service. As part of initialization, AudioRecorder() object is created.
// Create Audio Recorder object
	__pAudioRecorderSer = new (std::nothrow) AudioRecorderService();
	TryReturn(__pMediaPlayer != null, false, "[E_FAILURE] Failed to create __pMediaPlayer.");
	AppLog("__pAudioRecorder is created.");

	// Create and Initialize Audio Recorder
	__pAudioRecorderSer->InitRecorder();
Handling the recorder service requests
Below is the function which is defined in the AudioServiceRecorder.cpp, which implements the logic for the audio recording.
result AudioRecorderService::StartAudioRecording(void)
{
	result res = E_SUCCESS;
	AppLog("StartAudioRecording called");
	String RecordedFilePath = Tizen::App::App::GetInstance()->GetAppRootPath() + L"data/recordedfile.amr";
	RecorderState state = __pAudiorecord->GetState();

	res = __pAudiorecord->CreateAudioFile(RecordedFilePath, true);
	if (IsFailed(res))
	{
	   return res;
	}
	if ((RECORDER_STATE_INITIALIZED == state) || (RECORDER_STATE_OPENED == state) || \
		(RECORDER_STATE_PAUSED == state) || (RECORDER_STATE_CLOSED == state) ||	\
		(RECORDER_STATE_STOPPED == state))
	{
		res = __pAudiorecord->Record();
		if (IsFailed(res))
		{
		   return res;
		}
	}
	return res;
}
The audio recorder sample application uses the default recording codec (amr) and quality. You can add handlers to use particular codec and quality as desired (ofcource from the list of supported codecs) from the user for recording.
Please refer to the sample applications for the implementation details for both Audio playback and Audio Recording.
Use the below commands to install the sample application (HybridAudioPlayer.wgt file).
- sdb root on
- sdb push HybridAudioPlayer.wgt /opt/home/root/
- sdb shell
- $ cd /opt/home/root/
- $ wrt-installer -i HybridAudioPlayer.wgt
Screenshot:
License:
The image(s) used in the applications are licensed under Creative Commons License Attribution-ShareAlike 2.0.
Development Environment:
Tizen SDK
Version : 2.2.0
Build id : 20130708-1957
Was this document helpful?
We value your feedback. Please let us know what you think.