Monitoring Devices with the Device Manager
PUBLISHED
![]()
![]()
![]()
Dependencies
- Tizen Studio 2.0 and Higher
Content
- Accessing Device Manager
- Connecting Devices
- Installing Applications
- Permitting Devices to Install Applications
- Managing Device Files
- Viewing Device Logs
- Configuring Device Manager
Related Info
Device Manager is a standalone tool that manages devices and allows you to access their internal file systems and logs. A device can be either a virtual device, such as an emulator, or a physical device connected with a USB cable or a wireless connection.
Device Manager provides a graphical user interface that is more convenient than Command Line Interface (CLI). You can use it to connect and disconnect devices to and from your computer, as well as to access devices' internal file systems and push or pull files between the device and your computer. Device Manager provides the device logs in a table format, and you can use filters to find the entries that interest you.
To use Device Manager with a specific device, you must connect the device over Smart Development Bridge (SDB). Physical devices can be connected with a USB cable, and emulators can be connected through Emulator Manager. When the device is connected over SDB, it is automatically displayed in Device Manager and its directory structure and logs are shown in the File Explorer and Log views, respectively.
Accessing Device Manager
There are two different ways to access Device Manager:
- Click the Device Manager icon on the desktop or in the Start menu.
Ubuntu Windows® macOS Desktop > Applications > Device Manager: 
Start > All Programs > Tizen Studio > Tools > Device Manager: 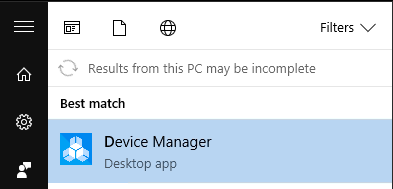
Finder > Applications > Tizen Studio > Device Manager: 
- Run Device Manager from the command line.
Ubuntu Windows® macOS <TIZEN_STUDIO>/tools/device-manager/bin/device-manager<TIZEN_STUDIO>\tools\device-manager\bin\device-manager.exe<TIZEN_STUDIO>/tools/device-manager/bin/device-manager.app/Contents/MacOS/device-manager
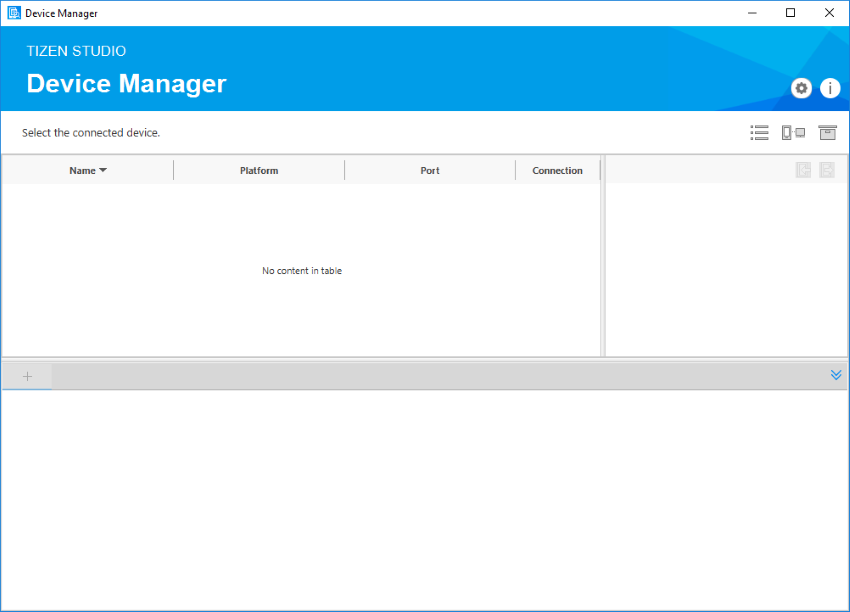
If the program is executed normally, the Device Manager window appears.
Figure: Device Manager main screen
Connecting Devices
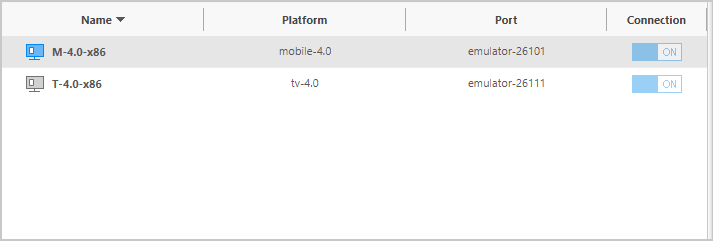
Device Manager shows both local devices connected to the system and any configured remote devices:
- Only connected local devices (both physical and virtual devices) are listed. Disconnected devices automatically disappear from the list. Therefore, the Connection switch is disabled.
- Remote devices are listed even if the connection is lost. You can turn the connection on and off with the Connection switch.
Figure: Connected devices in Device Manager
Connecting a device to a computer depends on the device type:
- Physical device
When you connect a local physical device with a USB cable, it automatically appears in Device Manager.
- Virtual device
To connect a virtual device, click Emulator Manager
 , select the virtual device, and click Launch.
When the emulator finishes booting, the device appears in Device Manager.
- Remote device
To connect a remote device, follow these steps:
- In the Tizen Studio menu, select Tools > Device Manager.
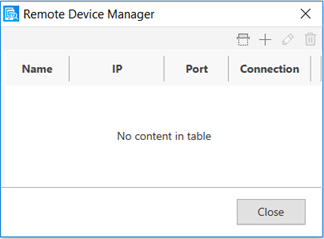
- In the Device Manager window that appears, click Remote Device Manager
 .
. - In the Remote Device Manager window that appears, you can scan, add, edit, and delete a device. You can click Scan Devices
 to see the list of available devices.
- To add a remote device, click Add +.
- In the Add Device dialog that appears, enter the device name, the IP address of the device to which the connection needs to be made, and the port number. The default port number is 26101.
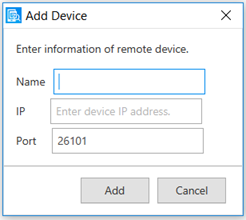 Note If you are using an emulator, then you need to enter the IP address of the system on which the emulator is launched.
 - Confirm the IP address and port number of the remote device, and toggle the Connection switch to ON.
When the connection is established, the remote device appears in Device Manager.
Installing Applications
You can install a Tizen application to a connected device with the TPK or WGT file:
- In the device list, right-click the device to which you want to install an application, and select Install app.

- In a file dialog, select a TPK or WGT file to install and click OK.
The application is installed and launched on the selected device.
Permitting Devices to Install Applications
If your device has a distributor certificate that contains a DUID starting with 1.0#, you must give the device permission to install applications.
Assume that you have registered two devices, the Gear S2 and Gear S, in your distributor certificate. The Gear S2 DUID starts with 2.0# and the Gear S DUID starts with 1.0#. This means that the certificate format is issued internally based on the 1.0# device, and both Gear S2 and Gear S devices must get permission before installing an application.
To permit a device to install applications, follow these steps:
- In the device list, select the device for which you want to give permission.
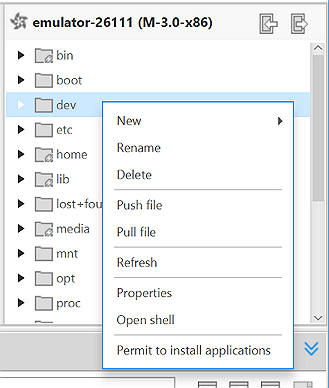
- In the File Explorer view, right-click anywhere and select Permit to install applications.
A
device-profile.xmlfile, issued in your profile directory, is pushed to the/home/developerdirectory of the device.
Figure: Context menu for the File Explorer view
A distributor certificate containing only #2.0 devices does not have the device-profile.xml file, and consequently does not require this process to push the file to the device.
Managing Device Files
You can browse the internal file structure of a connected device in the File Explorer view. Depending on your permissions, you can create and delete files on the device, and pull and push files between the device and your computer.
All files are granted read, write, and execute permissions and they cannot be arbitrarily changed.
You can perform a variety of actions through the File Explorer view:
- To check the read, write, and execute permissions for a file or folder, right-click the file or folder and select Properties > Permission.
- To create a new file or folder, right-click the directory where you want to create it, and select New > File or New > Folder. Name the new item and click OK.
- To remove a file or folder, right-click the item you want to delete, select Delete, and click OK.
- To push a file from the computer to the device, right-click the directory where you want to push the file and select Push the file. In the popup, select the file to push and click OK.
- To pull a file from the device to the computer, right-click the file you want to pull and select Pull the file. In the popup, select the destination directory on the computer and click OK.
Write permission set for the Other user.Viewing Device Logs
When a device is connected to Device Manager, a device log tab is automatically created in the Log view. The default tab name is the device ID, but it can be modified. You can create additional tabs for a device, and you can set different filters for each tab. Tabs for disconnected devices are shown as inactive, and are reactivated when the device is reconnected.
Figure: Log view
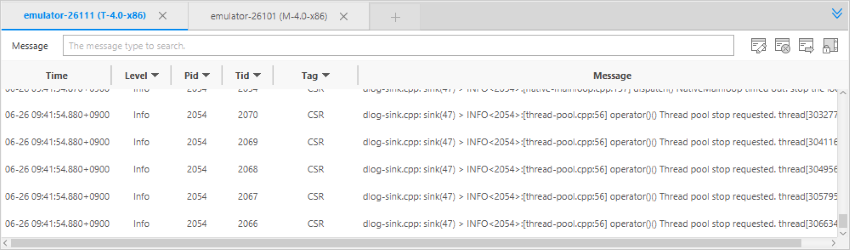
Each log tab contains a toolbar and a log table. The log table lists log messages in chronological order, and this order cannot be modified. Each log message contains the Time, Level (priority level of the log message), Pid (process ID), Tid (thread ID), Tag (identification of the log message source), and Message fields, and you can create filters for each field.
You can perform a variety of actions in the Log view:
- Creating a new log tab
You can create a new log tab in two ways:
- Right-click a device in Device Manager and select Add log tab. Enter a name for the tab and click OK.
- Select a device in Device Manager and click + in the Log view. Enter a name for the tab and click OK.
- Editing a log tab name
To edit the log tab name, click Edit Tab
 . Enter a new name for the tab and click OK.
 - Removing a log tab
You can either delete a single tab, or delete all tabs related to a device:
- To delete a single tab, click X next to the name of the log tab.
- To delete all tabs for a device, right-click it in Device Manager and select Delete log tabs. Confirm the deletion by clicking OK.
Note Any filters created for a log tab are deleted when the tab is removed. - Filtering log messages
You can filter log messages based on the table columns:
- To filter log messages based on the Level, Pid, Tid, or Tag columns, click the
 icon next to the column name, select 1 or more values you want to show, and click OK.
 - To filter log messages based on the Message column, enter the string you want to search for in the Message field at the top of the Log view.
- To filter log messages based on the Level, Pid, Tid, or Tag columns, click the
- Clearing logs
To clear all log messages from a tab, click Clear Logs
 .
. - Exporting logs
To export logs to a file, click Export Logs
 , select the file storage location and file name for the exported log, and click OK.Note If you have filters applied to a log tab, only messages that match those filters are exported. If you want to export the complete log, remove all filters before exporting.
Configuring Device Manager
You can access Device Manager Configuration window by clicking the Settings icon.
Figure: Device Manager Configuration

You can set the following settings for Device Manager:
- Application path
To set the application installation path and data storage location, select the General tab, change the directory paths, and click OK.
- File transfer timeout
This is the maximum wait time for push and pull operations in the File Explorer view. To set the timeout value, select the Device tab, change the value, and click OK.
Note Only values between 30,000 and 600,000 (milliseconds) are allowed. - Log buffer size
This is the maximum amount of log entries to store in the log table. To set the buffer size, select the Log tab, change the value, and click OK.
Note Only values between 5,000 and 100,000 (lines) are allowed.