Creating Thumbnails
You can create a thumbnail component with the SectionChanger API.
This feature is supported in wearable applications only.
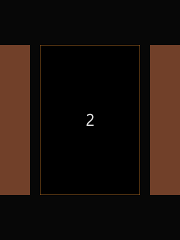
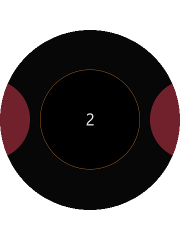
The following figure shows the layout of the thumbnail component in a rectangular and circular UI.
Figure: Thumbnail component in rectangular and circular devices


To implement the thumbnail component:
- Edit the HTML code to add the thumbnail component to your application screen:
<div class="ui-page ui-page-active" id="sectionChangerPage" data-enable-page-scroll="false" >
   <div id="sectionChanger" class="ui-content ui-section-changer">
      <div id="scroller">
         <section class="ui-section-active">
            <div class="thumbnail">1</div>
         </section>
         <section>
            <div class="thumbnail">2</div>
         </section>
         <section>
            <div class="thumbnail">3</div>
         </section>
      </div>
   </div>
</div>
- Edit the CSS code to set the visual style of the thumbnail:
section { padding: 0 10px 0 10px; height: 100%; } .thumbnail { height: 300px; width: 200px; background-color: #80482f; top: 50%; transform: translate3d(0, -50%, 0); position: relative; text-align: center; line-height: 300px; } .ui-section-active .thumbnail { background-color: #000000; border: 1px solid #a06322; } @media all and (-tizen-geometric-shape: circle) { section { padding: 0; } .thumbnail { height: 200px; width: 200px; border-radius: 50%; background-color: #802532; top: 50%; position: relative; text-align: center; line-height: 200px; transform: scale(0.8) translate3d(0, -60%, 0); transition: transform 300ms; } .ui-section-active .thumbnail { transform: scale(1) translate3d(0, -50%, 0); } } - Edit the JavaScript code to manage the thumbnail events and other functionalities:
(function()
{
   var page = document.getElementById("sectionChangerPage"),
       sectionChanger = document.getElementById("sectionChanger");

   page.addEventListener("pagebeforeshow", function()
   {
      tau.widget.SectionChanger(sectionChanger,
      {
         orientation: "horizontal",
         fillContent: false
      });
   });
})();

