Creating the Application Project
You can create a Web application project by selecting from a variety of templates and samples. The following instructions are specific for creating the project with a template.
To create a Web application project:
- In the IDE, select File > New > Tizen Web Project.
If the project option you want is not visible, make sure that you are using the correct perspective (Tizen Web). To switch perspectives, go to Window > Open Perspective > Other and select the perspective you need.
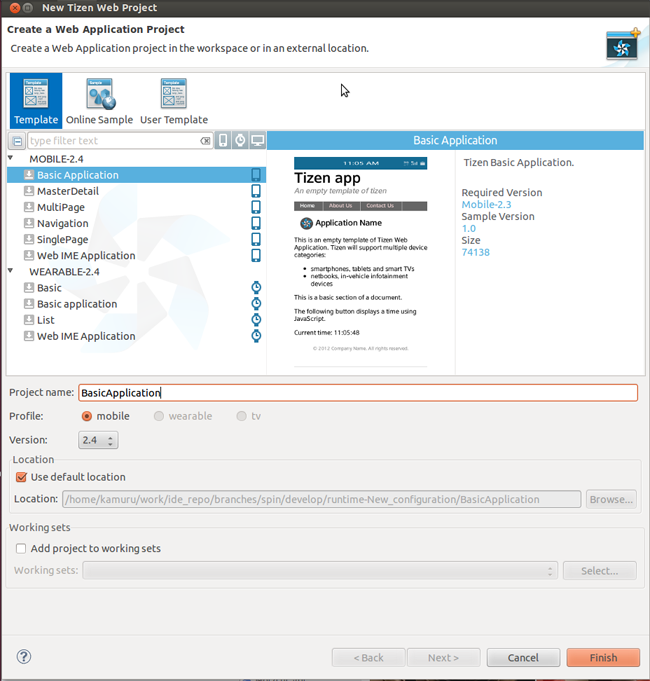
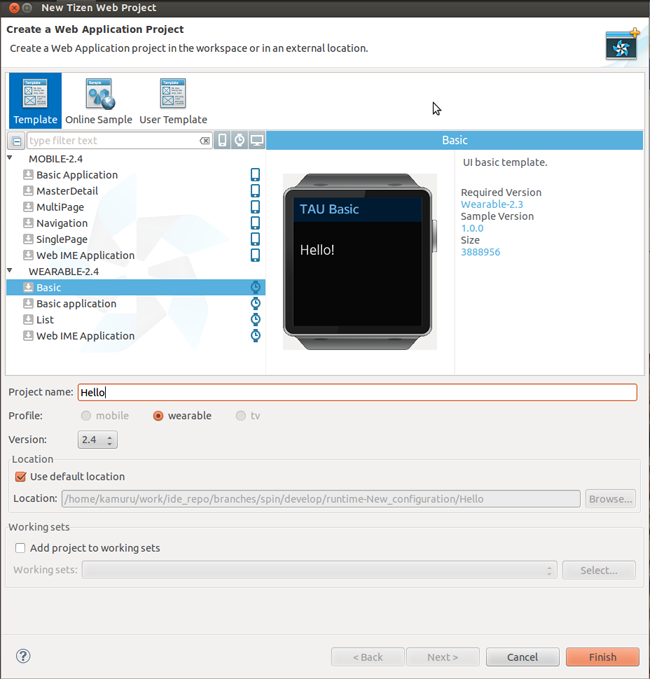
- In the New Tizen Web Project window, define the project details:
- Select the project type.
- Define the name of your project.
The default location for your application project is defined.
Note The Tizen API names cannot be used as project names. The project name must be more than 2 characters and is restricted to the following regular expression: [a-zA-Z][a-zA-Z0-9-]{2,49}.
- Click Finish.
The new application project is shown in the Project Explorer view of the IDE, with default content in the config.xml file as well as in several project folders.
Figure: Creating a Tizen mobile Web project

Figure: Creating a Tizen wearable Web project

Importing a Project
If you have an existing Tizen application project, you can import it into the Tizen IDE:
- Select File > Import > Tizen > Tizen Project or Package.
- Click Browse and select the root directory, which contains your existing project, or Web application package file (with the .wgt extension).
- Click the selection buttons under To, and select both a profile and a version.
- Enter a project name.
- Click Finish.
Exporting a Project User Template
To export an existing project as a user template that you can use as a basis for creating other projects:
- Select File > Export > Tizen > Tizen Web User Template.
- In the User Template Export Wizard window, define the project and user template details:
- Select the source project.
- Define the name of your user template.
- Click Browse and select the export location.
You can add the template to the User Template tab of the New Tizen Web Project window by selecting the Import a template to the new project wizard automatically check box. To select a template description, preview image, and icon files to be shown in the Project Wizard, click Next.
- Click Finish.
User Template
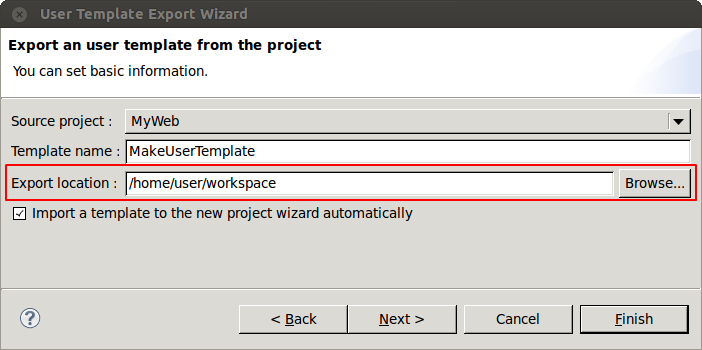
You can create custom user templates from existing projects and use these templates to create new projects. The created user templates are located in the <TIZEN_SDK_DATA>/ide/user-templates/web directory and a user-defined directory. When you create a user template, you can define the export location in the User Template Export Wizard.
Figure: User template export location

The <TIZEN_SDK_DATA> directory is different for different platforms:
- In Ubuntu: /home/${USER_NAME}/tizen-sdk-data (in mobile Web projects) or /home/${USER_NAME}/tizen-wearable-sdk-data (in wearable Web projects)
- In Windows® XP: C:\tizen-sdk-data (in mobile Web projects) or C:\tizen-wearable-sdk-data (in wearable Web projects)
- In Windows® 7: C:\tizen-sdk-data (in mobile Web projects) or C:\tizen-wearable-sdk-data (in wearable Web projects)
The project folder of a user template consists of project-related files that are copied into new projects created using the user template. You can modify these files in your new project.
The following table describes the files included in a user template in addition to the project folder content.
| File | Contents |
|---|---|
| description.xml |
This file consists of the following template description information that is displayed in the Project Wizard:
|
| tizen-app-template.xml |
This file consists of the following template definition information that is displayed in the Project Wizard:
|
To create a new user template from an existing user template (instead of an exporting the template from an existing project):
- Copy and rename the <TIZEN_SDK_DATA>/ide/user-templates/web folder.
The folder contains a default template layout.
- Edit the files within the new folder, or add new files (such as snapshot or icon images and JavaScript and CSS files), as needed.


