
Radio
This feature is supported in wearable applications only.
This UI component displays one or more options, but the user can only select one of them. It is composed of an indicator (selected or unselected). Even though it is usually grouped with two or more other radio objects, it can also be used alone.
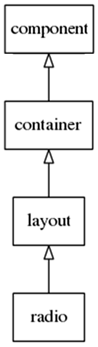
The radio component inherits from the layout component. All the layout functions can be used with radio objects.
Figure: Radio component
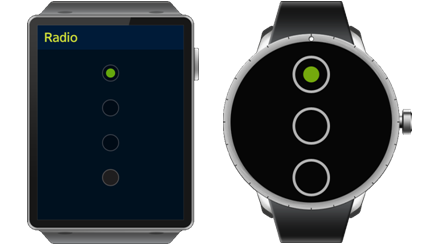
Figure: Radio hierarchy
Adding a Radio Component
Create a radio component.
Evas_Object *radio, *parent;

// Create a radio
radio = elm_radio_add(parent);
Changing the Radio Value
The user can select one of a set of values with the radio component. Each radio object from a group of radio objects represents an integer value. Here the value 1 is set to the new radio object.
elm_radio_state_value_set(radio, 1);
Managing the Radio Groups
The following example shows how to create a group of radio objects with at least two radio components.
// Create another radio object
Evas_Object *radio2 = elm_radio_add(parent);
elm_radio_state_value_set(radio2, 2);

// Create a group composed of radio and radio2
Evas_Object *group = radio;
elm_radio_group_add(radio2, group);
Now that a group composed of two radio objects has been created, you can choose which one is selected. In this example radio2 is selected.
elm_radio_value_set(group, 2);
You can use elm_radio_value_get() to see the currently selected radio of the group.
Using the Radio Callbacks
This UI component emits the following signals:
- changed: The state of a radio is modified in a group of radio objects.
The following example shows how to register a callback on this signal.
{
   evas_object_smart_callback_add(radio, "changed", changed_cb, data);
}

// Callback function for the "changed" signal
// This callback is called when the radio value changes
void changed_cb(void *data, Evas_Object *obj, void *event_info)
{
   dlog_print(DLOG_INFO, LOG_TAG, "The value has changed\n");
}
Using the Radio Callbacks with Circular UI Components
This UI component emits the following signals:
- changed: The user changes the slider value.
- clicked: Radio was clicked.
The following example shows how to register a callback on this signal.
{
   evas_object_smart_callback_add(radio, "clicked", clicked_cb, data);
}

// Callback function for the "changed" signal
// This callback is called when the radio value changes
void changed_cb(void *data, Evas_Object *obj, void *event_info)
{
   dlog_print(DLOG_INFO, LOG_TAG, "This radio was clicked\n");
}
