Enventor
Tizen SDK provides a useful theme editor tool, Enventor. Enventor supports the text edit function and the preview function for EDC source code. You can edit EDC source code to create your layout using Enventor.
Before using Enventor, familiarize yourself with the following:
- Enventor Layout
- Using the Text View
- Using the Live View
- Interactive Feedback
- Tool Functions
- Configuration Setting
| Note |
|---|
| Enventor is supported only in Ubuntu. |
For more information about the EDC format, see Edje module and EDC format.
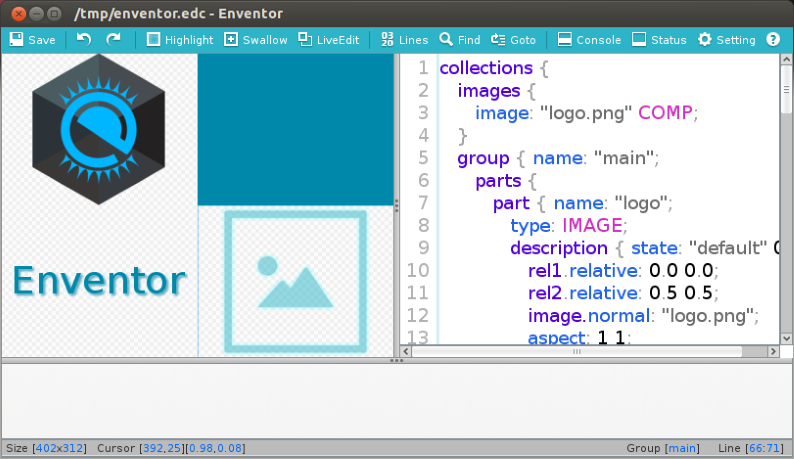
Figure: Enventor basic view
Enventor Layout
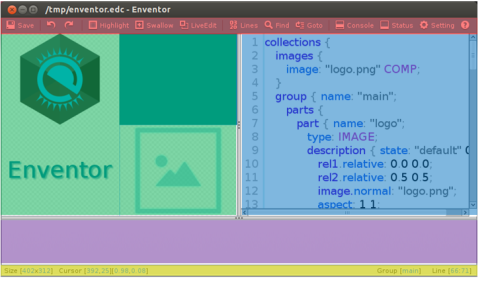
Basically, the Enventor view is divided into 2 sections, the live view and the text view. The live view is the left pane of the Enventor window and it previews images corresponding to the part objects of EDC source code. The text view is the right pane of the Enventor window and it contains EDC source code.
The following figure illustrates the layout. In the figure:
- Red: Tool bar
- Green: Live view
- Blue: Text view
- Purple: Console view
- Yellow: Status bar
Figure: Layout of Enventor
Using the Text View
The Enventor text view mainly supports text editing. You can write and modify EDC source code in this view. Once part sections are written in the text view and the modified EDC source code is saved, preview images corresponding to the part objects of EDC source code are displayed in the live view.
Enventor supports the following features:
- Auto-complete
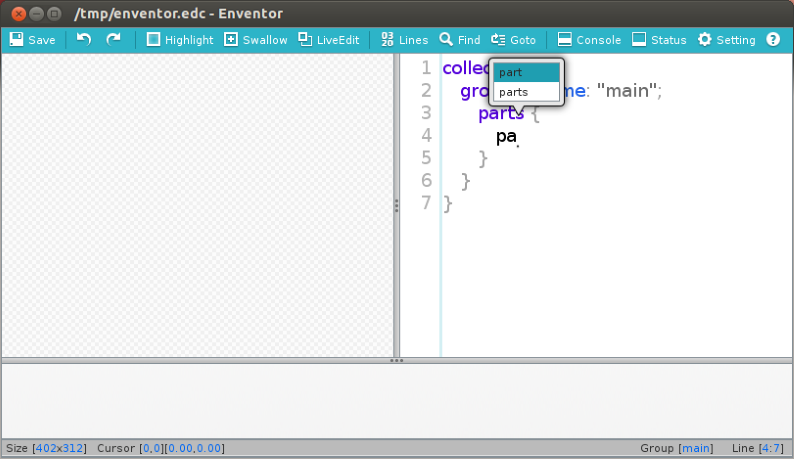
To help you write EDC source code, Enventor supports the auto-complete function, which lists the reserved keywords in a contextual pop-up.
When you enter a part of a reserved keyword, a contextual pop-up comes up with a list of keywords beginning with your input string. Choose the keyword with the up and down arrow keys, and press Enter. The keyword is selected and the related EDC format is added in the text view automatically. In contrast, if you press the Backspace key, the auto-complete function is cancelled and the contextual pop-up disappears. In addition, you can enable or disable the auto completion function in the configuration setting in the tool bar.
The following figure shows the auto-complete contextual pop-up listing the reserved keywords.
Figure: Auto-complete pop-up
- Candidate list
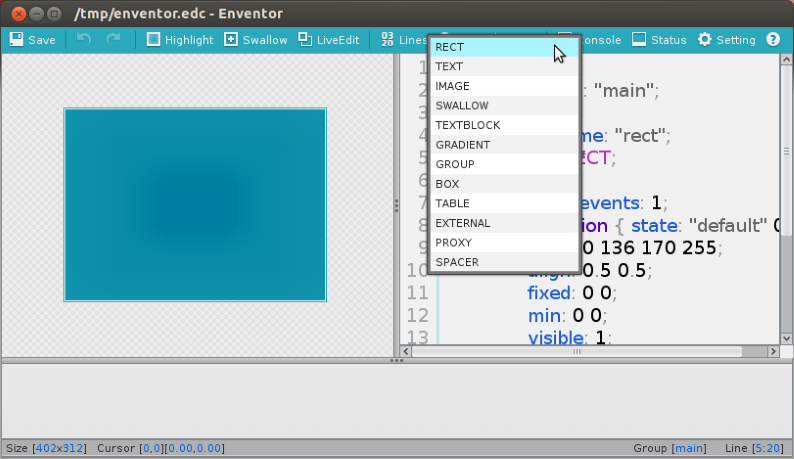
EDC source code provides a variety of predefined keywords including part object types and program action types. To edit the keywords easily, Enventor supports the candidate list function for the keywords. When you double-click a keyword in the text view, the available candidate keyword list based on the context pops up. If you select one of the candidate keywords, the double-clicked keyword is changed to the selected keyword.
The following figure shows the type candidate list.
Figure: Candidate list
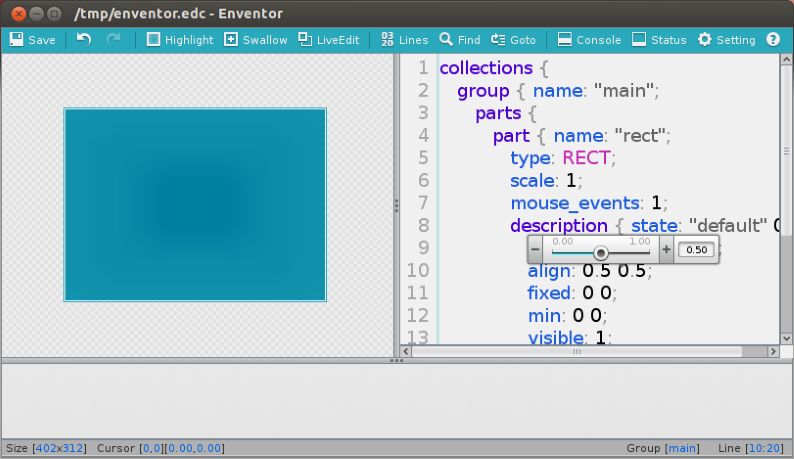
The candidate list function also helps you to know the available range of the numeric value based on the context. The numeric candidate function shows the range of the available number.
Figure: Numerical value range
Using the Live View
Enventor also provides another method called LiveEdit function to add part objects more easily. Click the LiveEdit button in the toolbar to activate the LiveEdit function. After that you can add a part object using the LiveEdit contextual pop-up and change the position and size of the part object by dragging. While the LiveEdit function is activated, the text view is disabled.
In the live view, you can:
- Add a part object.
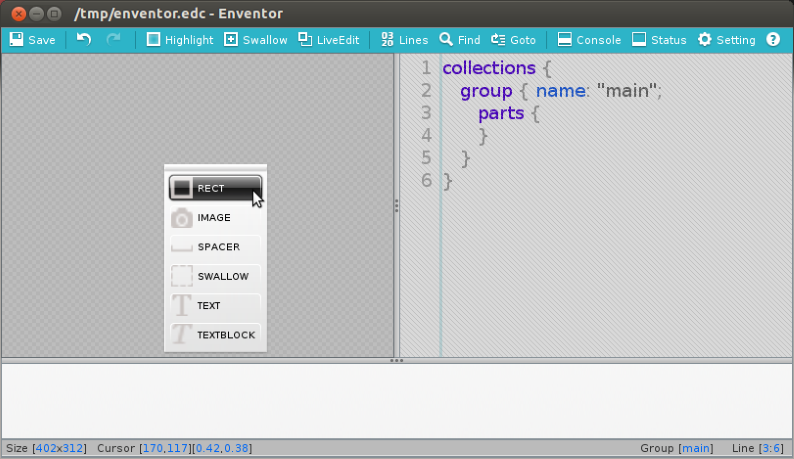
When you right-click in the live view, the LiveEdit contextual pop-up pops up. The pop-up contains 6 frequently-used part object types, RECT, IMAGE, SPACER, SWALLOW, and TEXTBLOCK. Click the needed part object type and the corresponding part object appears in the live view.
The following figure shows the LiveEdit contextual pop-up containing part object types.
Figure: Part object types
- Set the position and size of the part object.
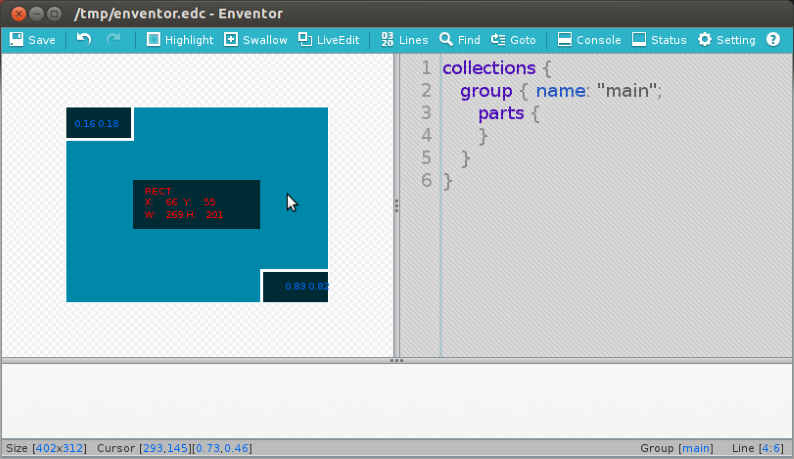
The position and size of the part object based on pixels are displayed in the center of the part object preview image. The relative position of the part object is displayed on the left top box and on the right bottom box.
The size of the part object is changed by dragging the left top box and the right bottom box. The position of the part object is changed by dragging the part object itself.
The following figure shows the preview of the rectangle object in the live view with the position and the size information created by the LiveEdit contextual pop-up.
Figure: Part object position and size settings
After the position and size of the part object is set, press Enter to add the part object. The corresponding EDC source code is added automatically in the text view.
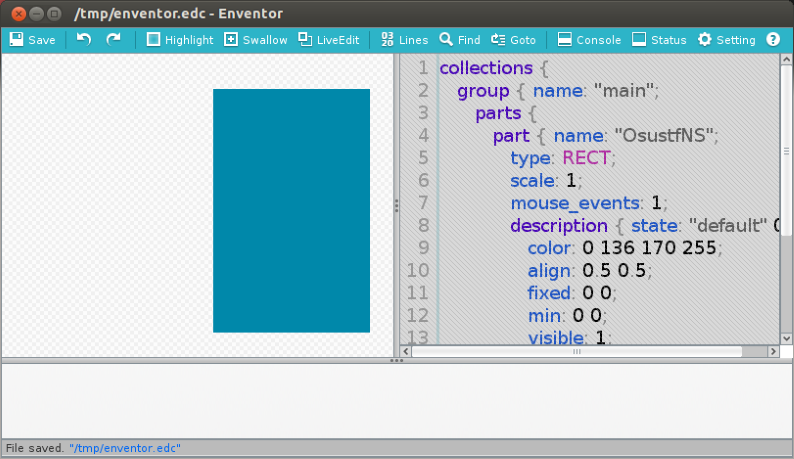
The following figure shows the automatically written EDC source code corresponding to the added rectangle part object.
Figure: Automatically created source code
Interactive Feedback
Enventor has the following ways of providing interactive feedback information while you edit the EDC source code:
- Highlight a part object.
To easily identify the part object that you modify, Enventor provides a function for highlighting the preview image corresponding to a part object. Click a part section in the EDC source code and the preview image corresponding to the part object in the live view gets highlighted.
- Preview an image file.
To easily check the image file you use, Enventor provides a function for previewing images files. Write the image keyword and an image file name in the EDC source code and click the image keyword. The preview image pop-up of the clicked image file appears. If other image files are written in the previous or next line of the previewed image file, you can change the preview image by with the arrow keys or scrolling.
- Execute a program action.
To easily check the action of a program, Enventor provides a function executing a program action. Click in a program in the EDC source code, the code is executed. If the executed code changes the layout, the changes are applied to the live view.
- Detect errors.
To quickly notify ab EDC grammar error, Enventor compiles the EDC source code and detects the errors whenever you save the modified EDC source code. The detected errors are printed in the console view. You can change the size of the console view by dragging the pane divider between the live and text views and the console view. Moreover, you can toggle the console view visibility with the Console button in the toolbar.
- View status information.
The status bar shows the size of the live view and the absolute coordinates and relative coordinates of the cursor in the live view. The status bar also shows the group name and the line number of the cursor in the text view. In addition, the status bar prints out the saving message with the file path. You can toggle the status bar visibility with the Status button in the toolbar.
Tool Functions
Enventor provides useful tool functions. The following table shows the toolbar buttons at the top of the Enventor window and their functions.
| Button | Function | |
|---|---|---|
|
|
Save |
Save a file. |
|
|
Undo |
Undo text changes. |
|
|
Redo |
Redo text changes. |
|
|
Highlight |
Add or remove the part object highlighting in the live view. |
|
|
Swallow |
Show or hide virtual images to visualize SWALLOW part objects in the live view. |
|
|
LiveEdit |
Add or remove the LiveEdit function. |
|
|
Lines |
Show or hide the line numbers in the text view. |
|
|
Find |
Find the given word. |
|
|
Goto |
Go to the given line in the text view. |
|
|
Console |
Show or hide the console view. |
|
|
Status |
Show or hide the status bar. |
|
|
Setting |
Show the configure setting window. |
|
|
About |
Show shortcut keys. |
Configuration Setting
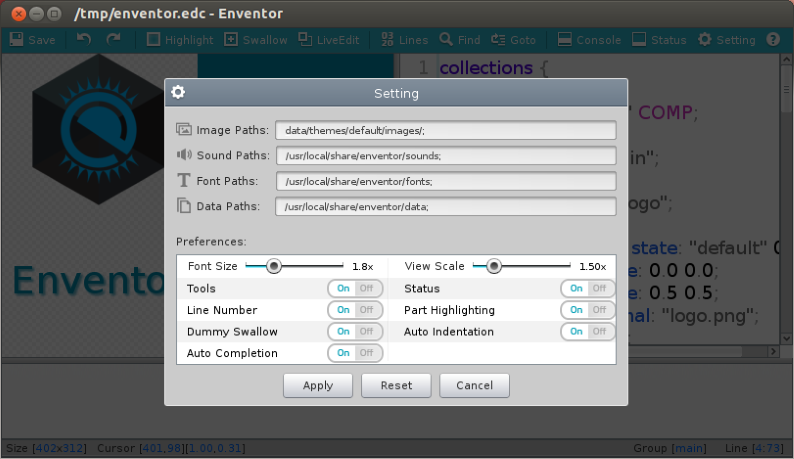
The configuration setting allows you to set and control Enventor properties.
You can set each file path that your EDC source code uses, respectively.
You can also control the font size and view scale using the sliders in the setting preferences. If you increase or decrease the font size, the font size of EDC source code in the text view is changed. The view scale means the scale factor of your layout. If you change the view scale, the scale factor is applied to your layout and the preview images are newly generated with the modified scale factor.
Additionally, you can control the tool functions.
Figure: Configuration Setting window
