Using EasyStar.js to implement pathfinding in Tizen game projects
PUBLISHED
Introduction
Many times while developing games you probably wondered about the fastest way to implement pathfinding algorithms for the enemy AI system. You probably invented some of your own ways to seek out the fastest path or have implemented existing mathematical algorithms. This process was probably time consuming and you had to get through many obstacles in order to get the job done.
In this article we show you a quicker and safer way to implement a pathfinding algorithm to aid you in this task. We are showing the A* algorithm implementation for JavaScript and Tizen through the use of the EasyStar.js library. This library is very simple to use and can be connected to any custom or official game engine in order to aid you in pathfinding tasks inside your project.
Alongside this article we have attached two example applications – EasyStarJS and EasyStarPhaserIso. The first one shows in practice the basics of setting up EasyStar.js, while the second one is a complex example of using the EasyStar.js library with a Phaser.js tile game project, with an isometric world (fig.1). The pathfinding is utilized there to find the shortest way for the enemy AI to the player.
Both applications have been created using the Tizen SDK 2.3 (rev2).

Figure 1 – The EasyStarPhaserIso.wgt sample application using EasyStar.js for AI pathfinding
EasyStar.js setup
Before searching for any paths we need to import the library to our project. We achieve this with the HTML <script> tag like shown below.
[…]

<script src="js/easystar-0.2.1.min.js"></script>

[…]
Having done that, we need some kind of a map for our pathfinding system. The best example for us will be creating a map using a 2 dimensional array. Inside the array values of 0 will represent walkable paths, while values of 1 will be our “walls”. Let’s take a look below on our 5x5 tile map.
[…]

    var level = [[0,0,1,0,0],
                 [1,0,1,0,1],
	         [0,0,1,0,0],
	         [0,0,1,1,0],
	         [0,0,0,0,0]];

[…]
After setting up the logical model of our map for EasyStar.js we have to create an instance of the EasyStar engine in our project. Then we should assign the map to the pathfinding engine by invoking the setGrid() function and passing by our level array to it. Also it is needed to tell the engine which values on our map are walkable. And which of them are not. For that you must use the setAcceptableTiles() function. In our example we pass the 0 parameter to the function as we have described earlier that we want the 0 tiles to be walkable. We have also chosen to be able for our pathfinding algorithm to walk diagonal. This can be achieved by invoking the enableDiagonal() function on the easystar engine instance object.
[…]

var easystar = new EasyStar.js();

easystar.setGrid(level);
easystar.setAcceptableTiles([0]);
easystar.enableDiagonals();

[…]
Also if you would like your pathfinding mechanism to pass diagonally and at the same time pass the corners of unwalkable tiles, then you can achieve that by running the enableCornerCutting() function on the easystar object.
[…]

easystar.enableCornerCutting();

[…]
Finding the path
Once we have EasyStar.js set up we would finally like to perform a path finding check. This can be done by using the findPath() function and then passing several parameters. These are, first the x starting point and y starting point of our path finding algorithm. Then we have the x and y coordinates of the ending point of the path finding algorithm. The last parameter is the callback function which will be invoked after finding path. The first argument of the function will or will not contain an array containing the path from the starting point to the end point of the path finding algorithm. Of course it won’t contain the array if there is no valid path from the starting to the ending point. To finally run the algorithm and calculate the path we need to invoke calculate(). Below we have showed how you can handle the data from the returned path array.
[…]

easystar.findPath(0, 0, 4, 0, function( path ) {
        if (path === null) {
	        console.log("The path to the destination
                           point was not found.");
	    } else {

	    	for (var i = 0; i < path.length; i++)
	    	{
	    		console.log("P: " + i + ",
                             X: " + path[i].x + ",
                             Y: " + path[i].y);
	    	}

	    }
	});

[…]
Below we show you the console.log() listing of the path array from the point (0, 0) to the point (4, 0) on our level map array.
P: 0, X: 0, Y: 0
P: 1, X: 1, Y: 1
P: 2, X: 1, Y: 2
P: 3, X: 1, Y: 3
P: 4, X: 2, Y: 4
P: 5, X: 3, Y: 4
P: 6, X: 4, Y: 3
P: 7, X: 4, Y: 2
P: 8, X: 3, Y: 1
P: 9, X: 4, Y: 0
As seen above, our labyrinth was passed using 9 moves by EasyStar.js. For each P move position in our listing we got an x and a y coordinate, leading us to the target of our path – the point (4, 0).
EasyStar.js also gives you the possibility to change the accuracy and burdening of the processor power of your device. As we know pathfinding algorithms take much of the processing power of a device. That is why EasyStar.js comes together with the setIterationsPerCalculation() function. Using that, you can easily change how many iterations of the pathfinding algorithm will be run on every path calculation. You can tweak the parameter value to suit your needs.
But this library is even more awesome than you think. Until this moment we were talking about pathfinding in terms of walkable and unwalkable tiles. But what if you would want for example to create shallow water or high grass or even a swamp in your game, which only slows down the enemy? EasyStar.js has an easy answer for that. Both with the setTileCost(tileType, multiplicativeCost) and setAdditionalPointCost(x, y, cost) functions you can set the cost of tiles. Which means that the pathfinding algorithm will first choose the tiles that have a less cost and are easier to walk on for the enemy (dry land in opposition to swamp for example).
Integrating EasyStar.js with web game engines, for example - Phaser.js
In the beginning of the article we have written that you can connect EasyStar.js to any game engine you want. As an example, we are showing you how you can connect this library in a simple way with the Phaser.js game engine and the isometric plugin in the EasyStarPhaserIso application attached to this article.
We will discuss here only the most important issues connected with integration of EasyStar.js with Phaser. For an in depth view please look into the sample application. While reading this article please open the source code of the sample application (fig.2) in the Tizen IDE or any other code editor to see what actually happens in the mechanics.
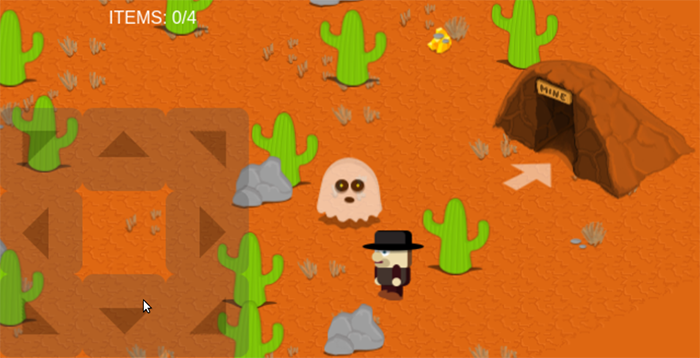
Figure 2 – The EasyStarPhaserIso.wgt sample application
First of all you have to conduct the standard setup of EasyStar.js like it was described above. So create the instance, have a two-dimensional array with your tiles. Assign it to EasyStar.js using the setGrid() function. Then determine which tiles are walkable and which are not walkable. Also choose if you want to go diagonal or not. In our sample application the above described code is in lines from 26 to 80.
The second thing to do is to load all the game assets in to the Phaser game engine in the preload section. Just like we did it in the previous Phaser article. Then you need to create sprite groups to put the tiles inside them. We also showed how to do that in the previous article and in the current sample application. So please refer either to the earlier article or to the sample application. Nevertheless, below we show you how to create the obstacle tiles in the obstacleGroup using the predefined 2D level array (the level array can be found at line 43 of the sample application).
[…]

obstacleGroup = game.add.group();

[…]

var cactus1;
var rock;

for (var yt = 0; yt < level.length; yt++) {

   var tile = level[yt];

	for (var xt = 0; xt < level[yt].length; xt++) {

             if (tile[xt] == 1) {
	        cactus1 = game.add.isoSprite(xt * tileSize,
                                             yt * tileSize, 0,
                                                 'cactus1', 0,
                                                  obstacleGroup);
	     }
	     else if (tile[xt] == 2) {
	        cactus1 = game.add.isoSprite(xt * tileSize,
                                             yt * tileSize, 0,
                                                 'cactus2', 0,
                                                  obstacleGroup);
	     }
	     else if (tile[xt] == 3) {
                rock = game.add.isoSprite(xt * tileSize,
                                          yt * tileSize, 0,
                                               'rock', 0,
                                                obstacleGroup);

		rock.anchor.set(0.5);

		// Let the physics engine do its job on this tile type
		   game.physics.isoArcade.enable(rock);

		// This will prevent our physic bodies from going out of the screen
		   rock.body.collideWorldBounds = true;

		// set the physics bounce amount on each axis  (X, Y, Z)
		   rock.body.bounce.set(0.2, 0.2, 0);

		// set the slow down rate on each axis (X, Y, Z)
		    rock.body.drag.set(100, 100, 0);

	     }


	     if (tile[xt] == 1 || tile[xt] == 2) {
		        cactus1.anchor.set(0.5);

		     // Let the physics engine do its job on this tile type
		        game.physics.isoArcade.enable(cactus1);

		     // This will prevent our physic bodies from going out of the screen
		        cactus1.body.collideWorldBounds = true;

		     // Make the cactus body immovable
		        cactus1.body.immovable = true;

	         }

	     }

	 }
[…]
As you see we have just iterated over the level array in two axis and took the information from it to put obstacles at their places. So now you have the physical obstacles from the EasyStar.js level map also on the screen using Phaser.js. This is the point where we have binded both the map logic and the game view.
But what about the pathfinding? In our sample application we are showing how an enemy can seek the shortest way towards the player and move towards him. We will focus more on the seeking part, as moving is quite easy to do in Phaser.js and is described in the comments of the sample application attached to this article.
In order to make the enemy seek a path towards the player we have created a setInterval() function which checks with the easystar.findPath() function if there exists a path from the current position of the cowboy to the current position of the player. We run the setInterval() function every 400 milliseconds in our example. In our sample app this information is written under the timeStep variable, so you can change it easily. But remember the less time you put in there, then the more burdening will be the seeking operations for the device.
Having the path from the cowboy enemy to the player we should next think how to tell which direction the enemy should move. This is quite easy. We just need to take the second pair of X and Y coordinates ( path[1].x and path[1].y), which EasyStar.js gives us back and check how in relation to the current position of the enemy they are. In our example these are stored in the currentNextPointX and currentNextPointY variables. Below is the complete code for checking the movement of the enemy cowboy. It is well commented so you should have no problems in understanding it.
[…]

setInterval(function(){

easystar.findPath(currentCowboyXtile, currentCowboyYtile, currentPlayerXtile, currentPlayerYtile, function( path ) {

if (path === null) {
    console.log("The path to the destination point was not found.");
}

if (path) {
    currentNextPointX = path[1].x;
    currentNextPointY = path[1].y;
}

if (currentNextPointX < currentCowboyXtile && currentNextPointY < currentCowboyYtile) {
       // left up

       console.log("GO LEFT UP");

       enemyDirection = "NW";
    }
    else if (currentNextPointX == currentCowboyXtile && currentNextPointY < currentCowboyYtile)
    {
       // up

       console.log("GO UP");

       enemyDirection = "N";

    }
    else if (currentNextPointX > currentCowboyXtile && currentNextPointY < currentCowboyYtile)
    {
       // right up

       console.log("GO RIGHT UP");

       enemyDirection = "NE";

   }
   else if (currentNextPointX < currentCowboyXtile && currentNextPointY == currentCowboyYtile)
   {
      // left

       console.log("GO LEFT");

       enemyDirection = "W";

   }
   else if (currentNextPointX > currentCowboyXtile && currentNextPointY == currentCowboyYtile)
   {
      // right

       console.log("GO RIGHT");

       enemyDirection = "E";

   }
   else if (currentNextPointX > currentCowboyXtile && currentNextPointY > currentCowboyYtile)
   {
      // right down

	console.log("GO RIGHT DOWN");

	enemyDirection = "SE";

   }
   else if (currentNextPointX == currentCowboyXtile && currentNextPointY > currentCowboyYtile)
   {
      // down

	 console.log("GO DOWN");

	 enemyDirection = "S";

   }
   else if (currentNextPointX < currentCowboyXtile && currentNextPointY > currentCowboyYtile)
   {
     // left down

	console.log("GO LEFT DOWN");

	enemyDirection = "SW";

   }
   else
   {

	enemyDirection = "STOP";

   }

   if (enemyDirection != "STOP") cowboy.animations.play(enemyDirection);

   });

   easystar.calculate();

}, timeStep);

[…]
As you can see above we are giving input to the enemyDirection variable in which direction the cowboy should move (for example “S” like sout or “NE” like north-east. But also you have probably seen that in the constructor of the findPath() function we are using the variables currentCowboyXtile, currentCowboyYtile, currentPlayerXtile, and currentPlayerYtile. These four variables are taken from the Phaser.js update function. We check in it every time the position of the player and the cowboy. Then we count on which tiles they are and set the earlier described four variable values. Of course you could ask why do we need to make so much workarounds? It is all because of the performance. We have put the pathfinding in to the setInterval() function in the create phase of the Phaser game engine, because if we had put it in the update function of Phaser then the game would probably crash. We do not want to check the path on every time Phaser updates. We want to check it only from time to time. But we need to read the player and cowboy positions every update. So that is why we are making those workarounds. Below you can find how we acquire both positions of the characters. In the sample app we also check, if we haven’t gone out of the game level borders. But you can check it in the sample app code. We wanted to keep the code snippet below more readable and focused on the most important issue.
[…]

    currentPlayerXtile = Math.floor(player.body.position.x / tileSize);
    currentPlayerYtile = Math.floor(player.body.position.y / tileSize);

[…]

    currentCowboyXtile = Math.floor(cowboy.body.position.x / tileSize);
    currentCowboyYtile = Math.floor(cowboy.body.position.y / tileSize);

[…]
The last thing to do after knowing in which direction the cowboy should go next is to actually move him towards the player. This is also done in the update part of the Phaser engine life cycle. Remember the enemyDirection variable we were setting earlier? Phaser is so neat that now you just have to change the velocity of the cowboys’ body object, having the enemySpeed and basing on what is written in the enemyDirection variable. Below you can see how we did it in our sample app. Of course you could also use the switch case statements.
[…]

// Move the ENEMY
            var enemySpeed = 90;

	        if (enemyDirection == "N") {
	        	cowboy.body.velocity.x = -enemySpeed;
	        	cowboy.body.velocity.y = -enemySpeed;
	        }
	        else if (enemyDirection == "S")
	        {
	        	cowboy.body.velocity.x = enemySpeed;
	        	cowboy.body.velocity.y = enemySpeed;
	        }
	        else if (enemyDirection == "E") {
	        	cowboy.body.velocity.x = enemySpeed;
	        	cowboy.body.velocity.y = -enemySpeed;
	        }

//… and so on for every direction possible

[…]
Summary
As you see the integration between EasyStar.js and Phaser.js is quite simple. But please look into both sample applications attached to this article. Play around with them. This is the best way to understand this vast topic. This article can only be a basic introduction to pathfinding and integration of EasyStar.js with game engines. This article described how to use EasyStar.js, how to find a path from one point to the the other on a 2D map. We have also showed an example of usage of this library with the Phaser game engine to create an intelligent enemy.
We hope that this article showed you that programming simple enemy artificial intelligence for games doesn’t have to be difficult and can be fun.
For more details please visit the official EasyStar.js web page and the GitHub repository.